![PALUSA New Logo Transparent-1.png]](https://helpcenter.skywire.com/hs-fs/hubfs/PALUSA%20New%20Logo%20Transparent-1.png?height=50&name=PALUSA%20New%20Logo%20Transparent-1.png)
The Mass Checkout function, or auto-close, allows you to quickly close out all qualifying appointments from the Visual Book or Guest Check-In without the need of going into the POS Module and Tendering Payment.
We can now create a “Comp | Account” Payment Type within a Site and attach this Comp to a Guest Type. If an appointment is booked for a Guest that is this designated Guest Type, then the appointment qualifies to be auto-closed. Appointments MUST be checked-in to process them as auto-close.
Mass Checkout Configuration
Mass Checkout Functionality
Mass Checkout Configuration
- Permissions Required
- Site Level – Create a Comp| Account Payment Type
- Corporate Level – Create a Guest Type that will be associated to this Comp
- Site Level – Enable the Mass Checkout function
- Business Center Level – Set a System Terminal
Permissions Required
User must have the “POS Manager” permission-set in order to perform this function.
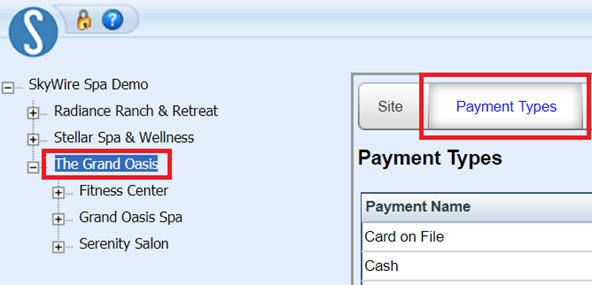
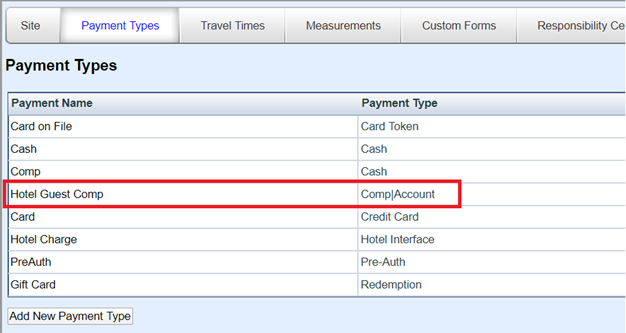
Site Level – Create a Comp | Account Payment Type
Step 1:
Navigate to the Payment Types Tab
Step 2:
Select “Add New Payment Type”

Step 3:
Select “Comp | Account” from the Payment Type drop-down options

Step 4:
Enter a Name for this comp account
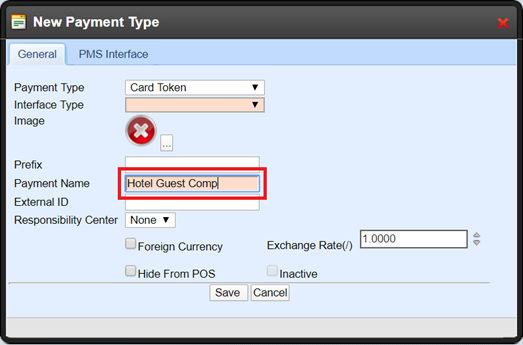
Step 5:
Select “Hide from POS”
NOTE: We do not want this option available in POS

Step 6:
Select “Save”

Step 7:
You added a “Comp | Account” Payment Type!
Corporate Level – Create a Guest Type that will be associated to this Comp
Step 1:
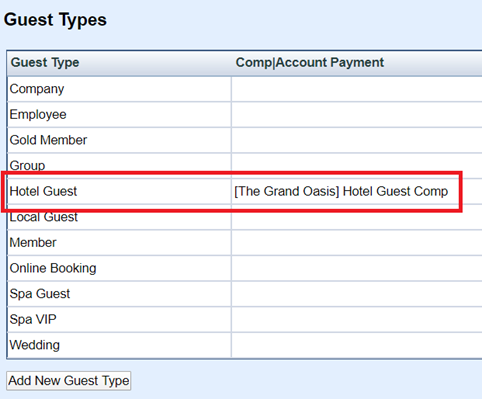
Navigate to the “Guest Types” Tab
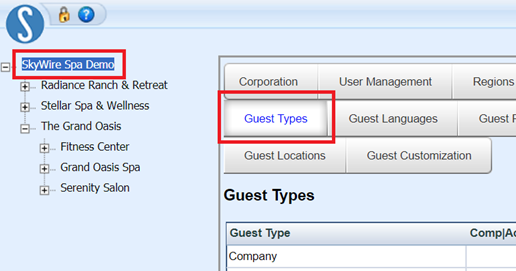
Step 2:
Select “Add New Guest Type”

Step 3:
Name the Guest Type
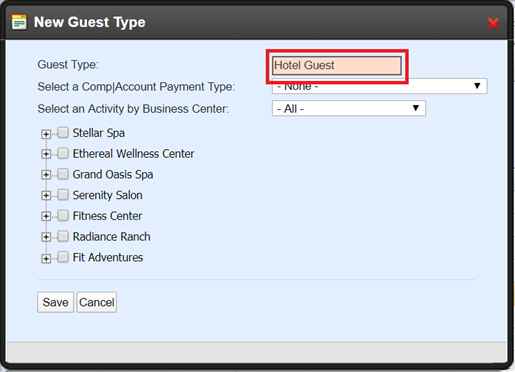
Step 4:
Select the Comp l Account that will be attached to this Guest Type

Step 5:
Select the specific Business Center (or - All - ) from the drop-down list that this Comp will apply to

Step 6:
Select the + and – to expand and collapse the Activities by Business Line

Step 7:
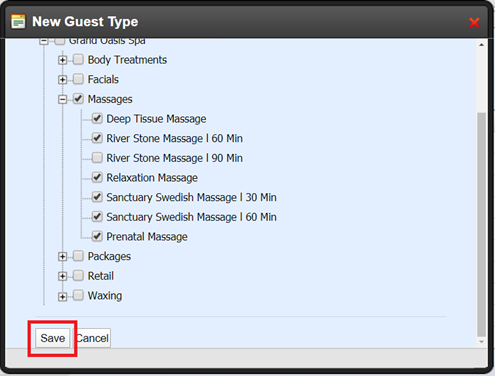
Select the checkbox for all Activities that this Comp will apply to
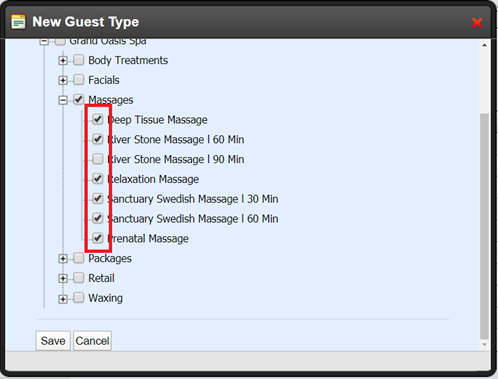
Step 8:
Select “Save”
Step 9:
You added a Comp Guest Type!
Site Level – Enable the Mass Checkout function
Step 1:
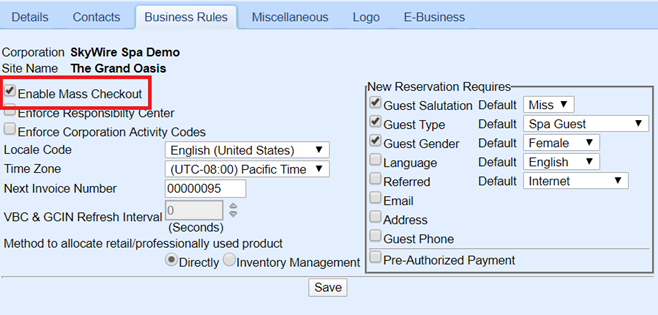
Navigate to the Business Rules Tab

Step 2:
Select the “Enable Mass Checkout”
Step 3:
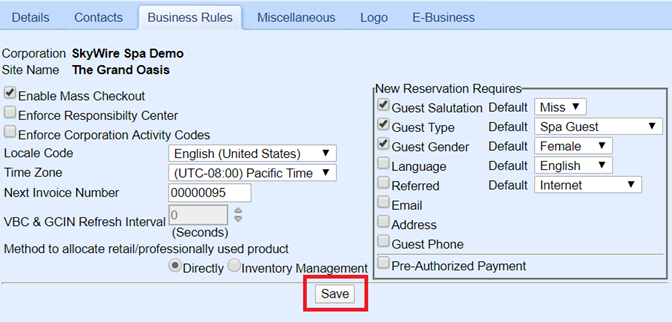
Select “Save”
Step 4:
You enabled the Mass Checkout Function!
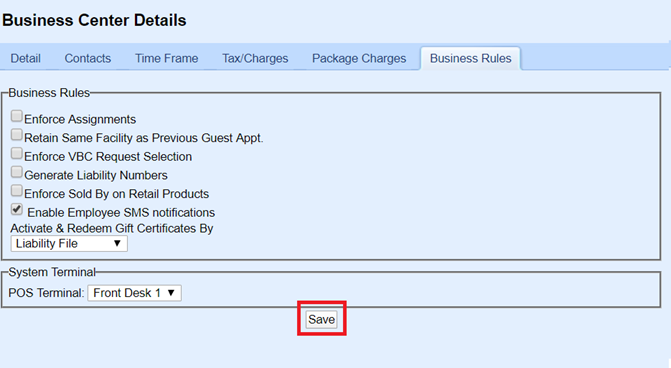
Business Center Level – Set a System Terminal
Step 1:
Navigate to the Business Rules Tab
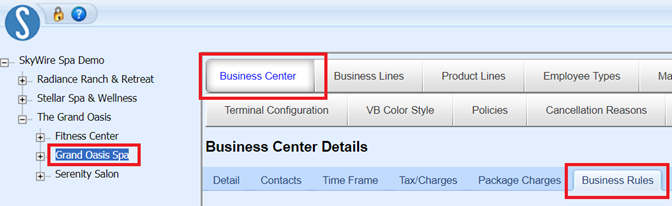
Step 2:
Select a POS Terminal from the dropdown list
NOTE: This can be an already existing terminal, the system simply needs a terminal to report to

Step 3:
Select “Save” – you set a system terminal!
Mass Checkout Functionality
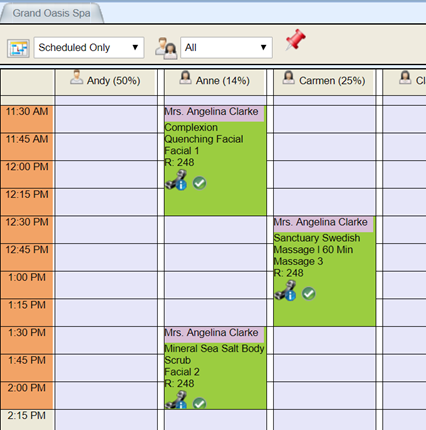
The Mass Checkout function allows you to automatically close all qualifying Appointments to a designated Comp Account from the Visual Book or Guest Check-In Module. An Appointment qualifies to be auto-closed if it meets the following requirements:
- The Guest booked is a Guest Type that is attached to a Comp Account
- The Activity booked is included in the Guest Type qualifications
- The Appointment is Checked-In
NOTE: Guest Types are set within the Guest’s Guest Management profile
To Mass Checkout
Step 1:
Book appointment(s) assuming that they meet all requirements
In this example, we created a Comp for all “Massages” for the Guest Type “Hotel Guest”
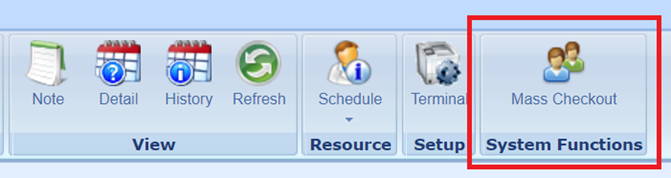
Step 2:
Navigate to “System Functions” within the Operation Tab and select “Mass Checkout”
NOTE: This function will only appear when there are qualifying appointments on the Visual Book
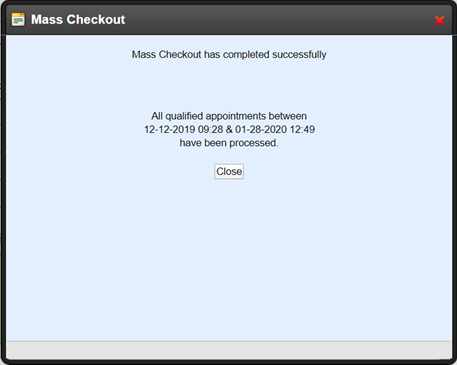
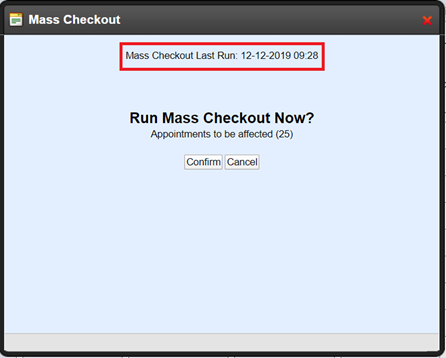
Step 3:
The Mass Checkout screen will list the LAST time the function was ran, using the function now will auto-close ALL qualifying appointments found from the last time ran to right now
Step 4:
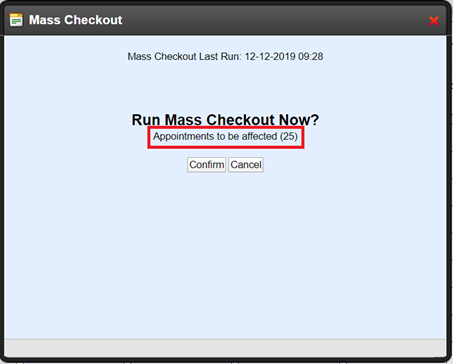
The system will list how many qualifying Appointments will be auto-closed
Step 5:
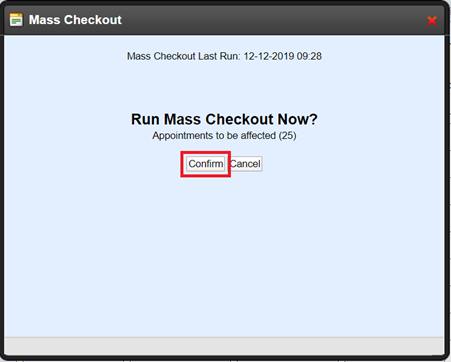
Select “Confirm”
Step 6:
The system will prompt you to confirm – select “OK”

Step 7:
You auto-closed Appointments!
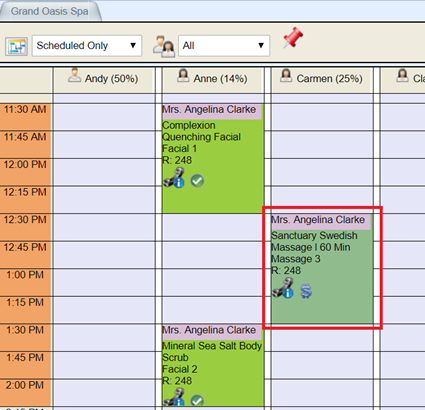
NOTE: All qualifying Appointments change color and populate a $ indicating that it is checked-out