![PALUSA New Logo Transparent-1.png]](https://helpcenter.skywire.com/hs-fs/hubfs/PALUSA%20New%20Logo%20Transparent-1.png?height=50&name=PALUSA%20New%20Logo%20Transparent-1.png)
Video - How to Create a Tender
Tenders are forms of payment. Tenders can be interactive and non interactive. Tenders that act like cash would be considered non interactive because it does not require a two-way flow of information. Credit cards would be considered an interactive Tender because it does require a two-way flow of information. Interactive Tenders will need an electronic payment configured prior to creating the Tender. Tenders are created at the property level and are assigned to terminals. All profit centers in the property will have access to the Tenders created.
How to Create Tenders
- Select a Property.
- Select "Go."
- Select "Payments."
- Select "Tenders."
- Select "Create."

Detailed description below.
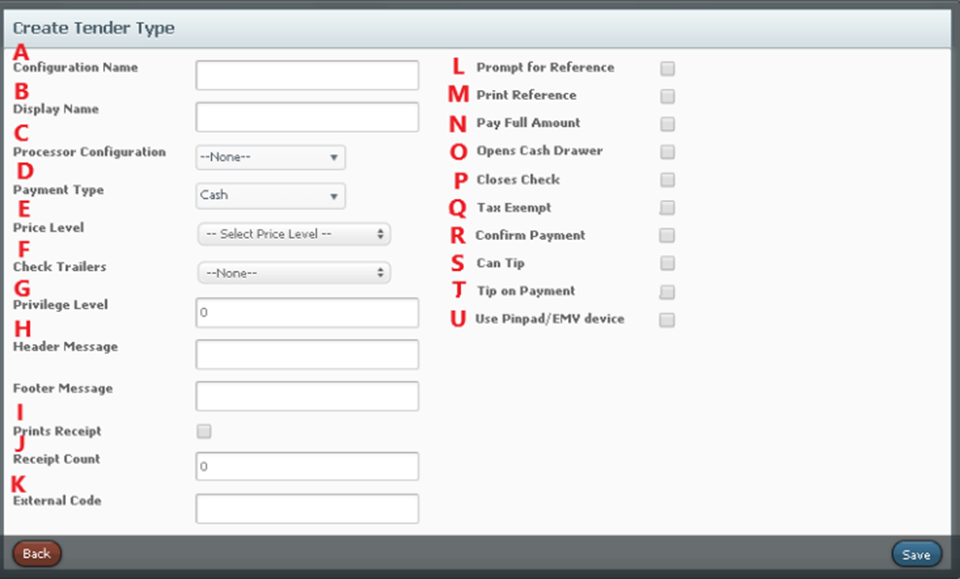
A. Configuration Name: Enter the name used for configuration.
B. Display Name: Enter the name to be displayed on the terminal and for reports.
C. Processor Configuration: Use the drop down to select processor configuration. This is created in electronic payment.
D. Payment Type: Select a payment type. Options include cash, house account or other when the tender does not have an electronic payment. Payment types will change based on processor configuration.
E. Price Level: Select a price level to be applied after the tender is applied, if applicable.
F. Check Trailer: Select a check trailer to print when the tender is applied.
G. Privilege Level: Select a number from 0-10, 0 being the highest and 10 being the lowest level of privilege. Privilege levels dictate which users can apply tenders created. The privilege level is also configured in "User Roles.” Confirm the privilege level correlates with the users who need to apply the tender.
H. Header and Footer Message: Enter a message for the header or footer for the receipt.
I. Prints Receipt: Select this option to print a receipt once the tender is applied.
J. Receipt Count: Enter the number of receipts to print.
K. External Code: Code for mapping interfaces.
L. Prompt for Reference: Select this option to prompt the user to input data when applying this tender.
M. Print Reference: Select this option to print the input data.
N. Assume Paid in Full: Select this option if the tender closes the check without giving an option to apply multiple or partial payments.
O. Opens Cash Drawer: Select this option to open the cash drawer when the tender is applied.
P. Closes Check: Select this option to close the check after the tender is applied.
Q. Exempt from Tax: Select this option to remove tax when this tender is applied.
R. Confirm Payment: Select this option for a confirmation prompt before the tender is applied.
S. Can Tip: Select this option to prompt for tip when closing order.
T. Tip on Payment: Select this option to prompt for tip before the tender is applied.
U. Use Pinpad / EMV device: Select this option when using a payment device.
- Select “Save.”
- Confirm the Tender is assigned to terminal (s) applicable.

Video - How to Create a Tender