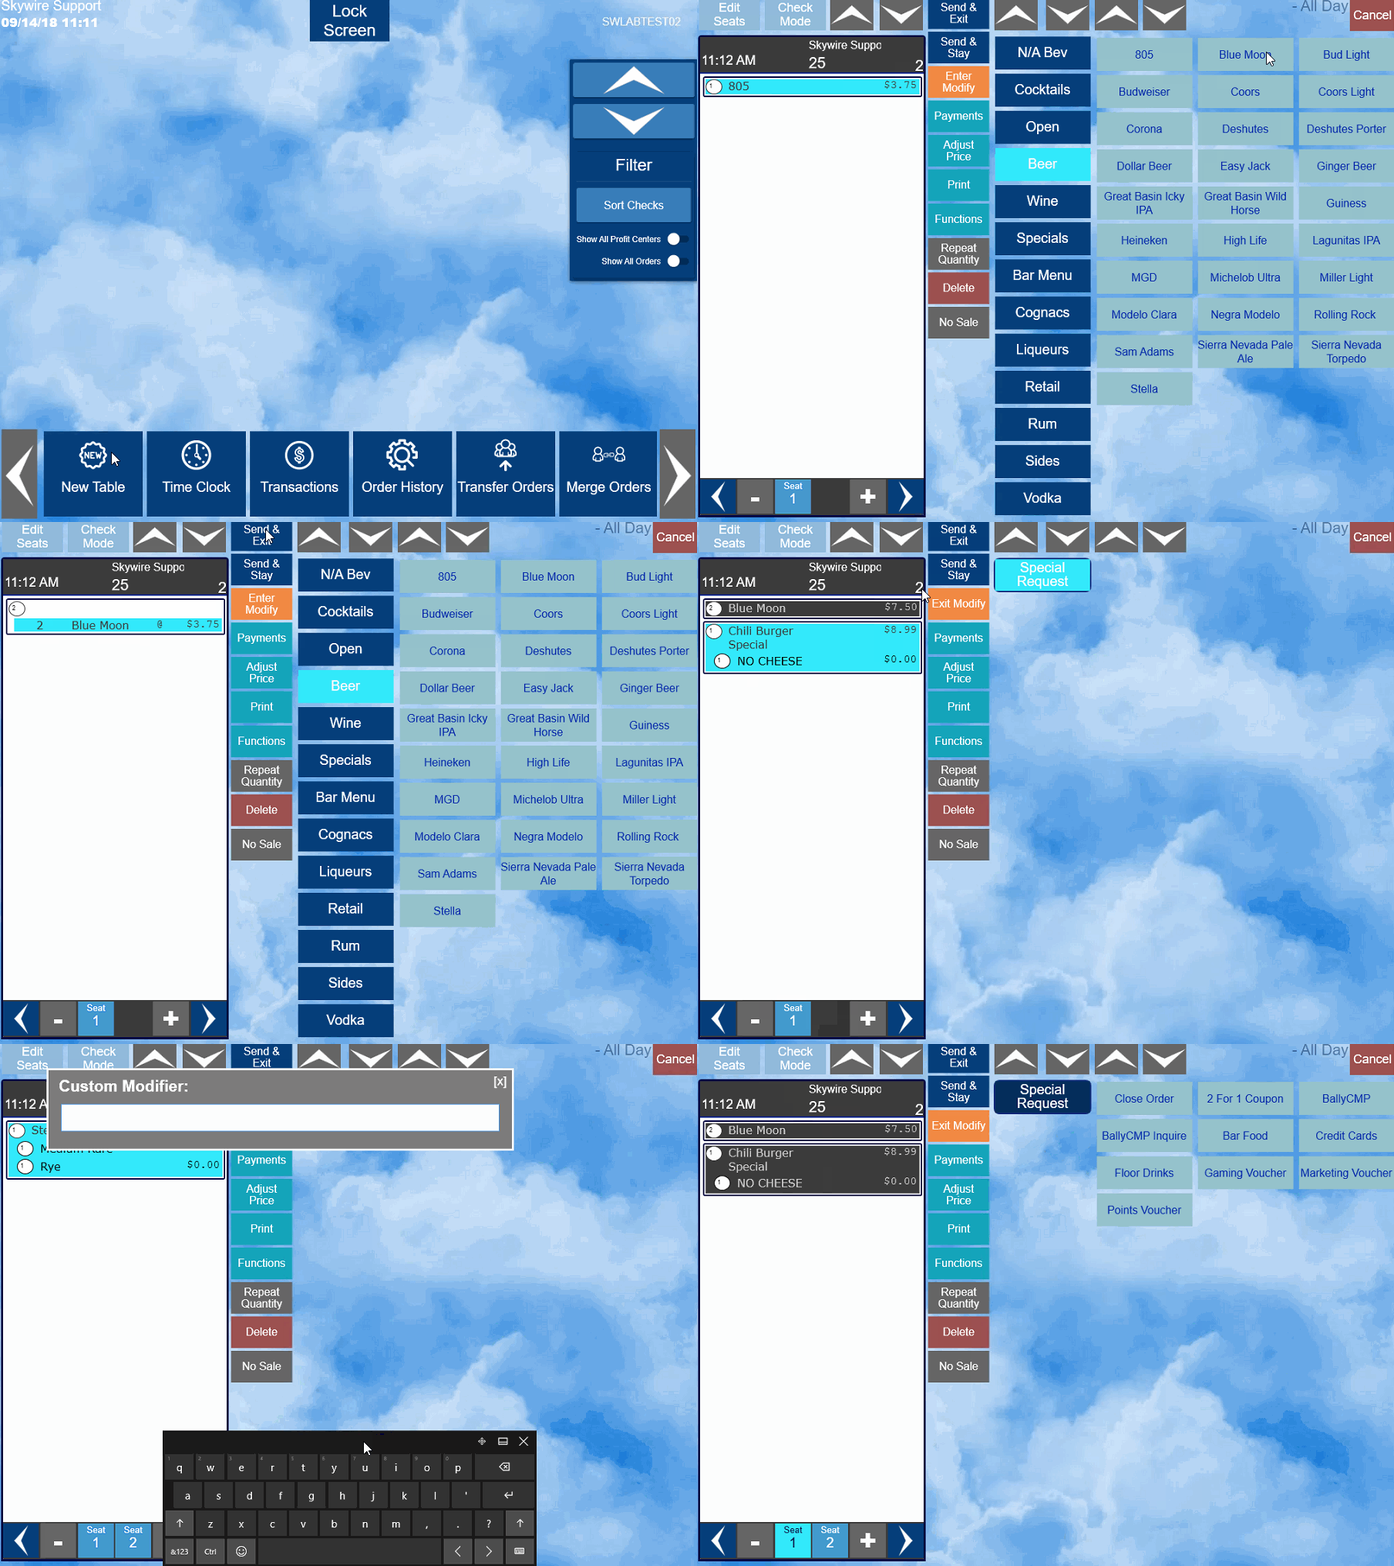
This article will show the front of house user how to place an order within Skywire.
New Order / New Table
- To start a new table / order, select “New Table” from the Main Screen.
- Single pass environments will only have to select "New Table" after signing-in.

- Enter a table number.
- Select “OK.”

- If prompted, enter a party count (Guest Count).
- Select “OK.”

Ordering a Menu Item
- To order an item, select the Product Group the item is assigned to, once you have located the item, select the item desired.

Forced Modifiers
- Forced Modifiers are modifiers that automatically prompt after selecting an item. Example, meat temperature for a steak.


Exception Modifiers
- An “Exception Modifier” is one that is optionally added to modify an item due to a special circumstance or request.
- Select the Item.
- Select “Enter Modify.”

- Select the modifiers applicable.
- Select “Exit Modify” when all Exception Modifiers have been add.

Special Request
- Special Request will allow you to type a special instruction.
- Highlight the item requiring the special request.
- Select “Enter Modify.”

- Select “Special Request.”

- Use the keyboard to type a special request.

- Select “Exit Modify” when complete.
Seat Number Ordering
- By default, all items are automatically assigned to seat 1.
- To order items for another seat, select “+” to add a new seat.
- Select “-” to remove a seat.
- Select the seat number you are ordering for and select items for that seat.
- To move items to different seats, select “Edit Seats.”

- Select the item to move and then select the seat that you are moving the item to.
- Select “Exit” when complete.

Send & Stay vs Send & Exit
- To send an item to a remote printer, select “Send & Exit” OR “Send & Stay.”
- Send & Exit will send the order to the remote printer(s), save the order, and exit the current screen.

- Send & Stay will send the order to the remote printer(s), save the order, and keep the order on the screen.
- When an item has been sent to a remote printer, it will appear in gray on the screen.

Delete Menu Item in Current Round
- To delete an item from an order before it has been saved, select the item.
- Select “Delete.”
- You can highlight multiple items if needed.

- You must be in seat mode to do this. If in check mode, a prompt will appear asking you to switch to seat mode.

Print an Order
- To print a check, select “Print.”

- Once the check has printed, the items will show in gray. This indicates the items have been saved and sent to remote printers if applicable.
- Depending on payments, you may be prompted with the option to print a trailer.

Seat Mode & Check Mode
- By default, the check is in Seat Mode once the order is opened. Here you can add items to each seat and edit seat numbers.
- Switching the order to Check Mode will allow you to apply tenders, discounts, functions, etc.

- You can toggle from “Seat Mode” to “Check Mode” using the buttons located on the top left of the screen.

Repeat Quantity
- Select “Repeat Quantity” to order an item in quantity.
- This can be done before or after the item has been selected.

- After you enter a quantity, the next item you order will be ordered with that quantity.
- Or, select the item to be repeated and then select “Repeat Quantity.”

Video - How to Place an Order

