![PALUSA New Logo Transparent-1.png]](https://helpcenter.skywire.com/hs-fs/hubfs/PALUSA%20New%20Logo%20Transparent-1.png?height=50&name=PALUSA%20New%20Logo%20Transparent-1.png)
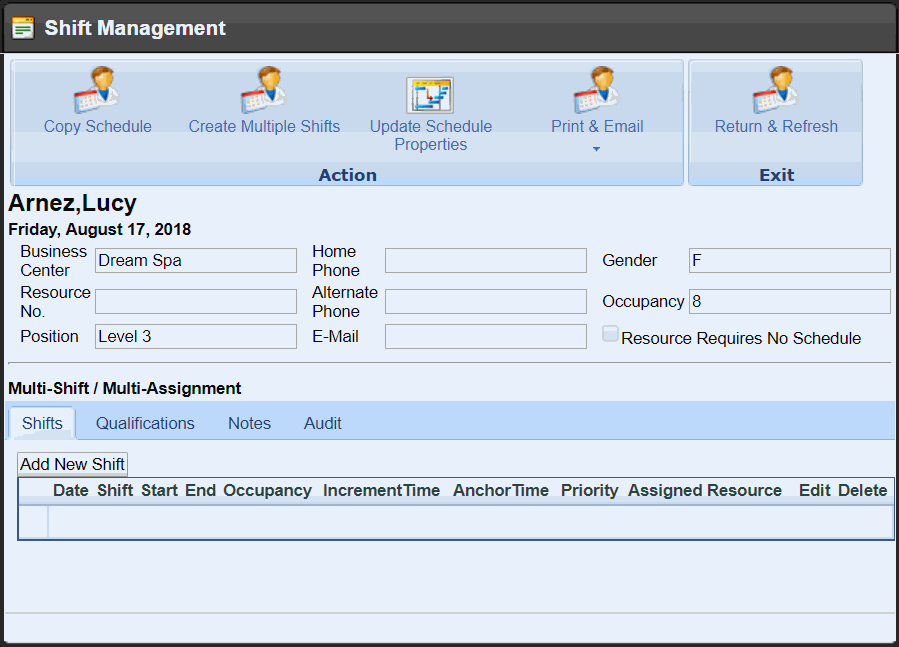
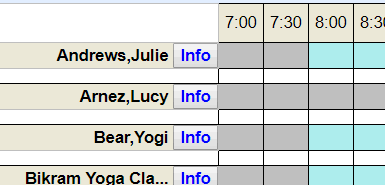
Select the "Info" icon next to the Resource's name to open the Shift Management screen

Step 2:
Select "Add New Shift"
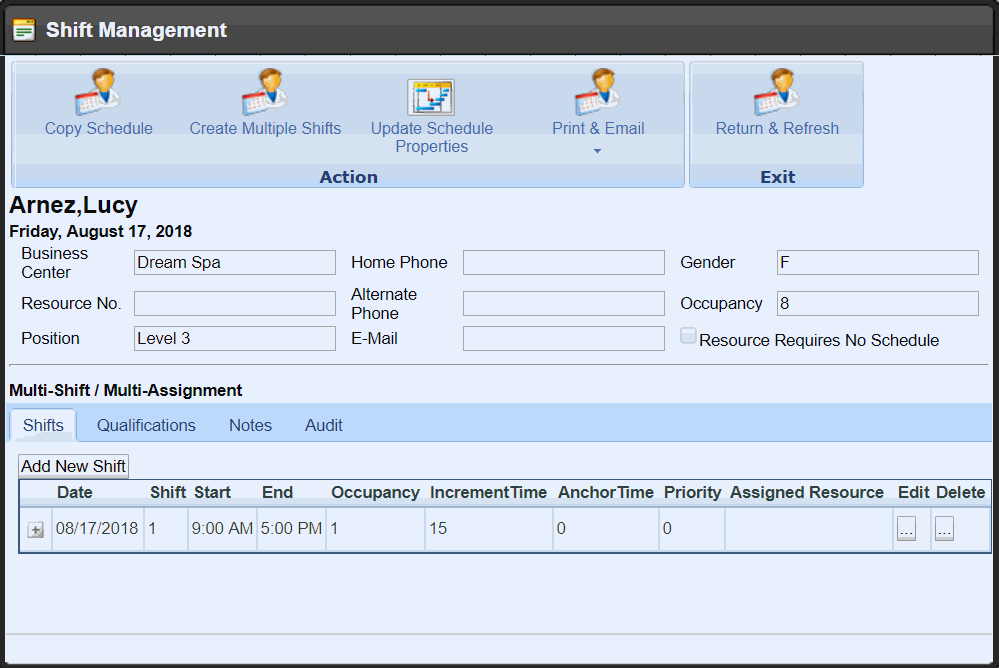
Step 3:
Enter a Starting Time, Ending Time, select the confirmation checkbox at the bottom, and select "OK"
Step 4:
You created a Shift! Select "Return Refresh" to return to the Resource Scheduler
Optional Fields
You can prioritize the booking of Resources based on the associated number.
For example: If you have a Provider that has the highest booking priority in your Spa, enter a "1" within the Priority field and they will be displayed first on your Visual Book.

Adding a break
Select the "Info" icon next to the Resource's name to open the Shift Management screen
Step 2:
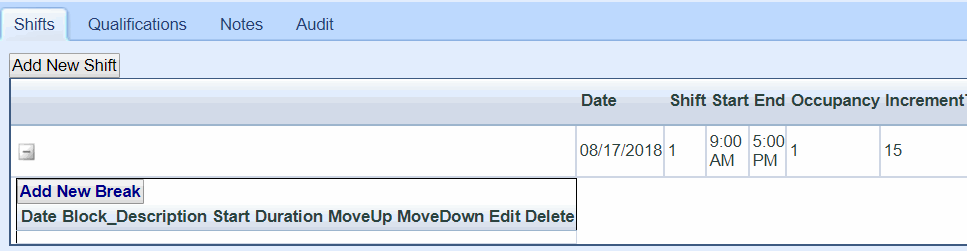
Select the + next to the scheduled shift
Step 3:
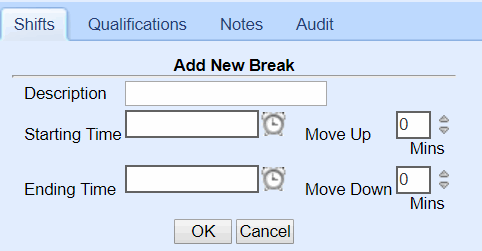
Select "Add New Break"
Step 4:
Enter a break description, Starting Time, Ending Time, and select "OK"
Step 5:
You added a break! Select the + next to the scheduled Shift to view any associated breaks

Optional Fields
The "Move Up" and "Move Down" function allows you the flexibility to move this break in the Visual Book if needed. Enter the max amount of minutes you will allow this break to be moved up and down.
You will be allowed to move the break up/down by increments of 15 until it has reached it's max.

Note: You can only copy from Provider to Provider, Facility to Facility, and Equipment to Equipment.
Step 1:
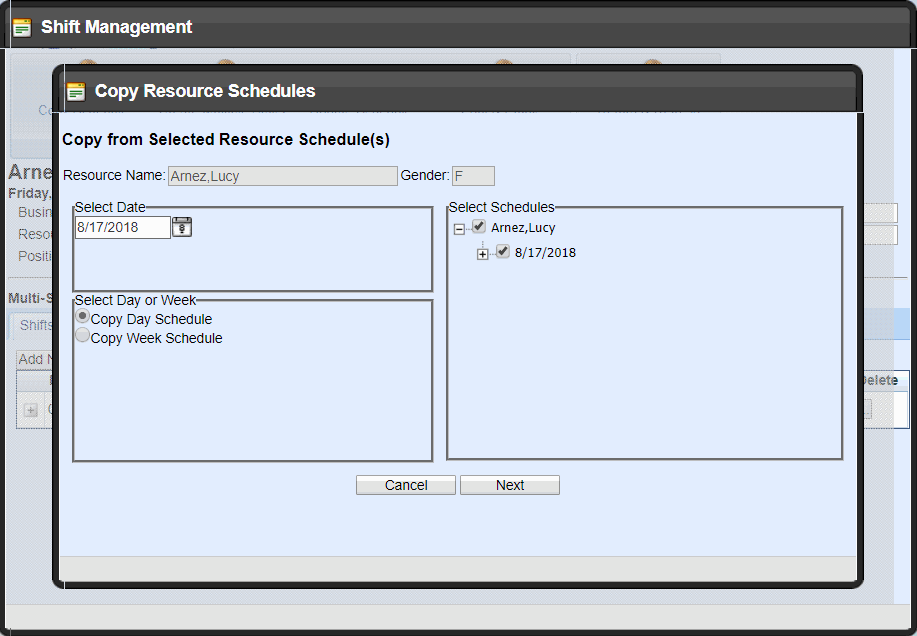
Select the "Info" icon next to the Resource's name to open the Shift Management screen - make sure you are selecting the Resource with the Shift you wish to copy from
Step 2:
Select "Copy Schedule"
Step 3:
Select the date you would like to copy from - the date with automatically populate with the day you are currently on, but you can always select another day to copy from

Step 4:
Select whether you would like to copy a day schedule or week schedule
Step 5:
On the right screen, you can select the + to expand the dates to verify which shift(s) you are copying
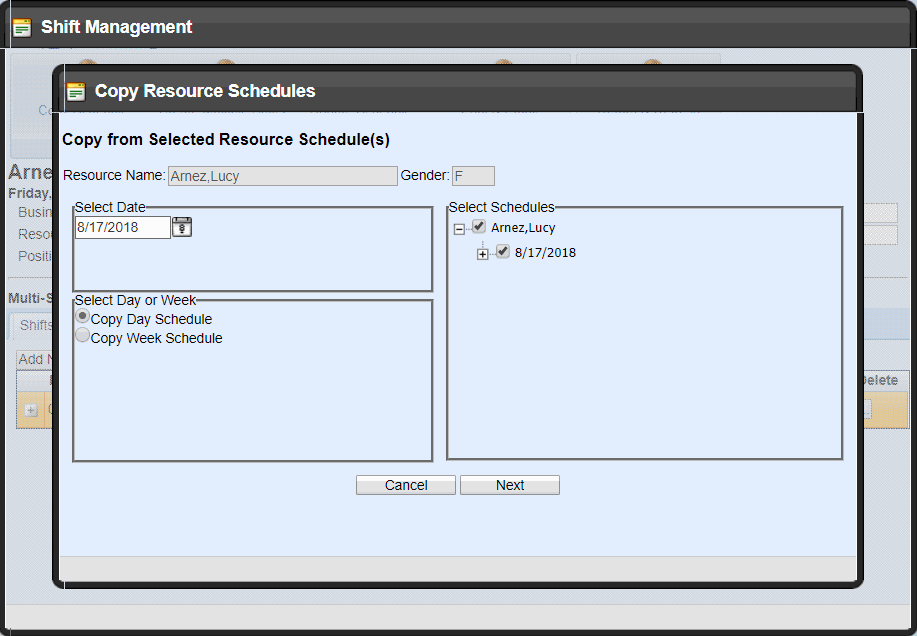
Step 6:
Select "Next" to continue or "Cancel" to return to the Shift Management screen

Step 7:
Select the date range you would like to copy to

Step 8:
Select which Resource you would like to copy to
- Same Resource Only - copy the shift(s) to the Resource you are currently on
- View By Resources - copy the shift(s) onto multiple Resources
- View by Business Lines - copy the shift(s) onto multiple Resources, but sort them by Business Line
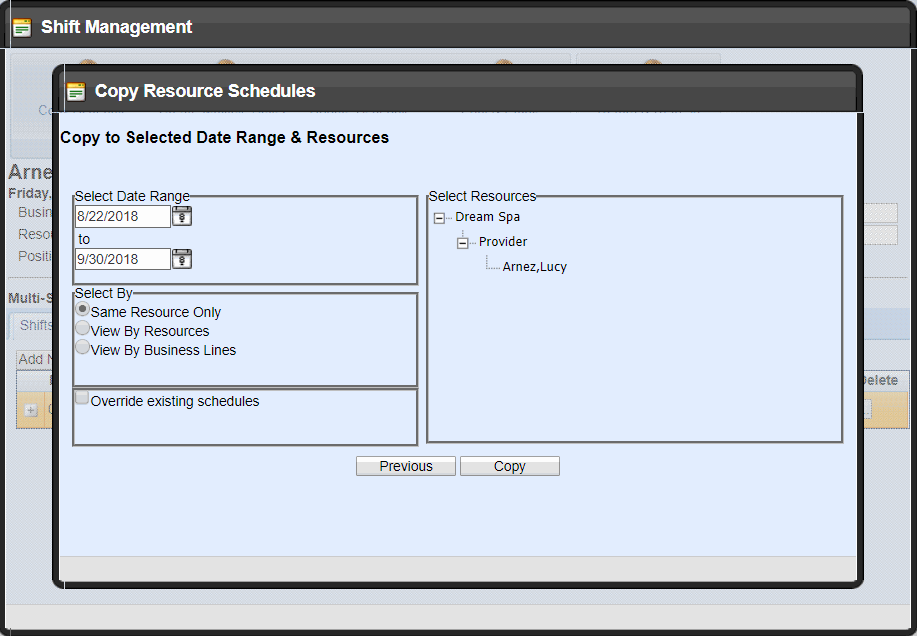
Step 9:
Select "Copy" and wait for the Copy Successful message to appear
Note: If you select "Return" before the message appears, the Shift(s) will not be copied

Step 10:
You copied a shift! Select "Return Refresh" to return to the Resource Scheduler
Copy Range
You can copy Shifts 3 months at a time, but you can continue to copy out as far as you wish by repeating this process with 3 month periods.
For example: If you would like to schedule a Facility for an entire year, you can start by copying it's Shift from January to March. You can then go back into the Copy screen and copy it's Shift from March to May. You can continue to repeat this process until you have scheduled the Facility as needed.
Override Existing Schedules
If the Resource you are copying to already has a scheduled shift within your copy range, the copy will fail.

Select the Override Existing Schedules checkbox for the Shift(s) to successfully copy.

Shift Management Tools
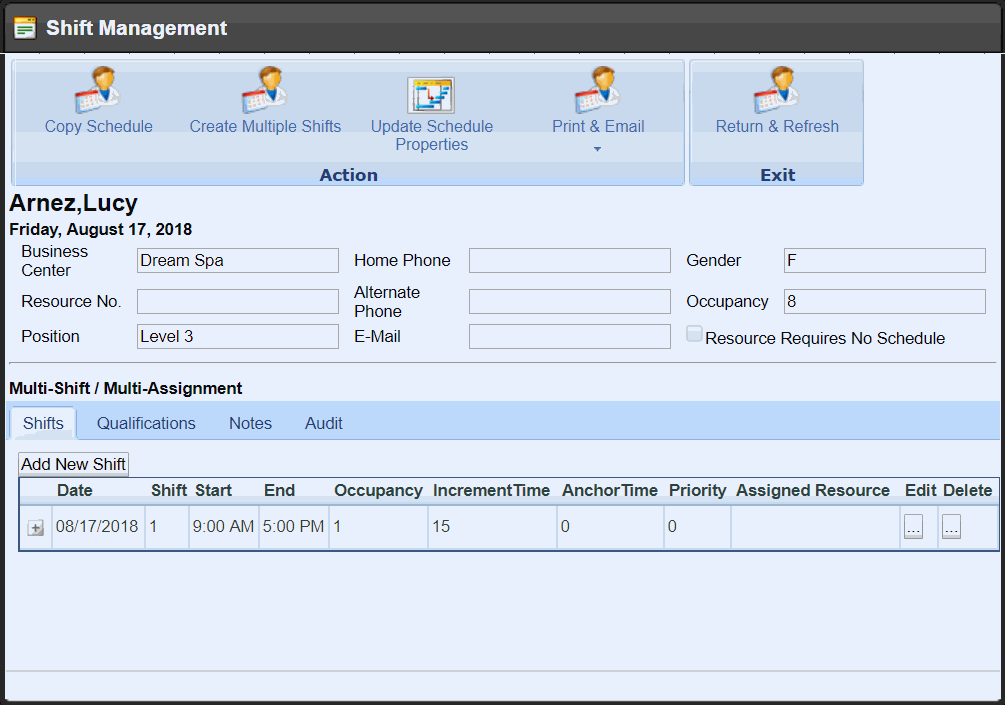
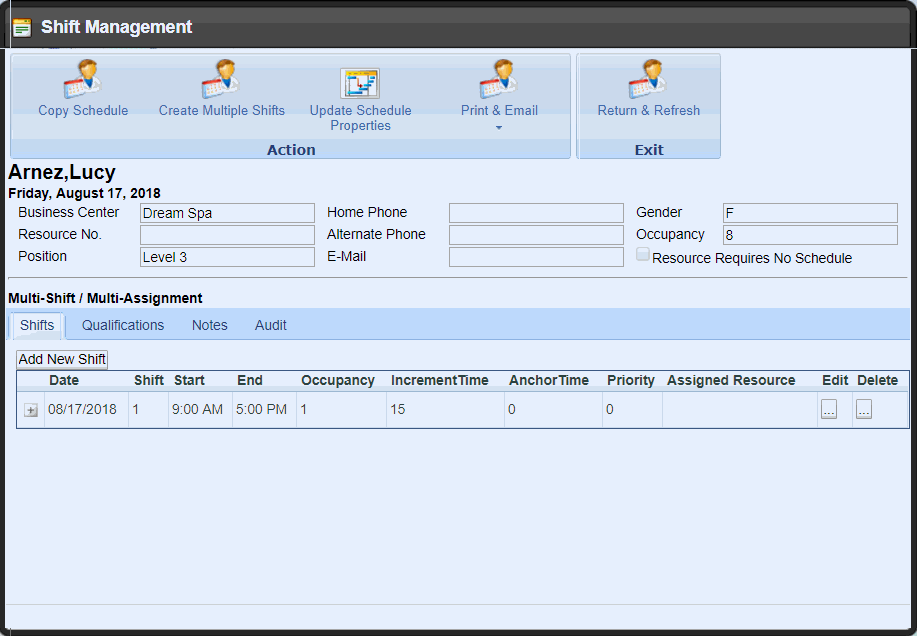
Details include Gender, Occupancy, contact information, and the Position they are assigned to.
To edit or delete a shift, select the "Edit" or "Delete" options located to the right of each Shift.

Toggle between the Multi-Shift / Multi-Assignment Tabs to view:
- Shifts: View/add/edit/delete shifts
- Qualifications: View activities that this Resource is qualified to perform
- Notes: View notes that are added to this Resource within Configuration
- Audit: View an audit trial of any adjustments that have been made to this Shift

Here you can hover over the "Print & Email" function and select whether you would like to send their scheduled shifts or, scheduled shifts and appointments.

Resource Schedules
This option will generate a report listing the Resource’s scheduled shifts. The system will pull the configured email address from the Resource’s employee profile, but you may enter a different address here.
Select “E-mail” to send!

Resource Appointments
This option will generate a report listing the Resource’s scheduled shifts AND booked appointments. The system will pull the configured email address from the Resource’s employee profile, but you may enter a different address here.
Select “E-mail” to send!
