You can access appointment functions by RIGHT-CLICKING or selecting the appointment and then selecting the function from the Ribbon Bar.
You may right-click on any area of the line-item appointment.

Check-In
Setting an appointment to Check-In establishes that the Guest has arrived for their appointment.

NOTE: Checking-in will send an SMS Text to the associated Provider. Provider’s SMS phone number must be configured into their Employee Profile.
To check-In
Step 1:
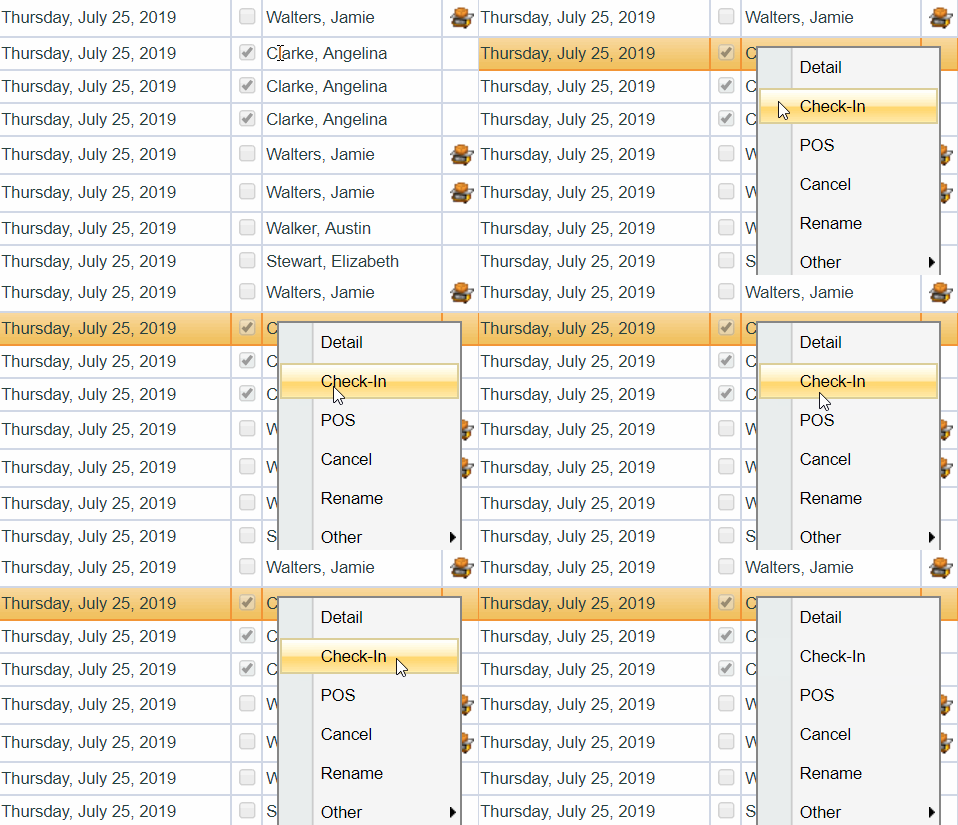
Access the Check-In function by right-clicking an appointment or
selecting the appointment and then selecting "Check-in"
Step 2:
The Check-In screen will list all appointments under this Guest

Step 3:
Select the appointments you would like to check-in - It is recommended that you select both the "Check-In" & "POS" checkboxes
Check-In: Establishes the arrival time
POS: Establishes that this appointment can be tendered for payment - if not selected, sale will not post to POS

Step 4:
Select "Accept" - you checked-in an appointment!

NOTE: The green checkmark indicates that this Guest is now checked-in
POS
The POS option is used to tender payment for an appointment or a set of appointments under the same Guest.

Getting Ready to Tender Payment
Step 1:
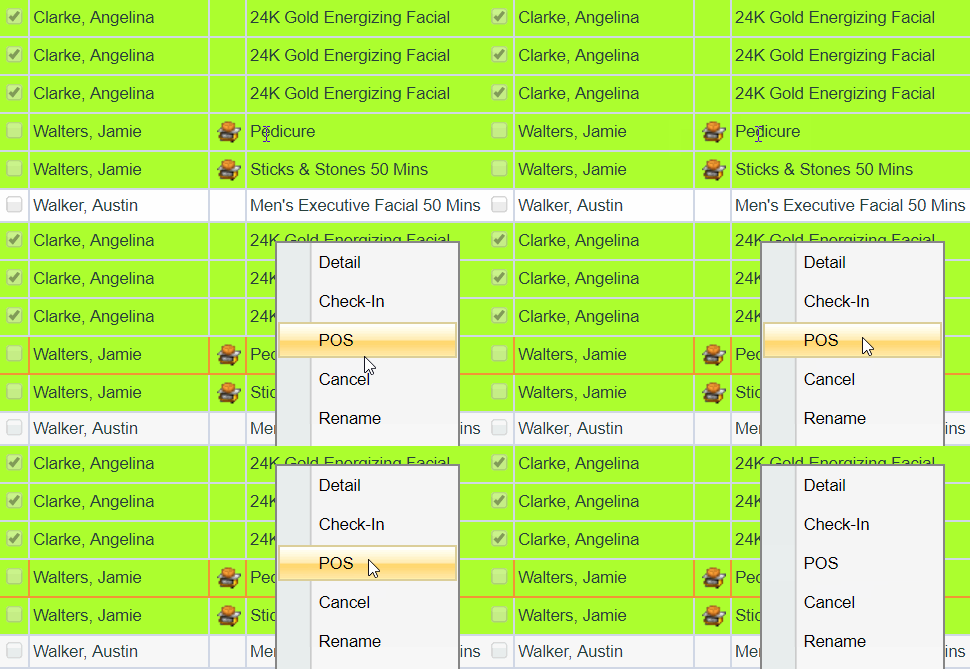
Access the POS function by right-clicking an appointment or
selecting the appointment and then selecting "POS" from the Ribbon Bar
NOTE: Appointment MUST be checked-in, if appointment is not checked-in, the sale will not display on POS
Step 2:
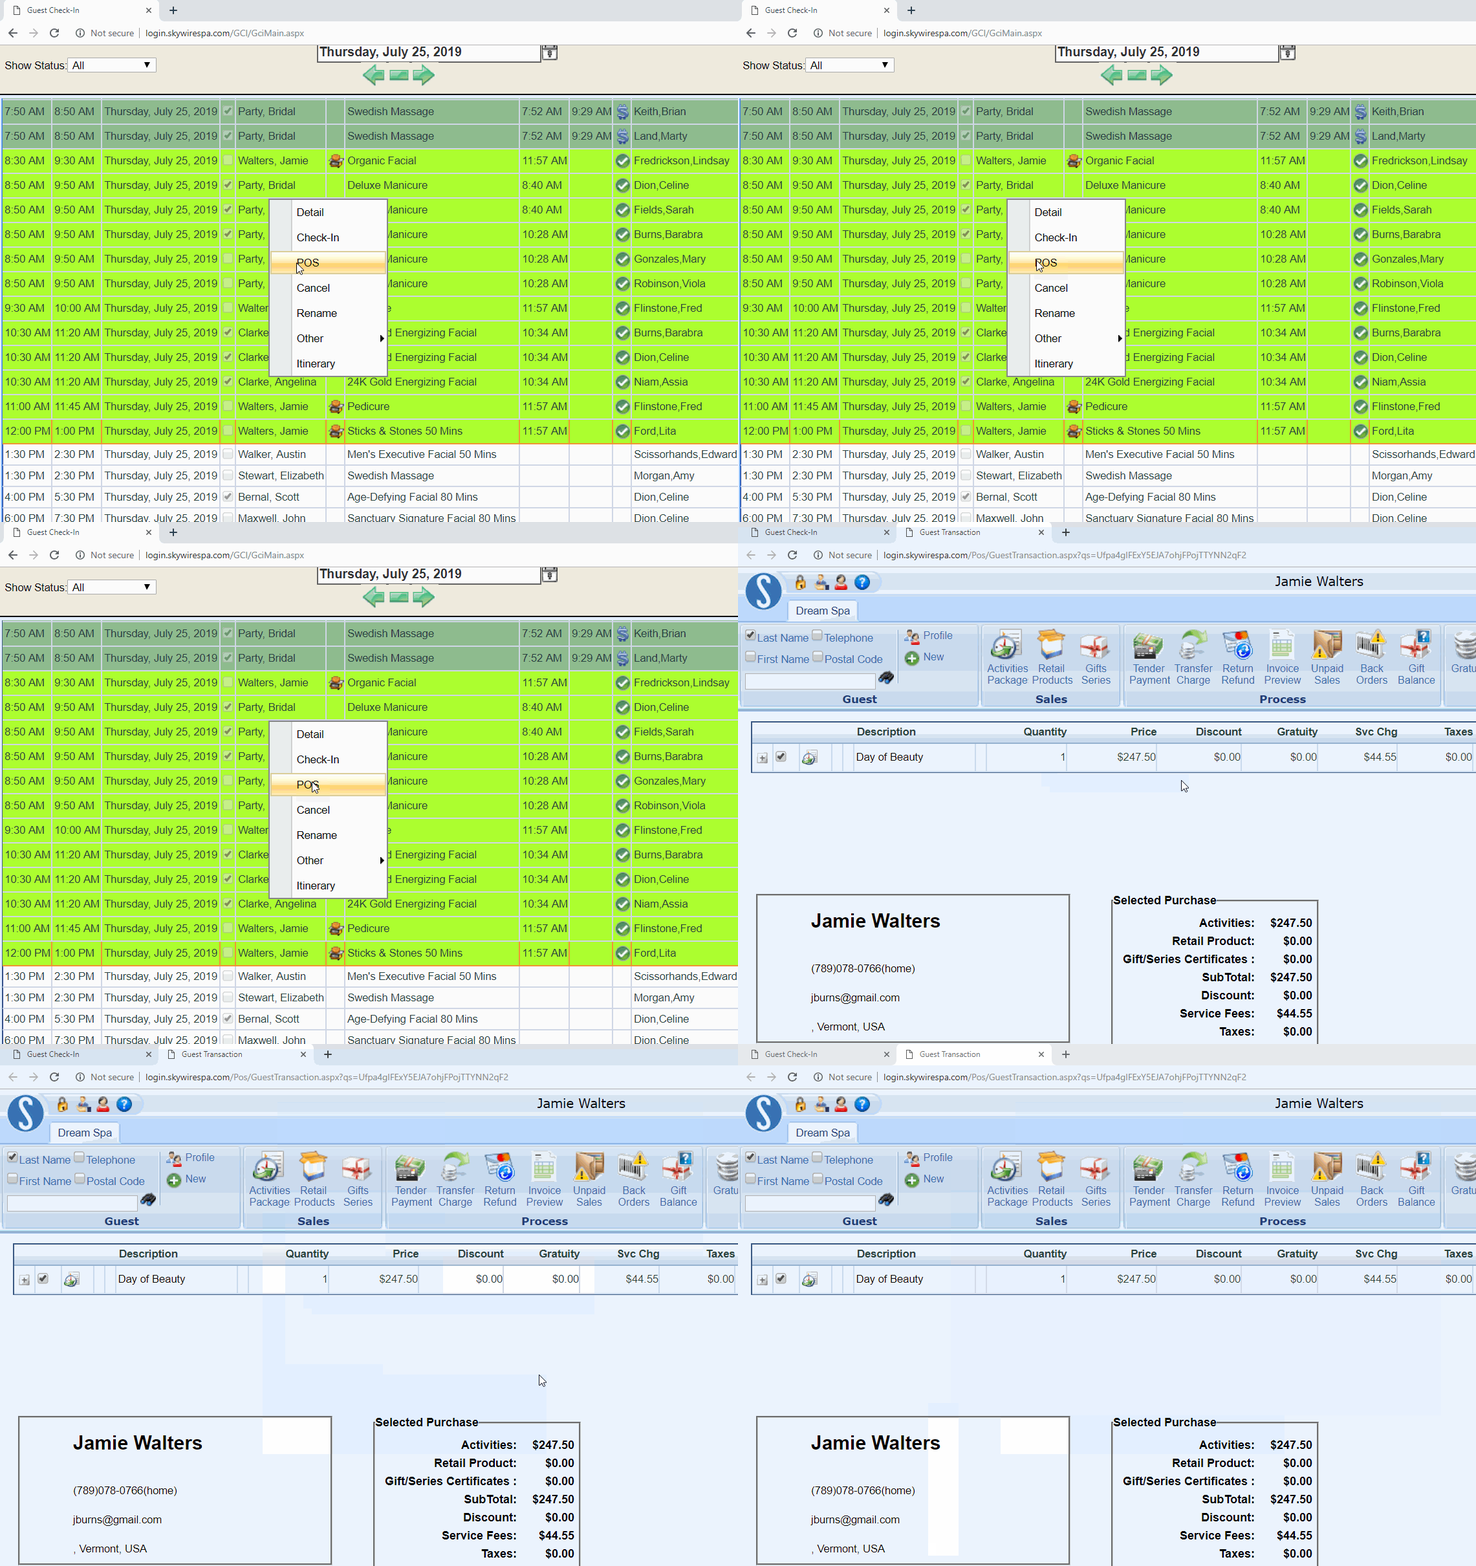
This will open a new tab and redirect you to the POS Module - please follow the POS course for complete instructions on how to tender payment
Checked-Out Appointments
Once an appointment has been Checked-Out you will see a dollar sign icon within the Status column. At this point, the appointment CANNOT be edited, cut, paste, or canceled – It can be refunded.

Cancel
You can access the cancel screen by double-clicking on an appointment or highlighting the appointment and selecting cancel.

NOTE: Canceling will send an SMS Text to the associated Provider. Provider’s SMS phone number must be configured into their Employee Profile.
To Cancel an Appointment
Step 1:
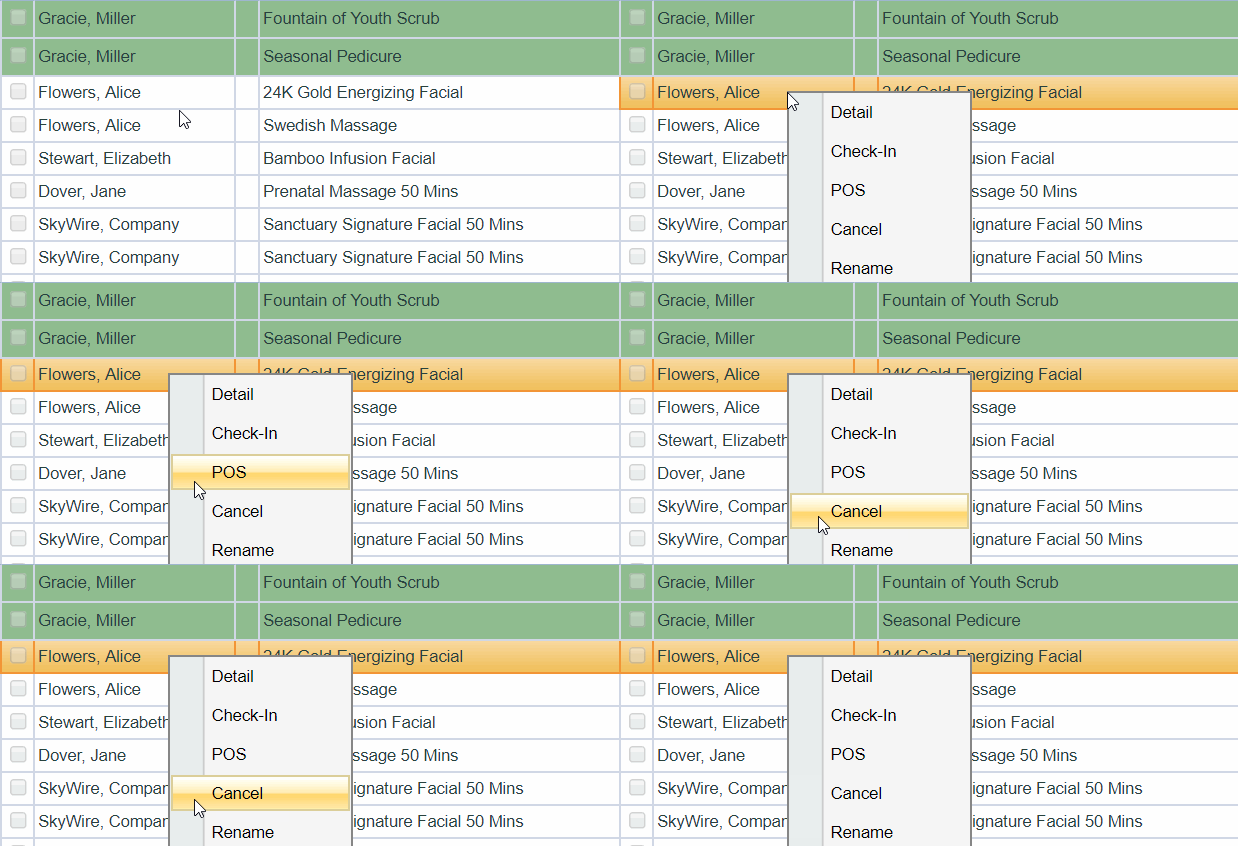
Access the Cancel function by right-clicking the appointment or
highlighting the appointment and then selecting "Cancel"
Step 2:
The Cancel screen will list all appointments under this Guest

Step 3:
Select the appointment(s) you wish to Cancel
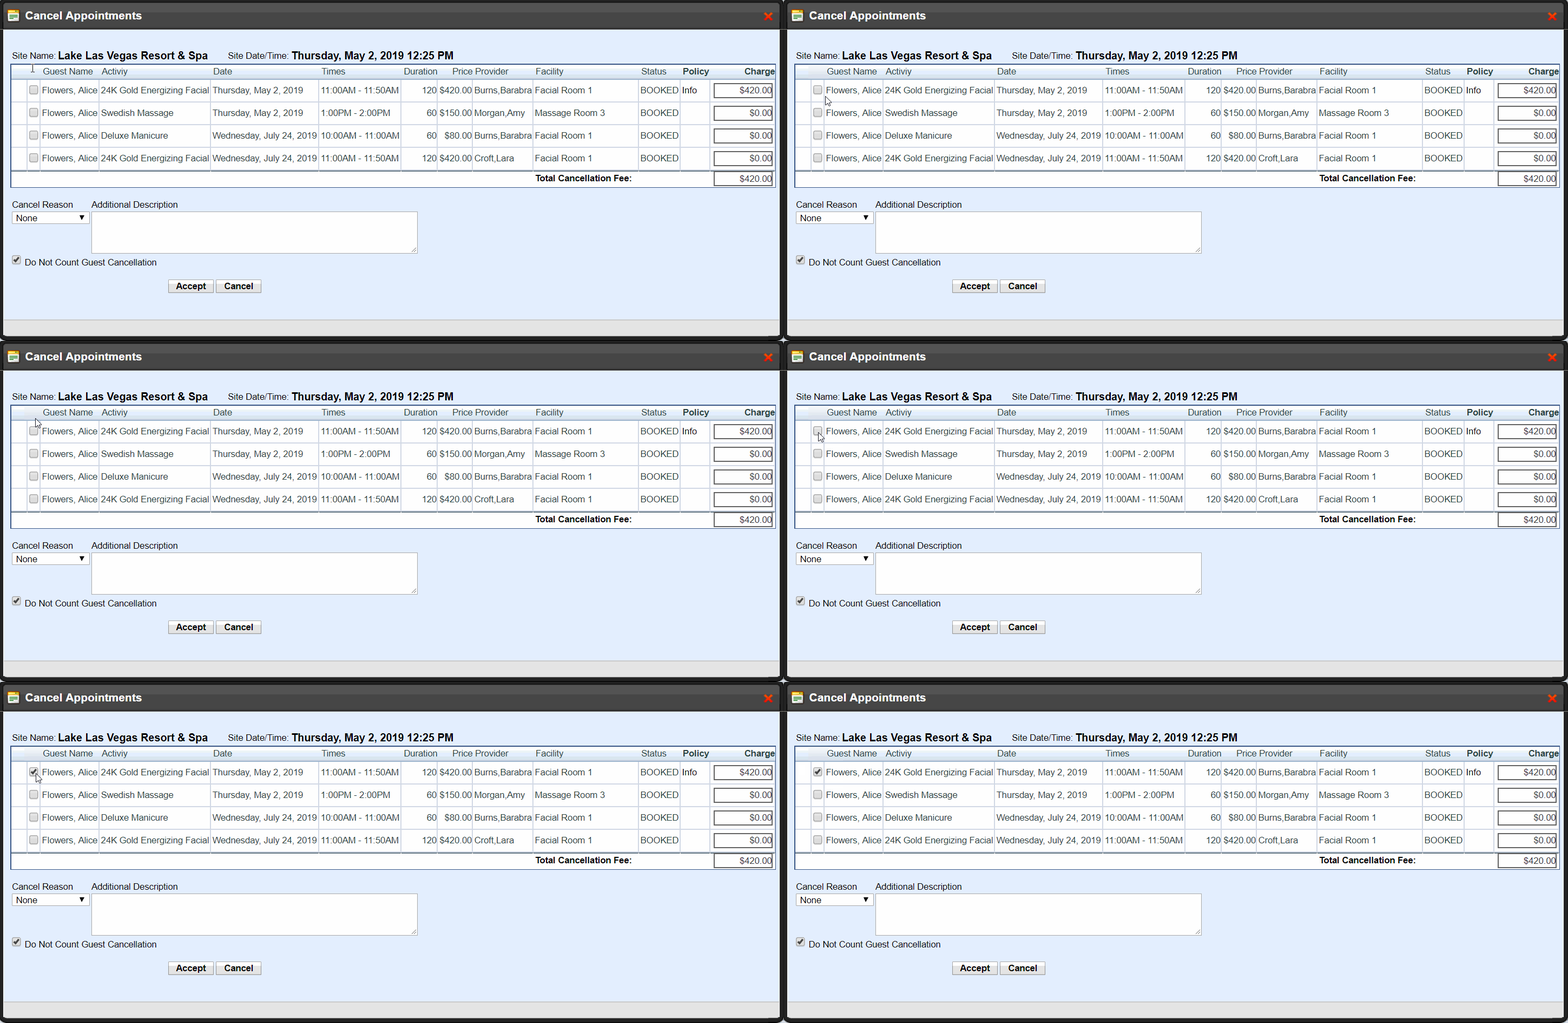
Step 4:
Select a Cancellation Reason from the drop-down list - Additional Description is optional

Step 5:
Select this checkbox if you DO NOT want to count this cancellation against the Guest - this will simply Cancel the appointment and not post the cancellation charge to their POS profile
Leave it unselected if you DO wish to count this cancellation against the Guest - this will automatically take you to their POS profile so you can settle payment or remove the charge
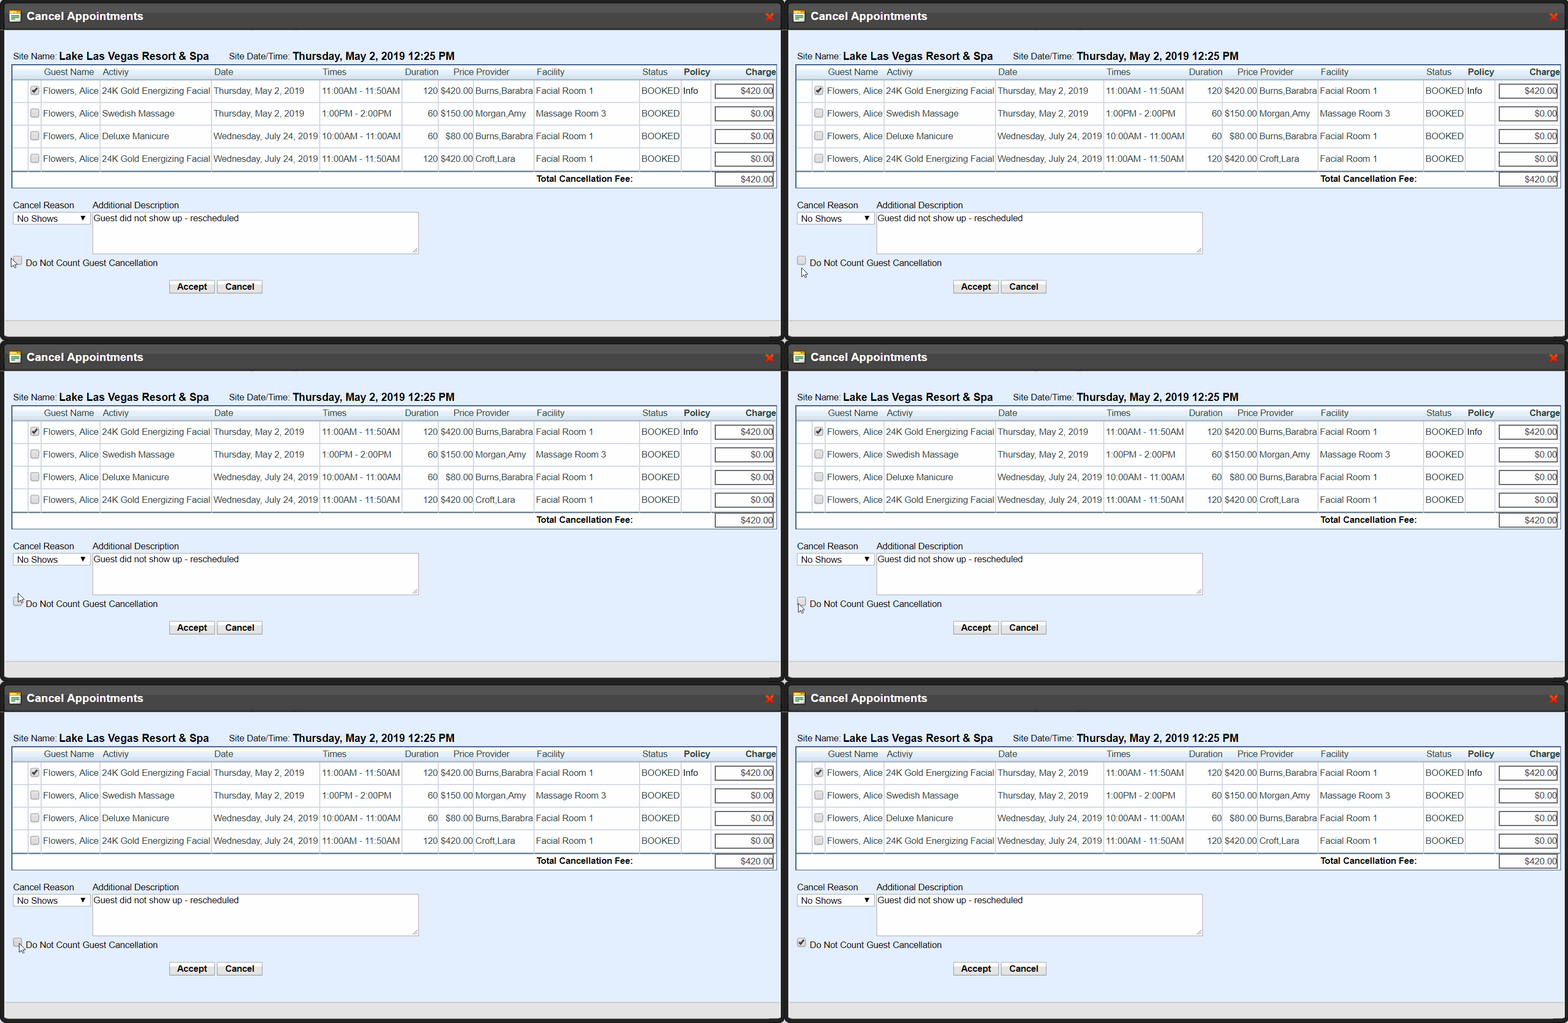
Step 6:
Select "Accept" - you have cancelled an appointment!
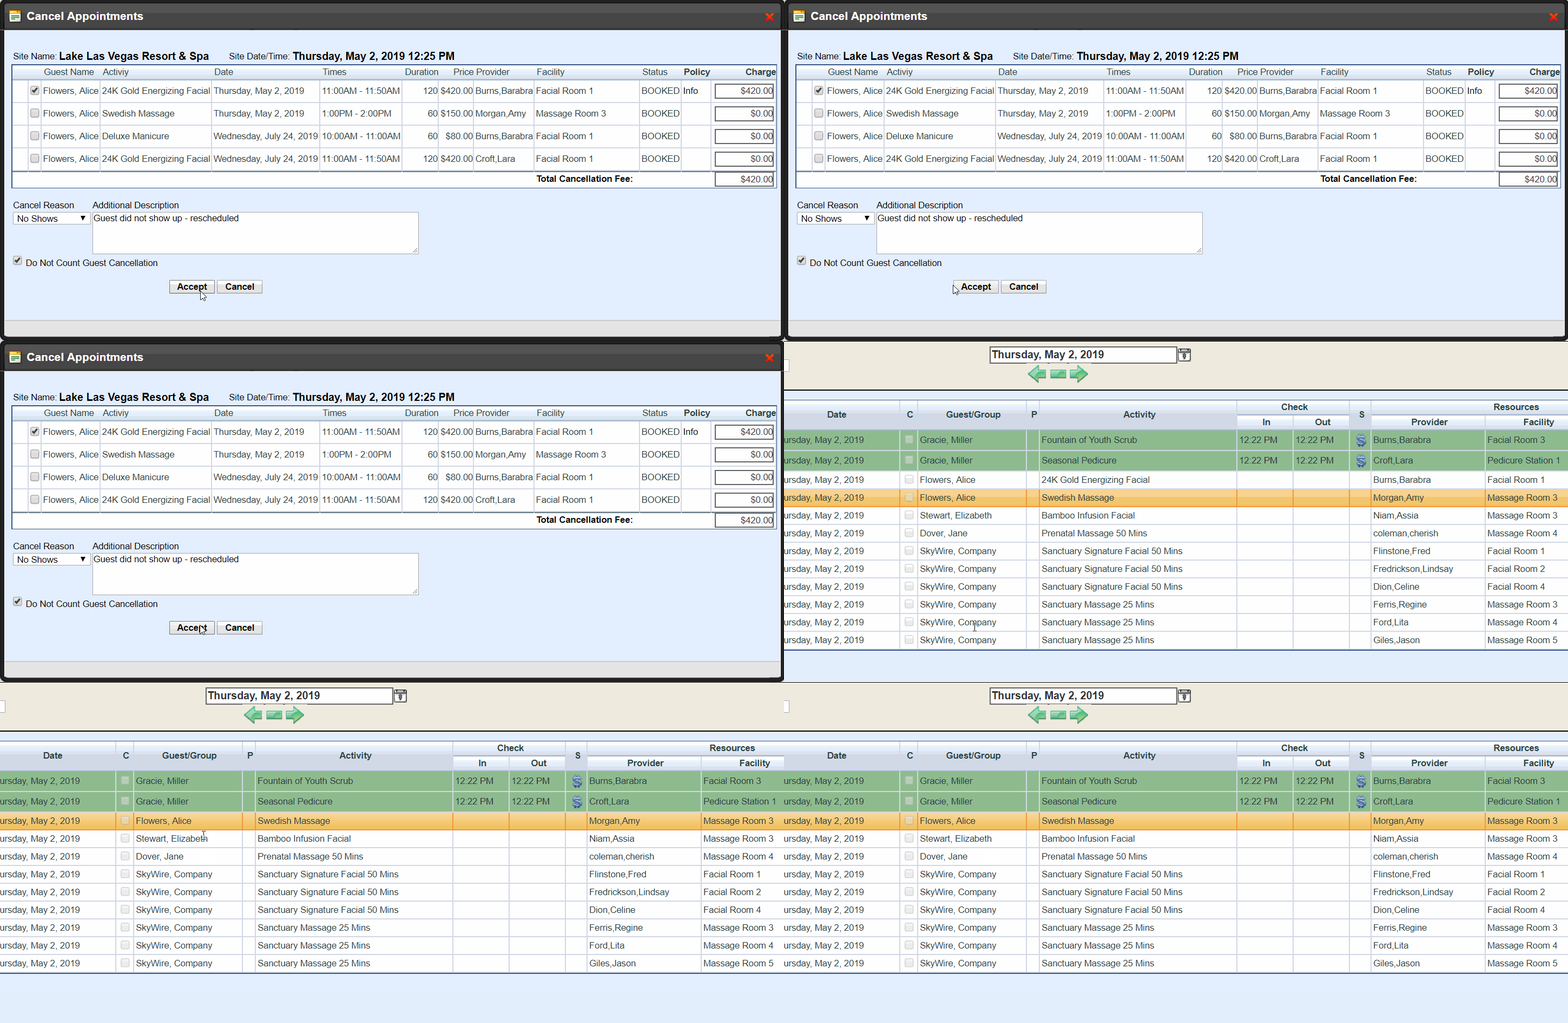
NOTE: You must have a Cancellation Policy in place and configured so the system can automatically calculate the cancellation charge
Rename
You can change the associated Guest of an appointment by Renaming.

To Rename an Appointment
Step 1:
Access the Rename function by right-clicking an appointment or
highlighting the appointment and then selecting "Rename"
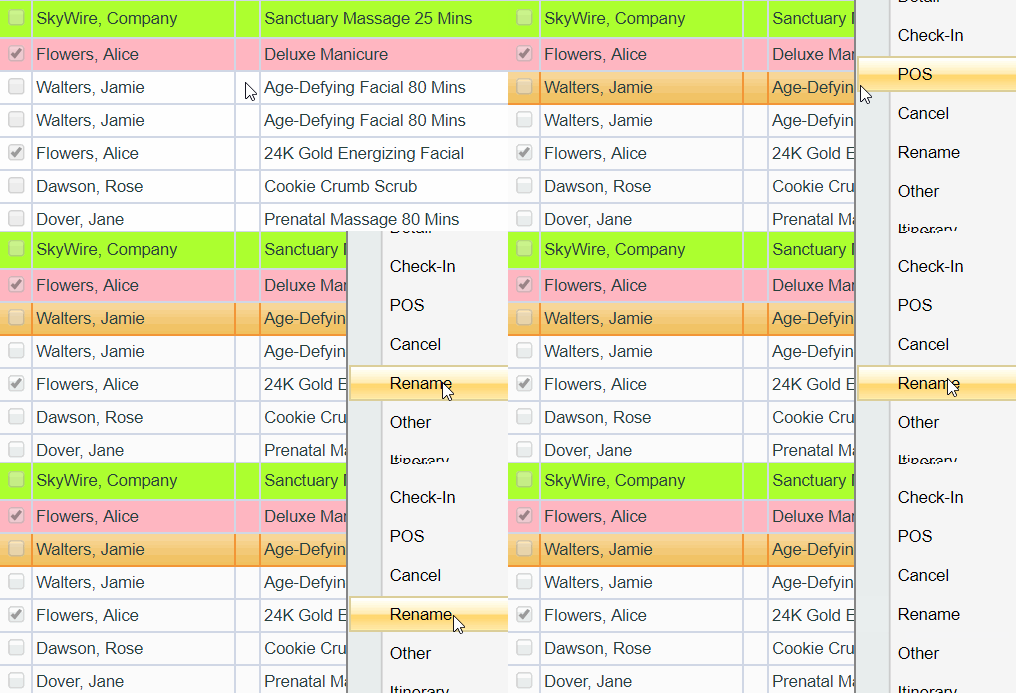
Step 2:
The Rename screen will list all appointments under this Guest
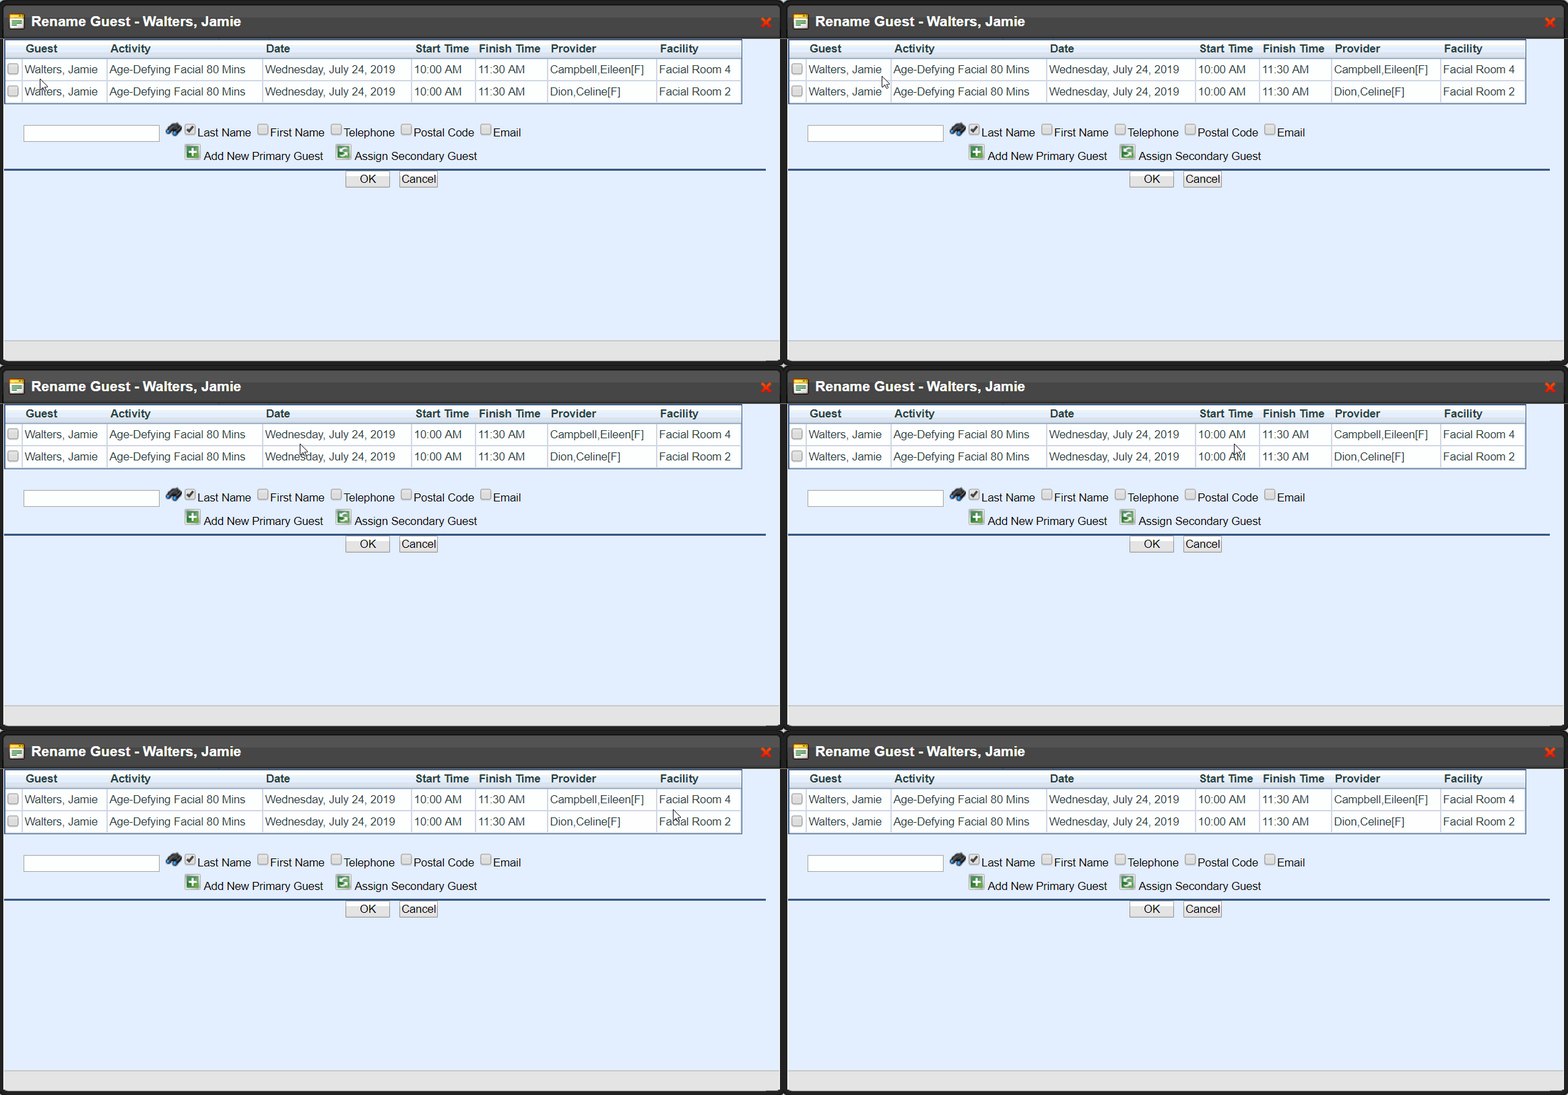
Step 3:
Select which appointments you would like to Rename
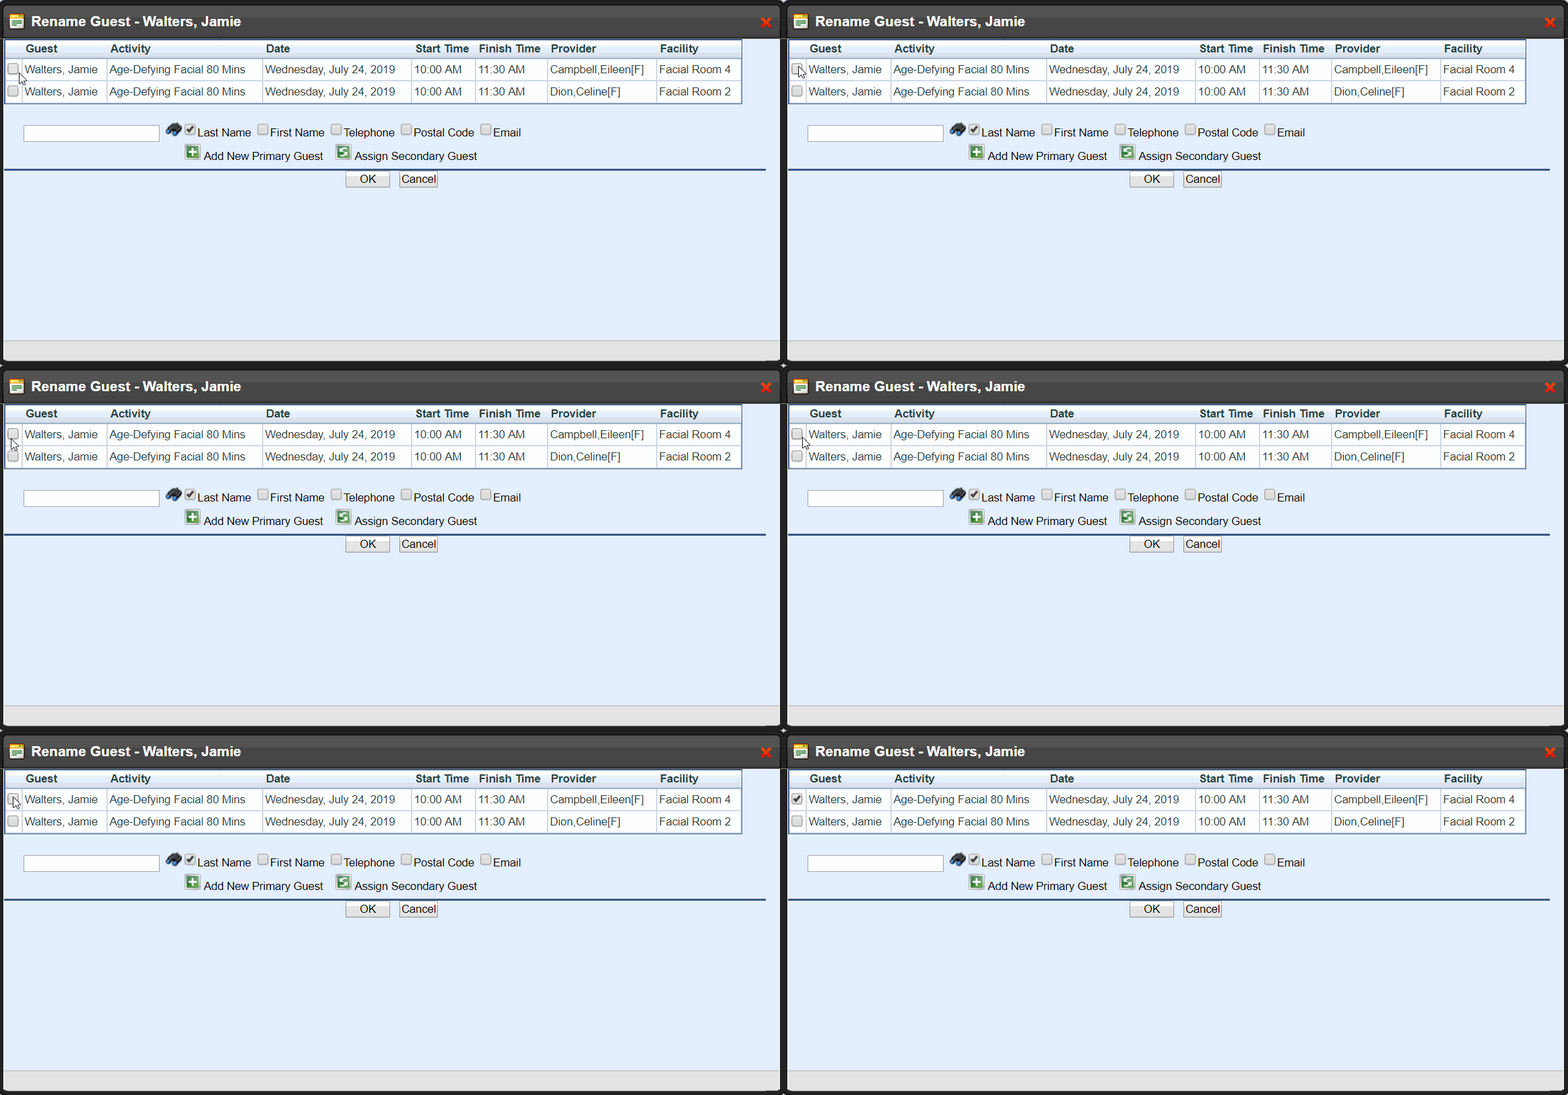
Step 4:
Search the Guest Name or "Add a New Primary Guest" if they don’t already exist
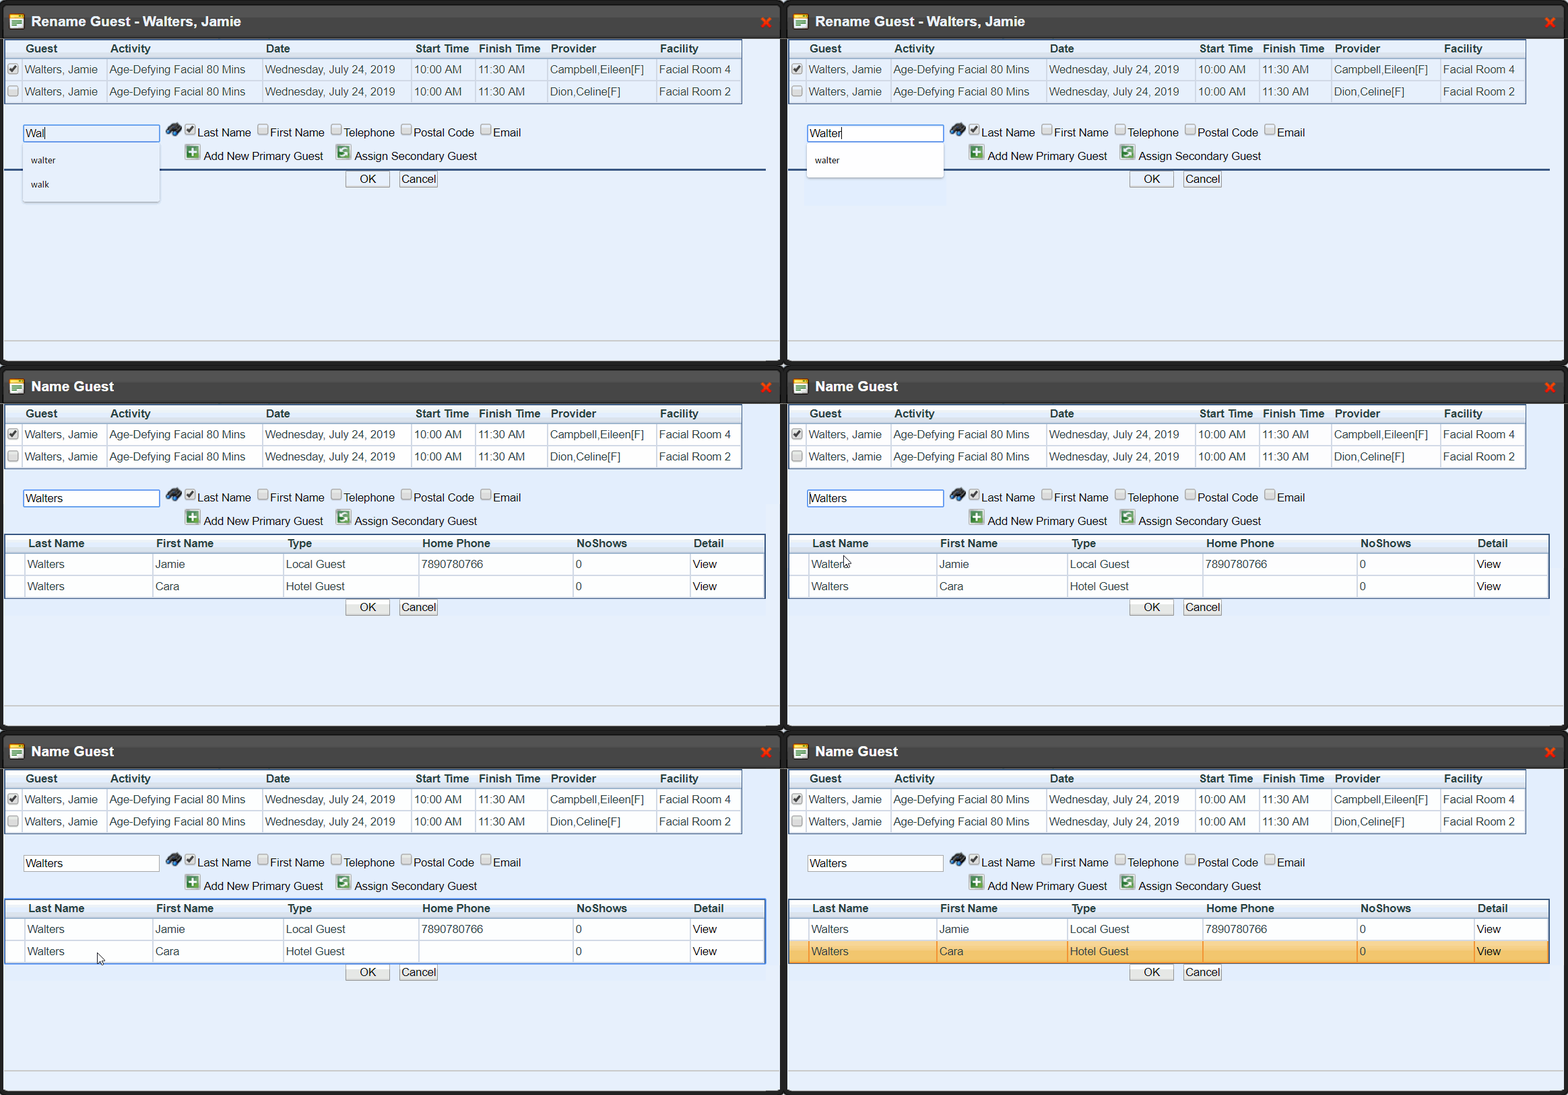
Step 5:
Select "OK" - you renamed an appointment
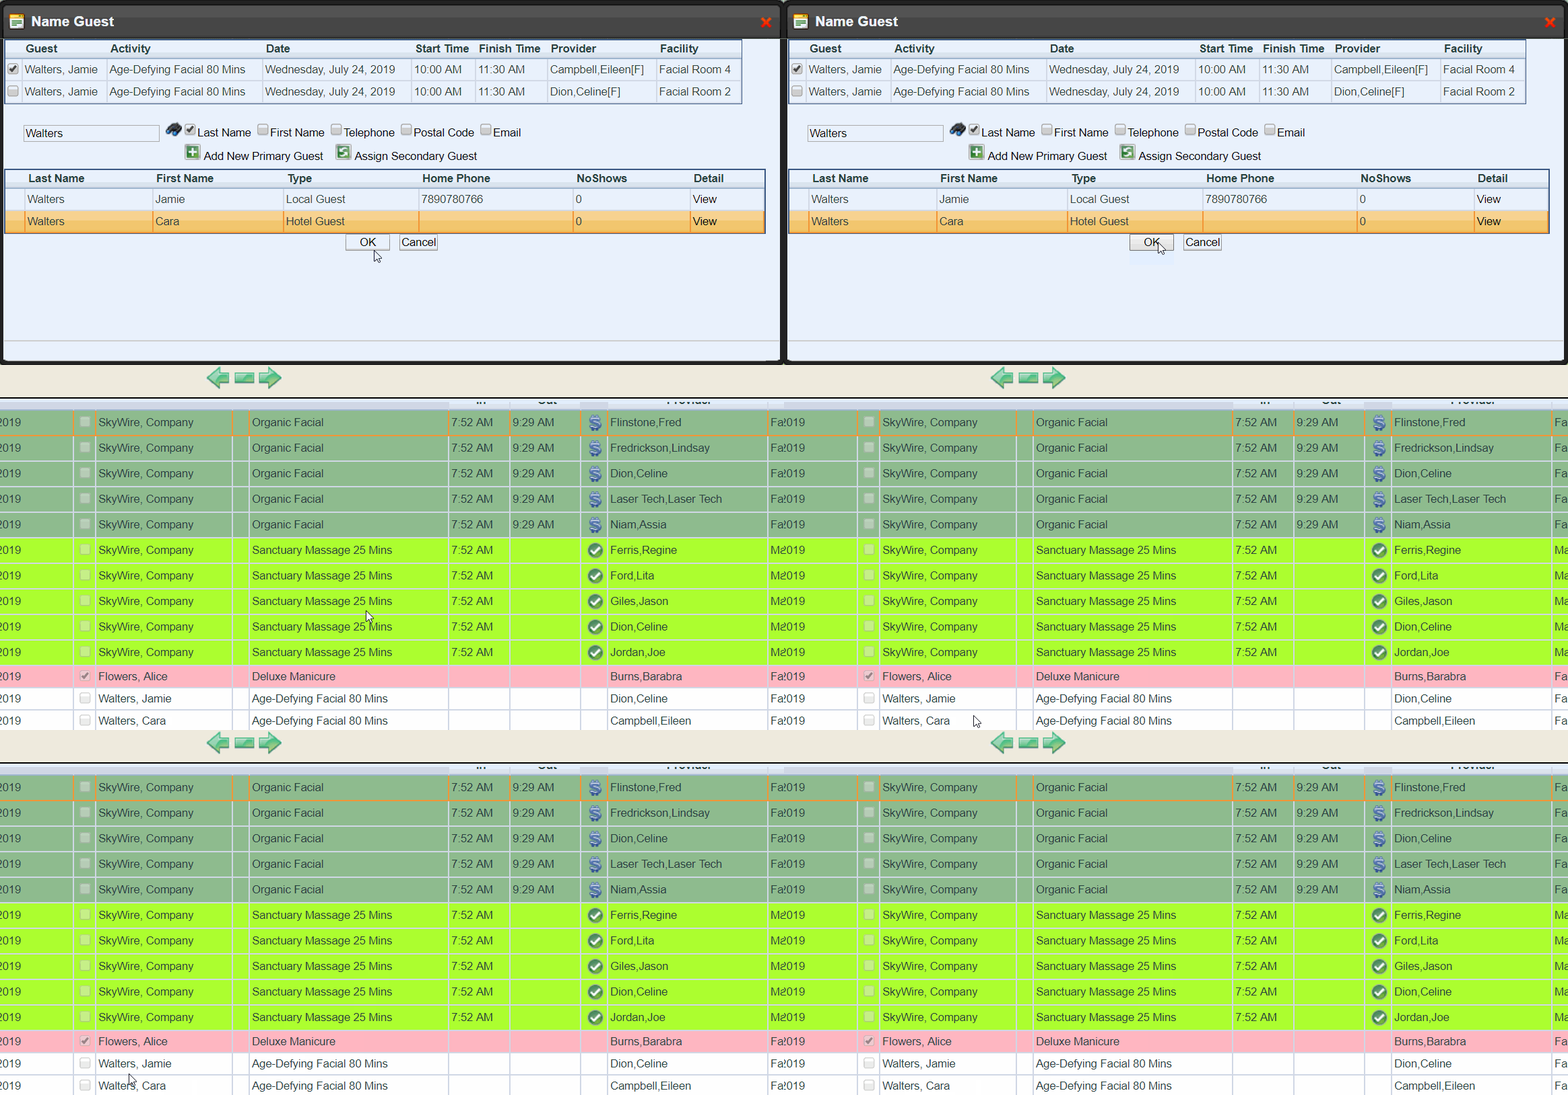
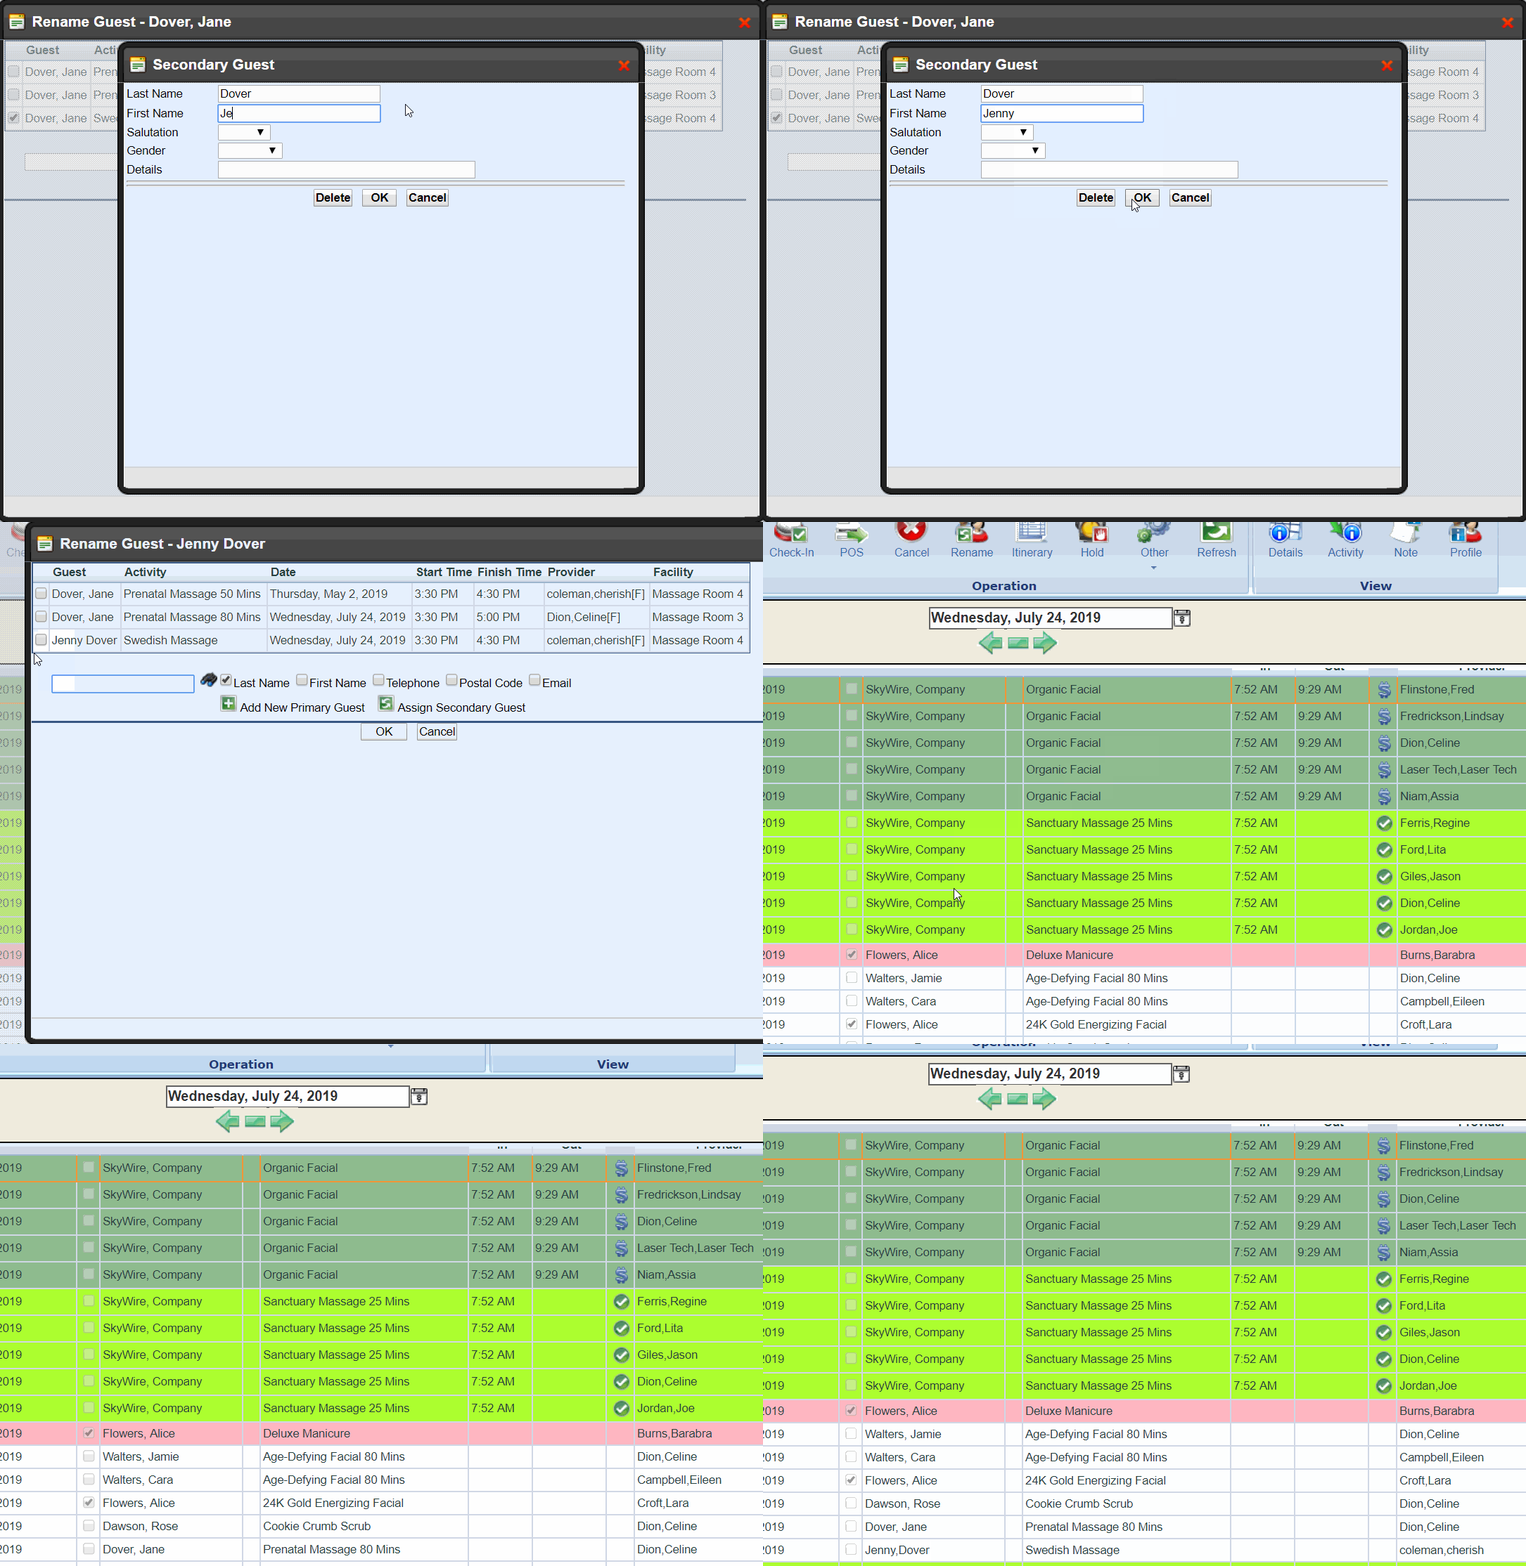
Secondary Guest
Secondary Guest will simply change the name on the physical appointment slot but keep the appointment record under the Primary Guest. For instance, lets say two appointments are booked by a Mother, but one is for a Daughter. Assigning the Daughter as a secondary Guest will allow you to correctly address the Guests when they arrive. Once the Guests are ready to check-out, both appointments will be associated under the Mother's profile.
Itinerary
You can send out or print an Itinerary confirmation for your Guest.

To Email/Print an Itinerary
Step 1:
Access the Itinerary function by right-clicking an appointment or
highlighting the appointment and then selecting "Itinerary"
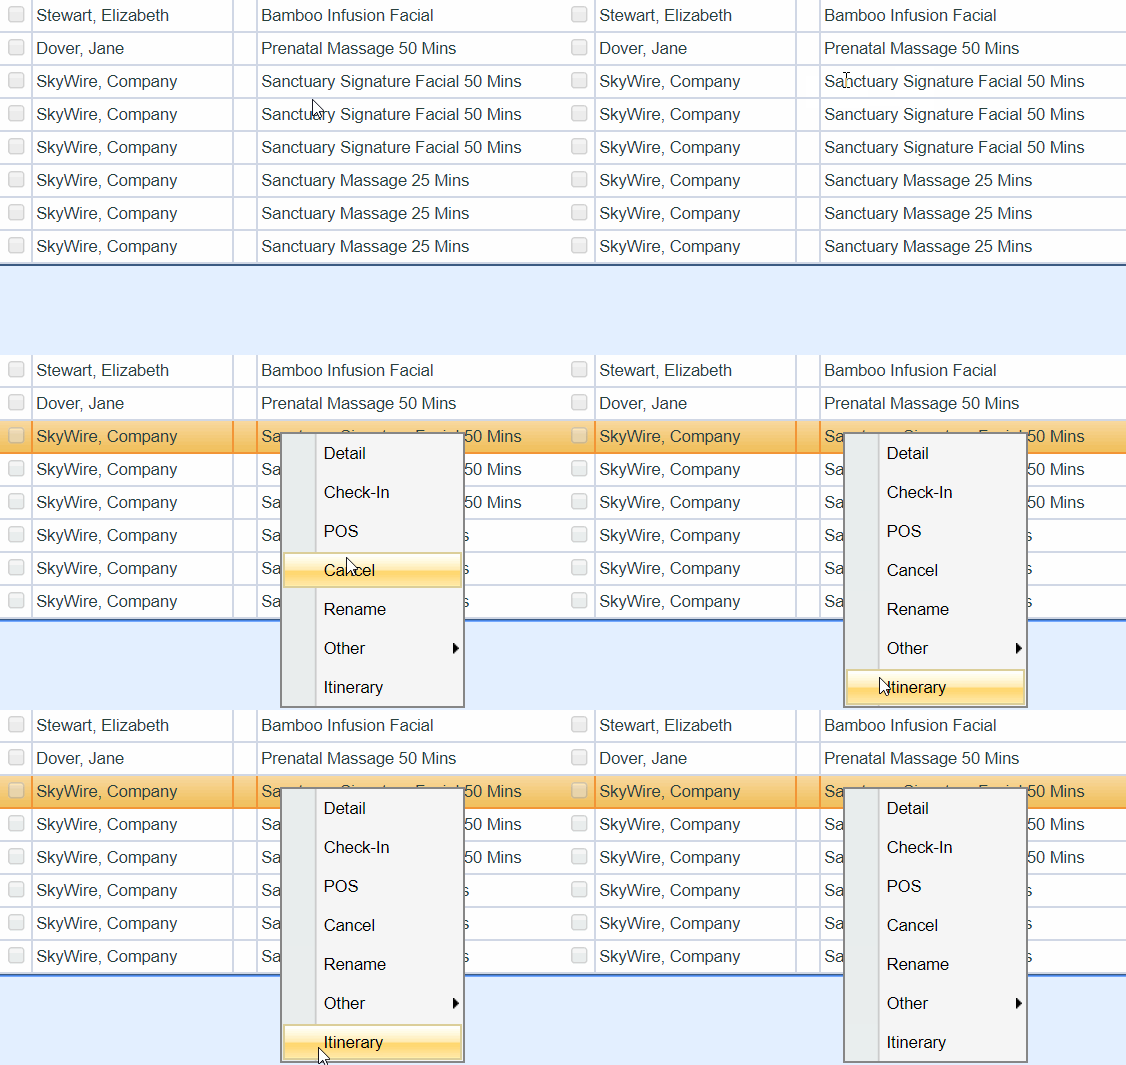
Step 2:
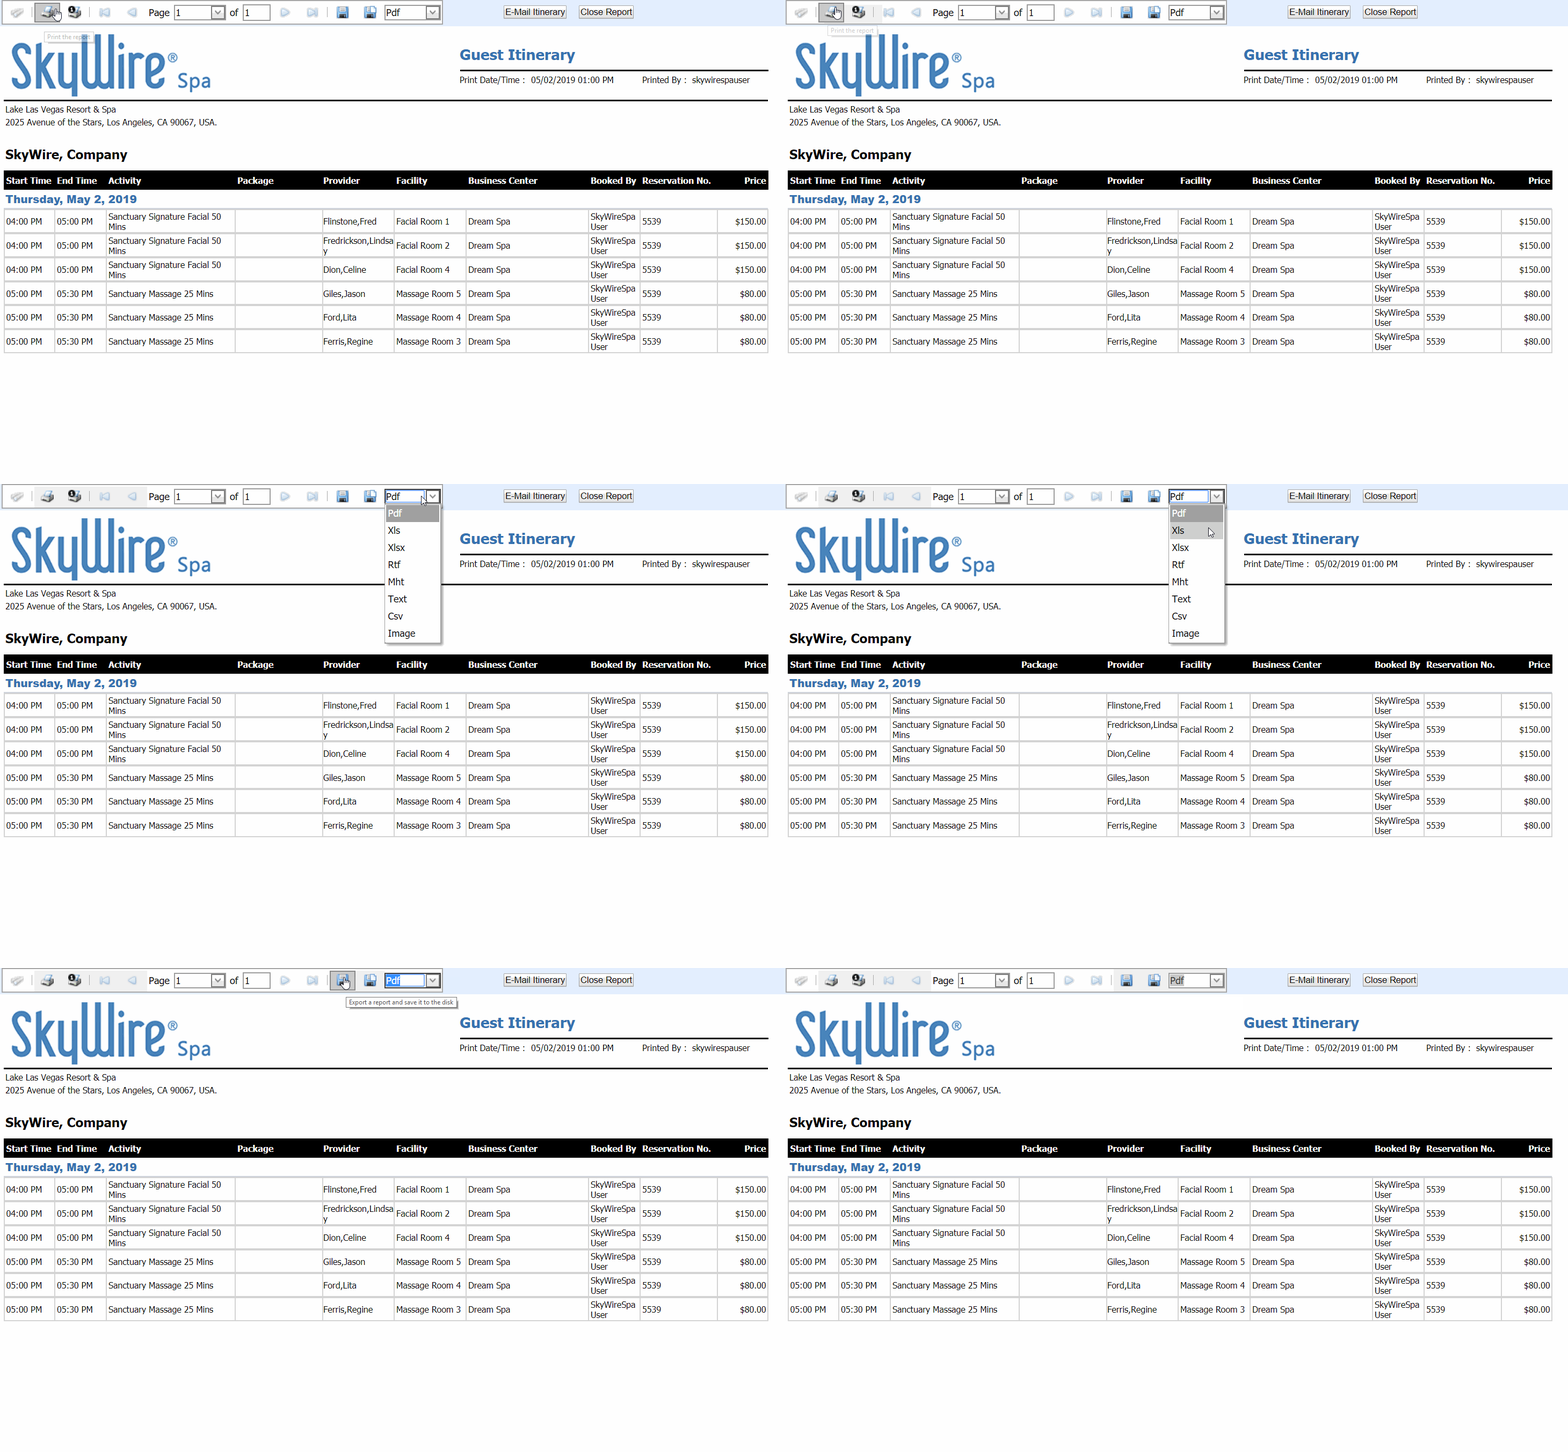
The Itinerary will open on a new Tab - select if you would like to view the Itinerary by Guest/Date or Reservation & select "OK"

Step 3:
Print the page to physically hand the Itinerary to your Guest - you printed an itinerary!
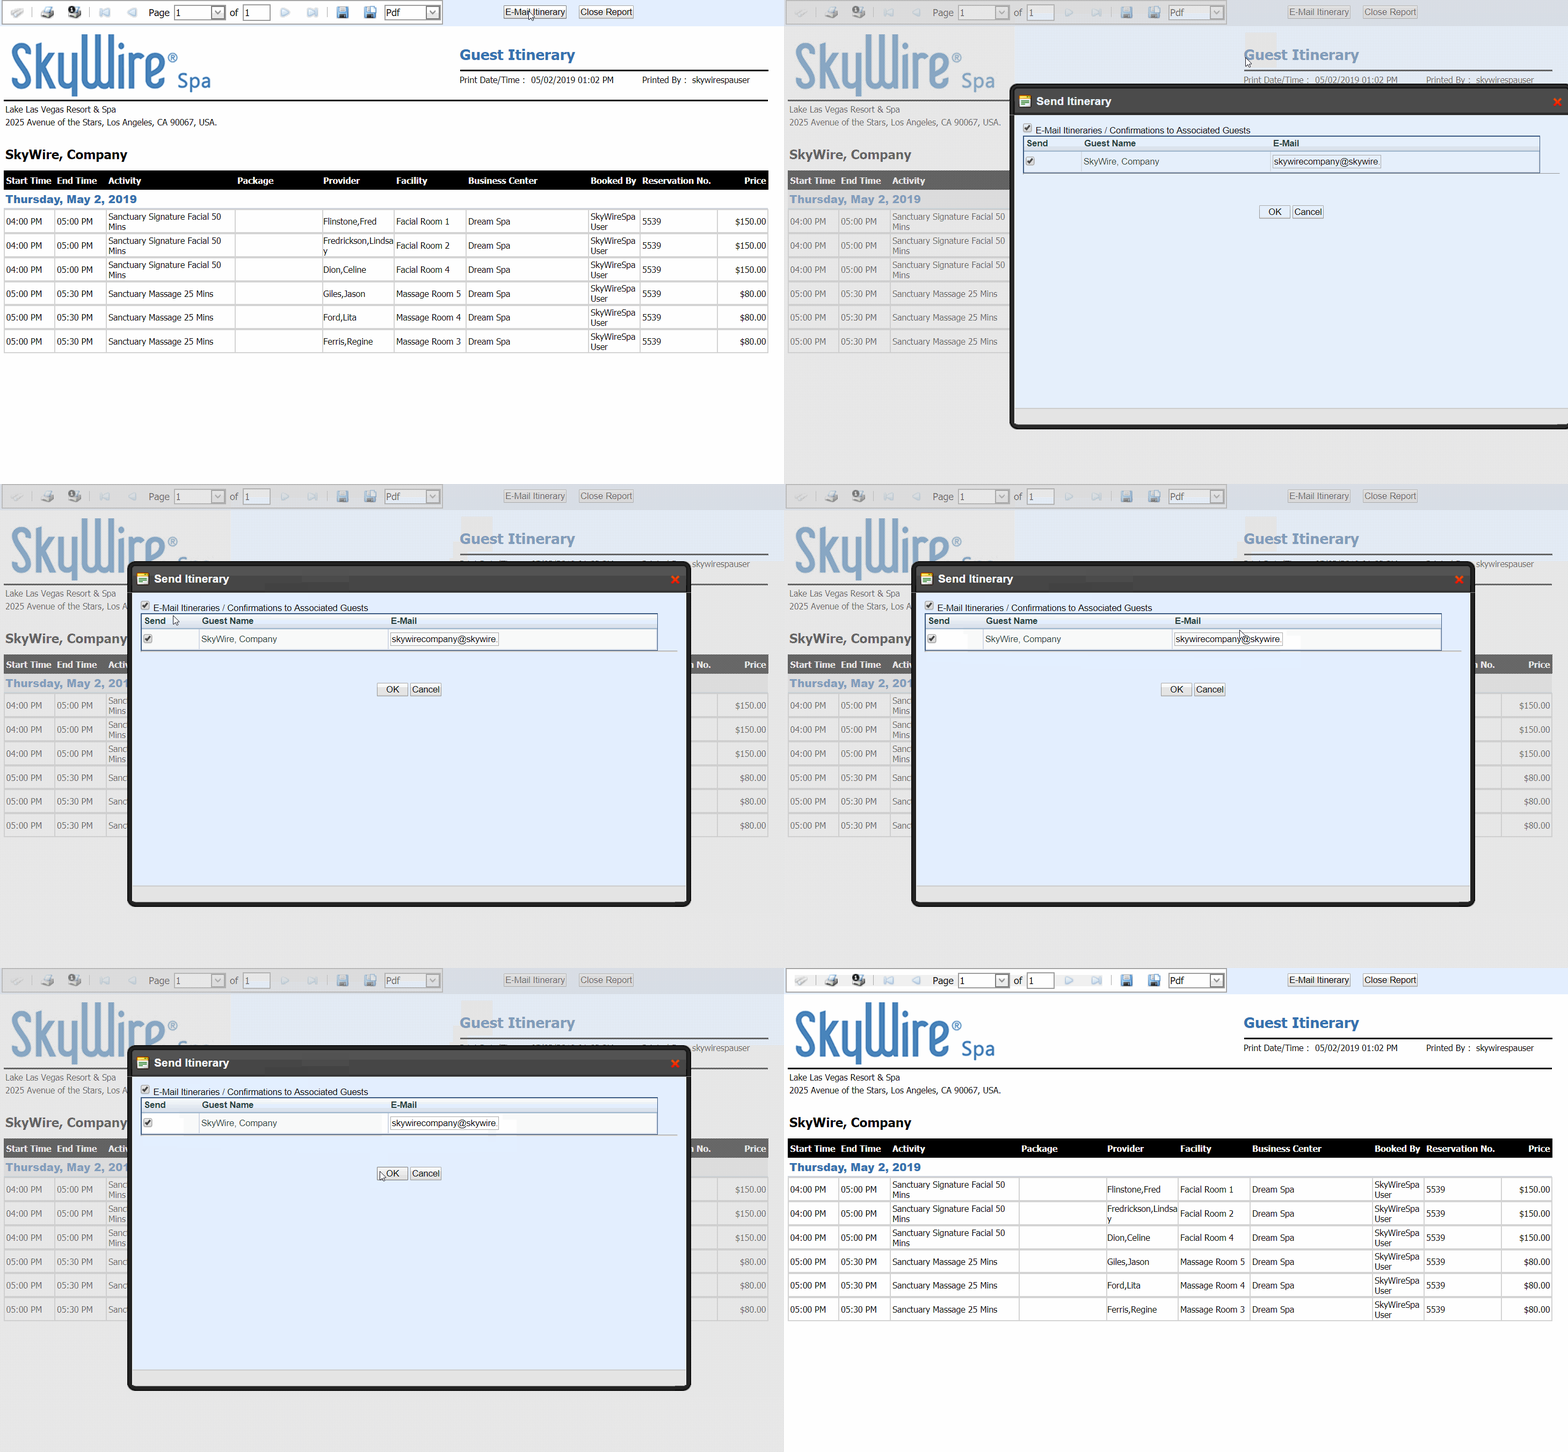
Step 4:
Select "E-Mail Itinerary" to send out an email copy - you emailed an itinerary!
Hold
Here you can set an appointment on Hold based on your configured Hold Policy.

During the reservation process or any time prior to confirmation or check-in, you may place an appointment on hold as a courtesy to the Guest. Your configured Hold Policy determines how long this hold may be. Once a hold has been established, the appointment cannot be moved unless the hold status is first removed.
NOTE: Appointments on hold that are subsequently cancelled are not subject to cancellation fees.
To Set an Appointment on Hold
Step 1:
Right-click appointment and navigate to "Other"
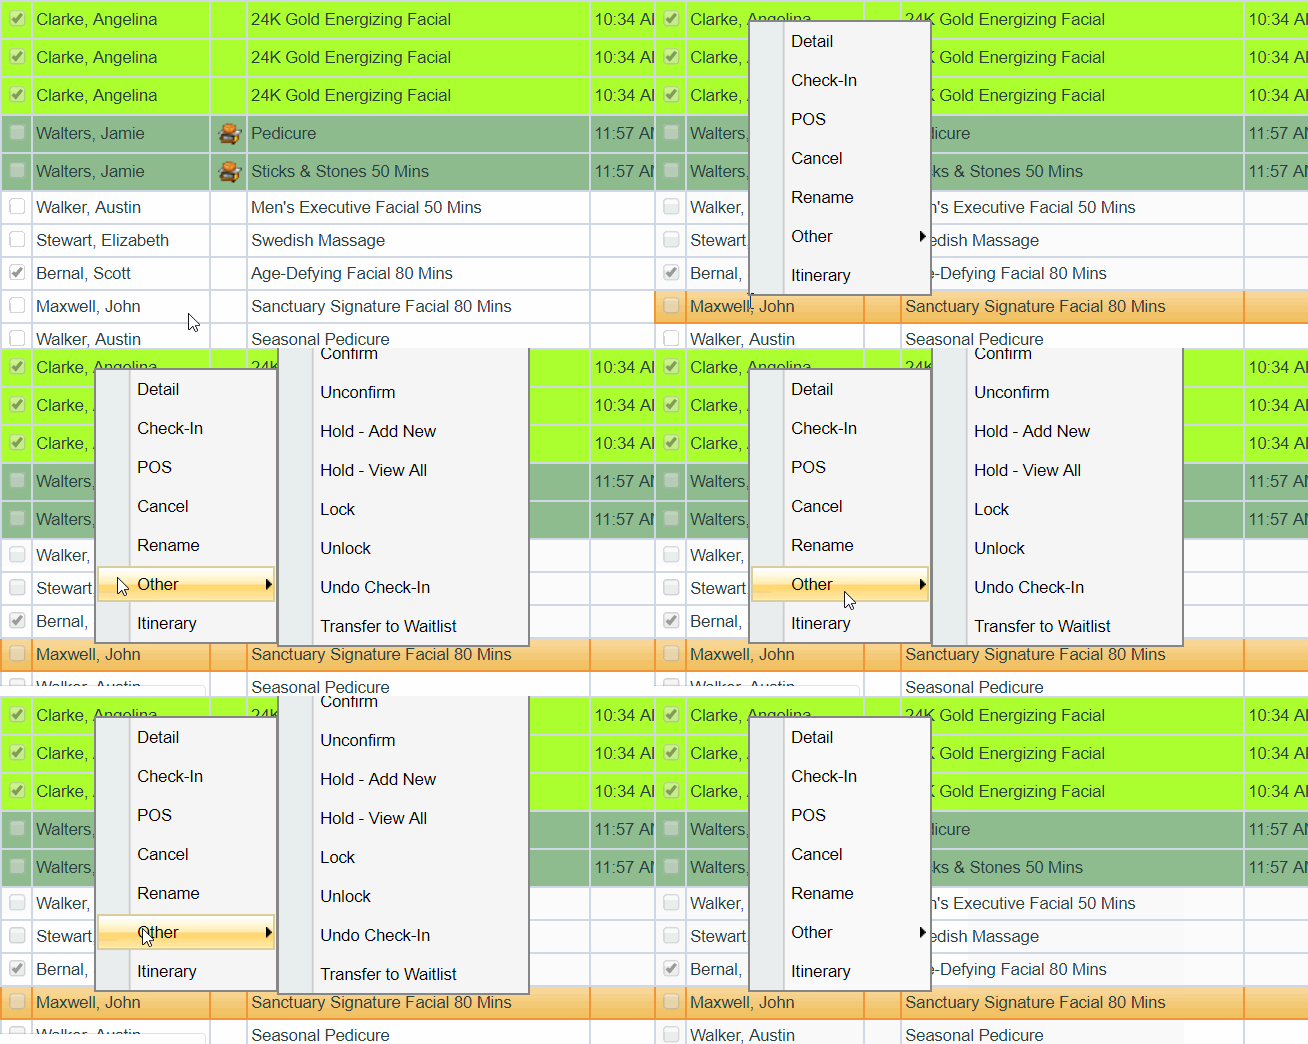
Step 2:
Select “Hold-Add New”
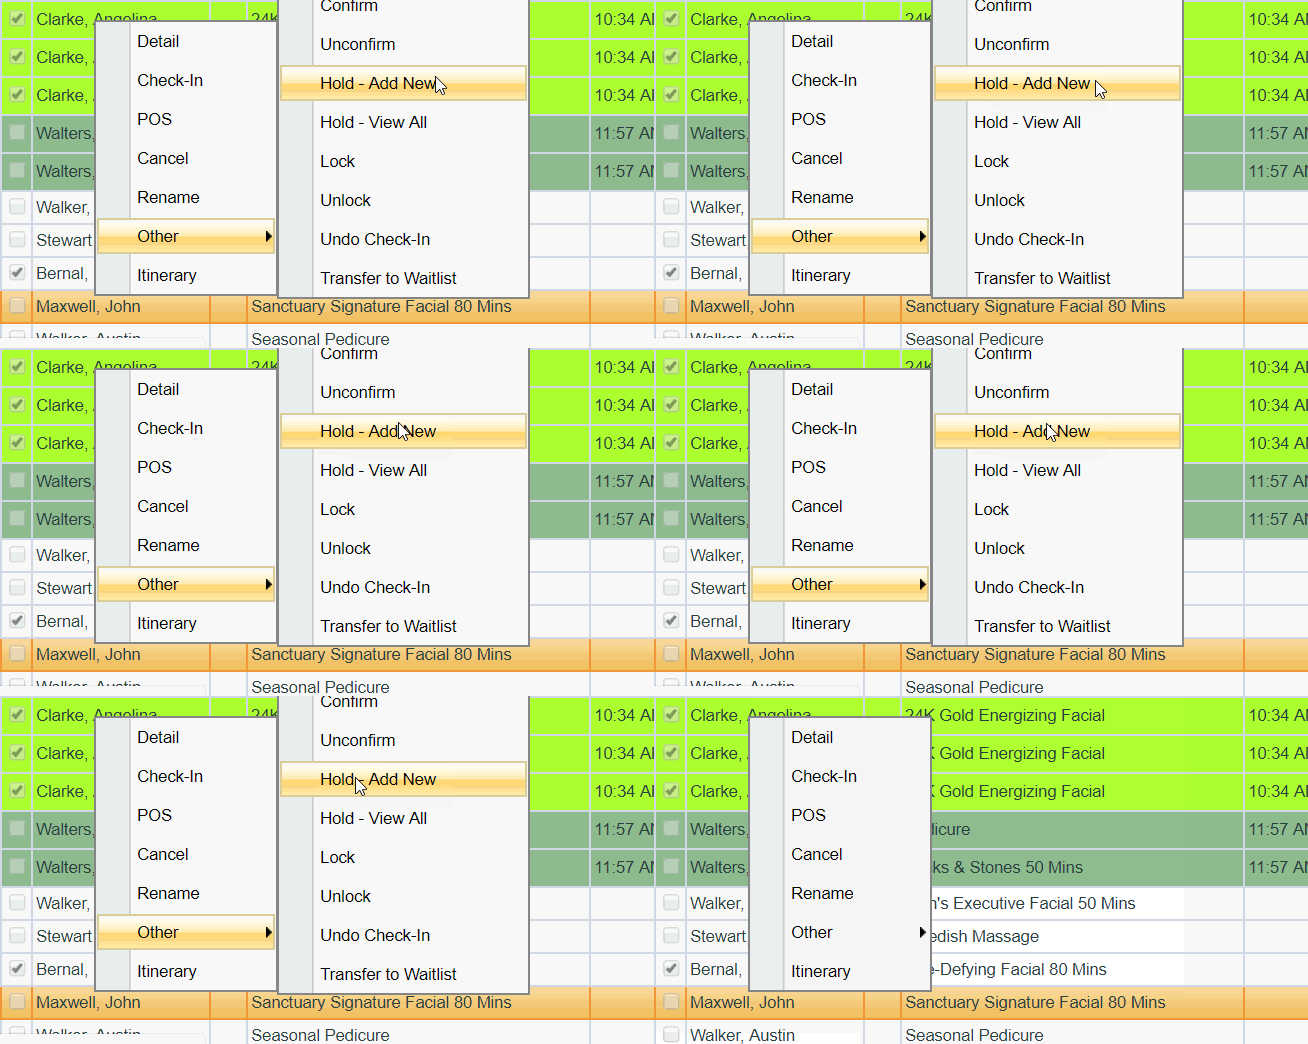
Step 3:
Select which appointments you would like to place on hold & select Hold Policy from drop down options

Step 4:
Select "Accept" - you set an appointment on hold!

Viewing/Removing Holds
You can view appointments on hold by right-clicking any appointment and navigating to "Others" > "Hold-View All" OR select appointment > select "Hold" on the Ribbon > expand the tree view to select a Business Center > select target date > Continue.
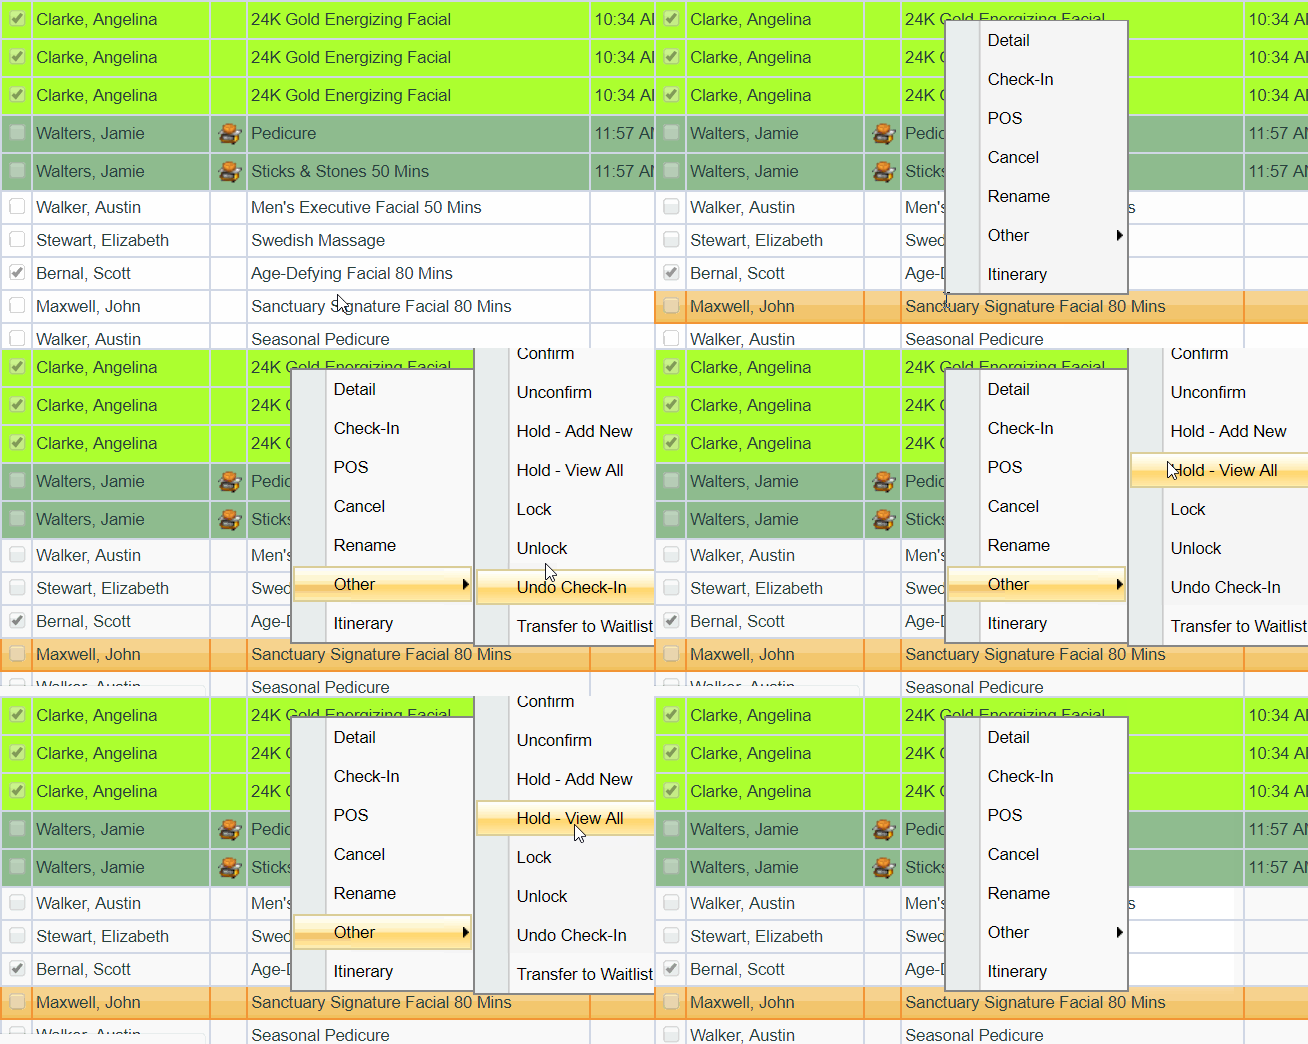
To remove an appointment that is on "Hold," simply select the "Remove Hold" or "Cancel Activity" checkboxes and select "Accept."

Other
Here you can Confirm, Unconfirm, Lock, Unlock, Undo Check-In, or transfer an appointment to the Waistlist.

Confirm
Confirming an appointment will remove the Phone icon from the appointment, this indicates that you have contacted the Guest to confirm that they will be arriving to their scheduled appointment. Confirming will send an SMS Text to the associated Provider.
NOTE: Provider’s SMS phone number must be configured into their Employee Profile.
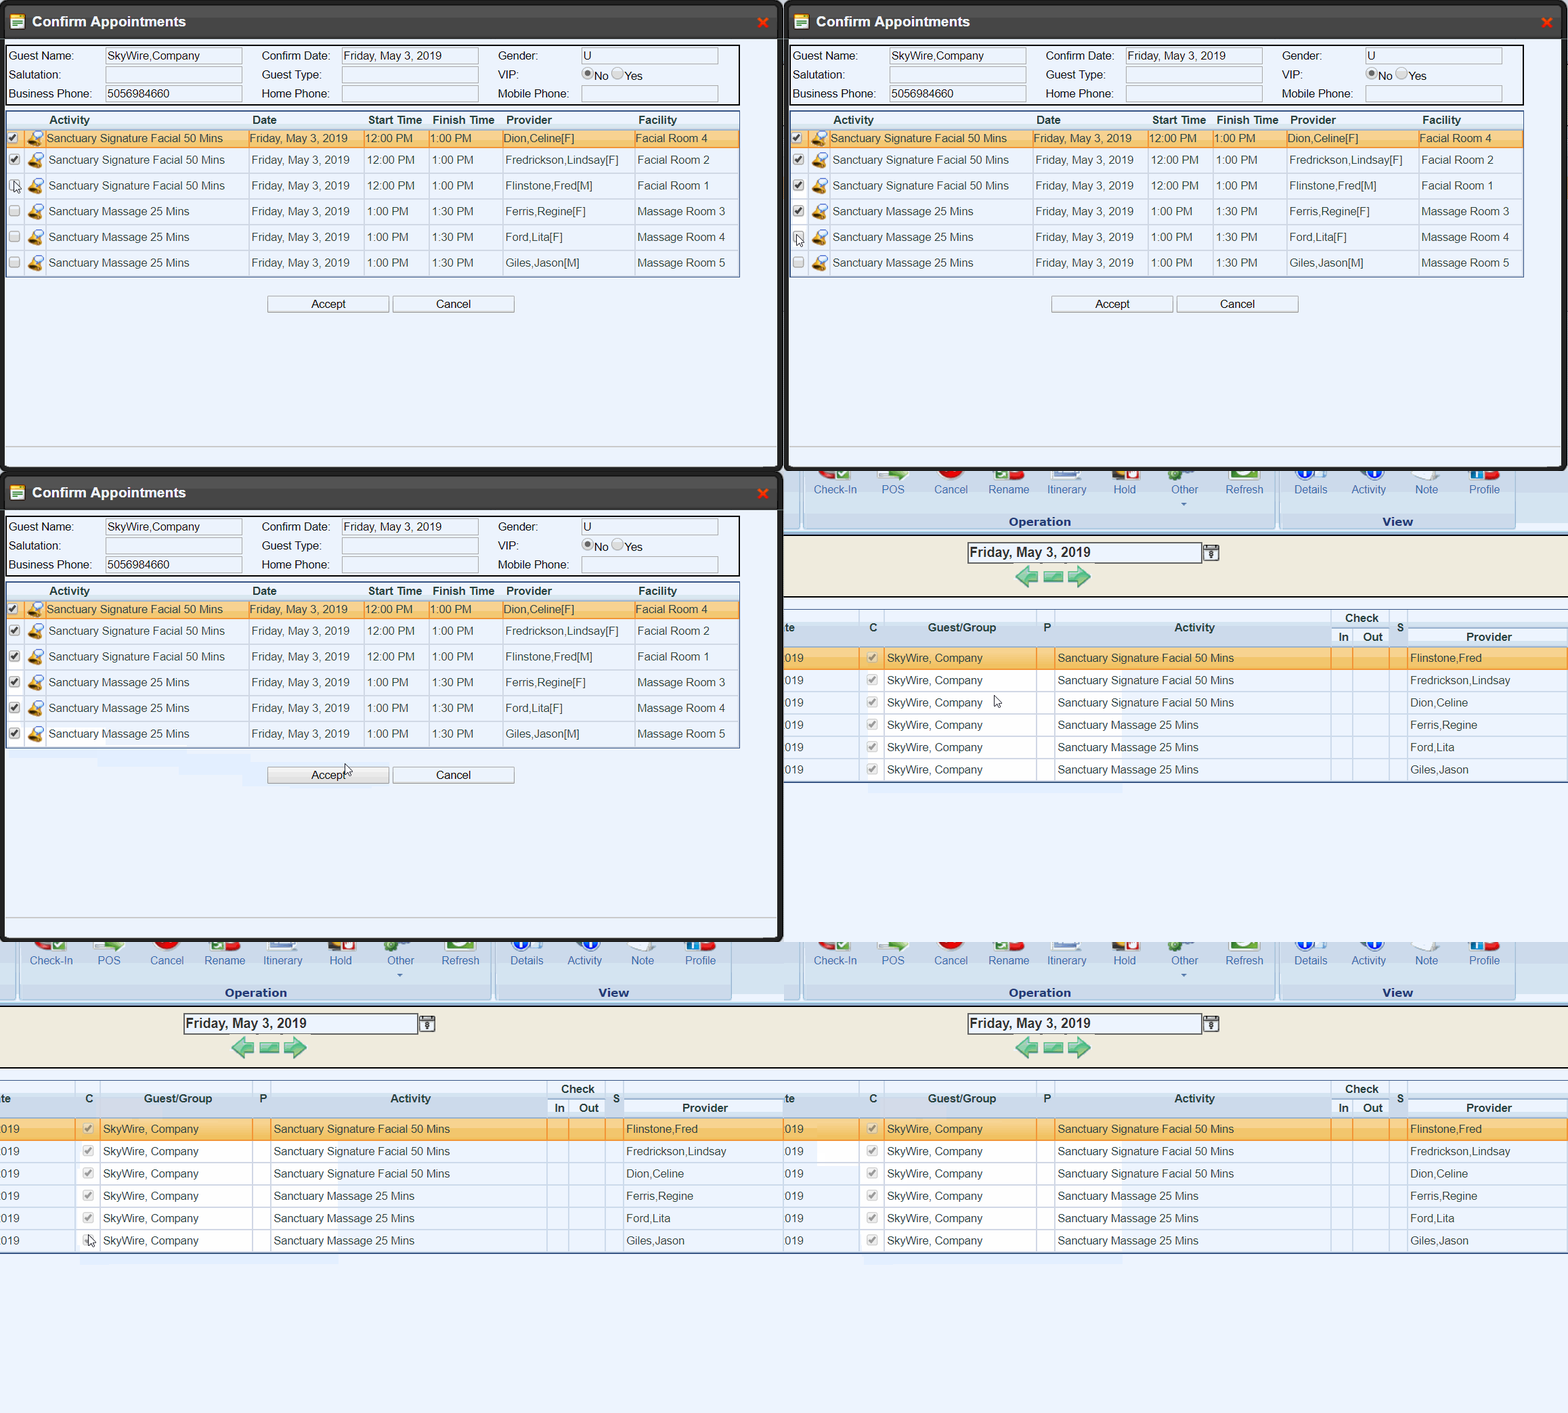
Lock/Unlock
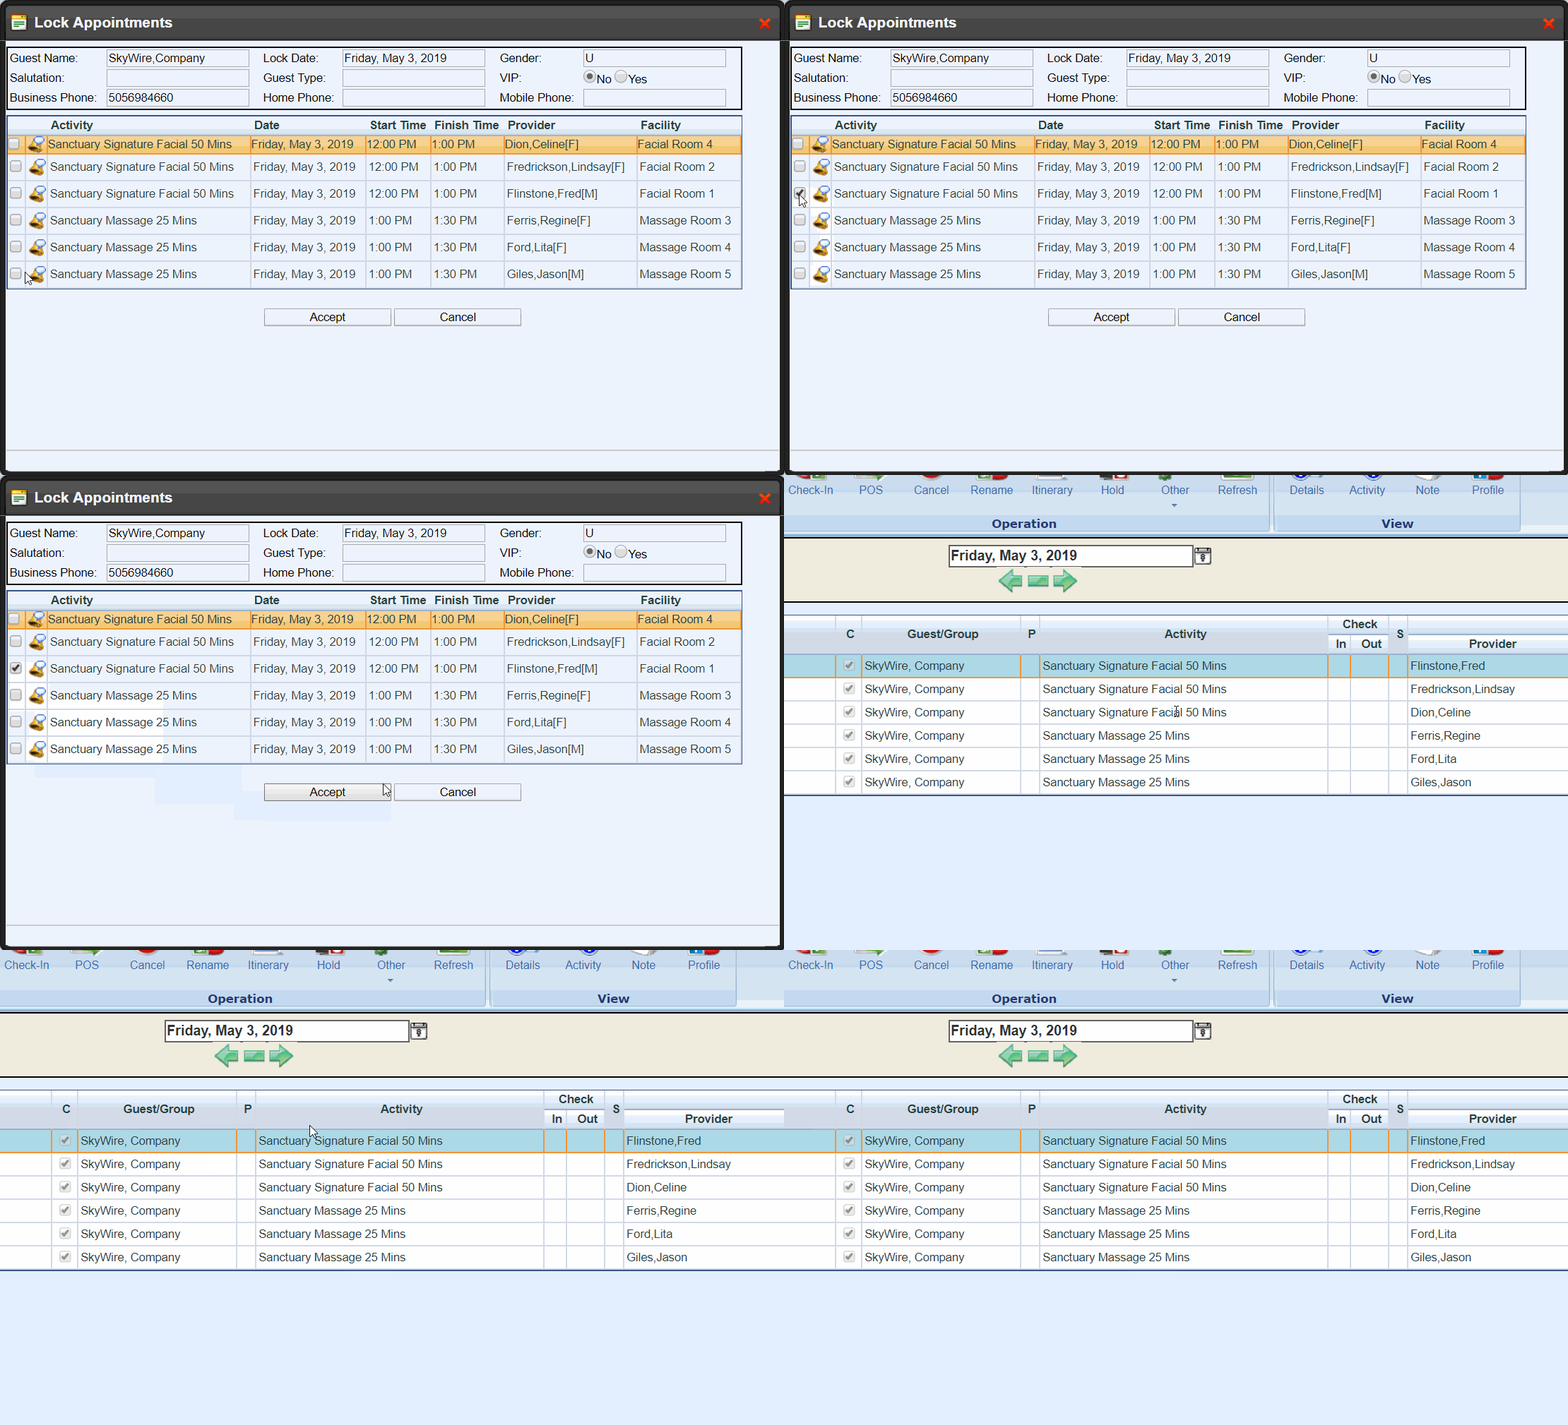
You can prevent an appointment from being edited, processed, or finalized by setting it to Lock. If you wish to continue to work with that appointment, you must unlock it before doing so.
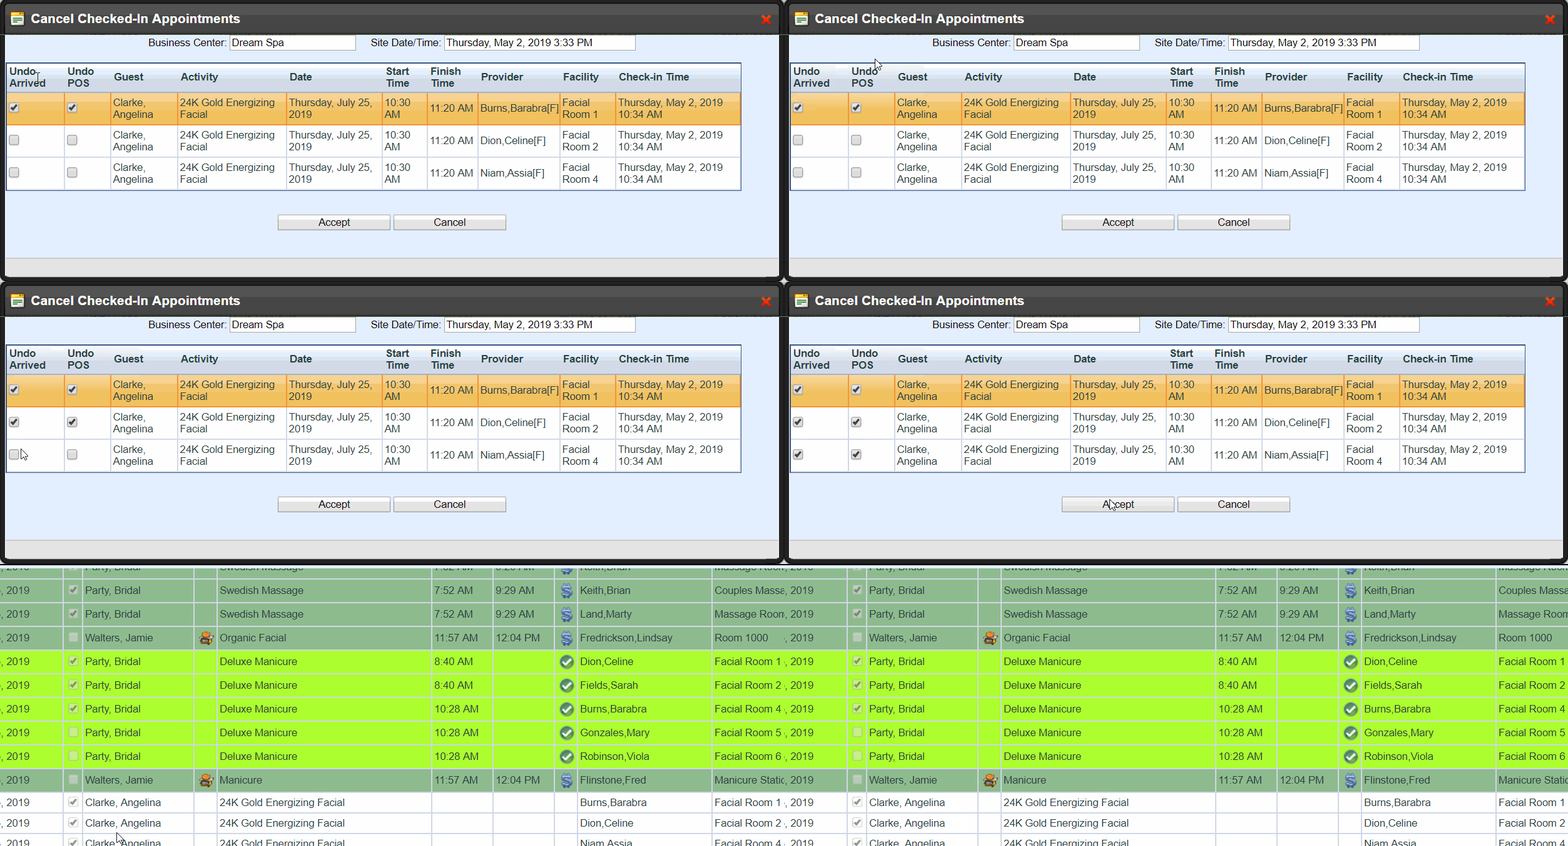
Accidentally checked-in or confirmed the wrong appointment?
No problem! Select Undo Check-In/Unconfirm to remove the Check-In/Confirm status.
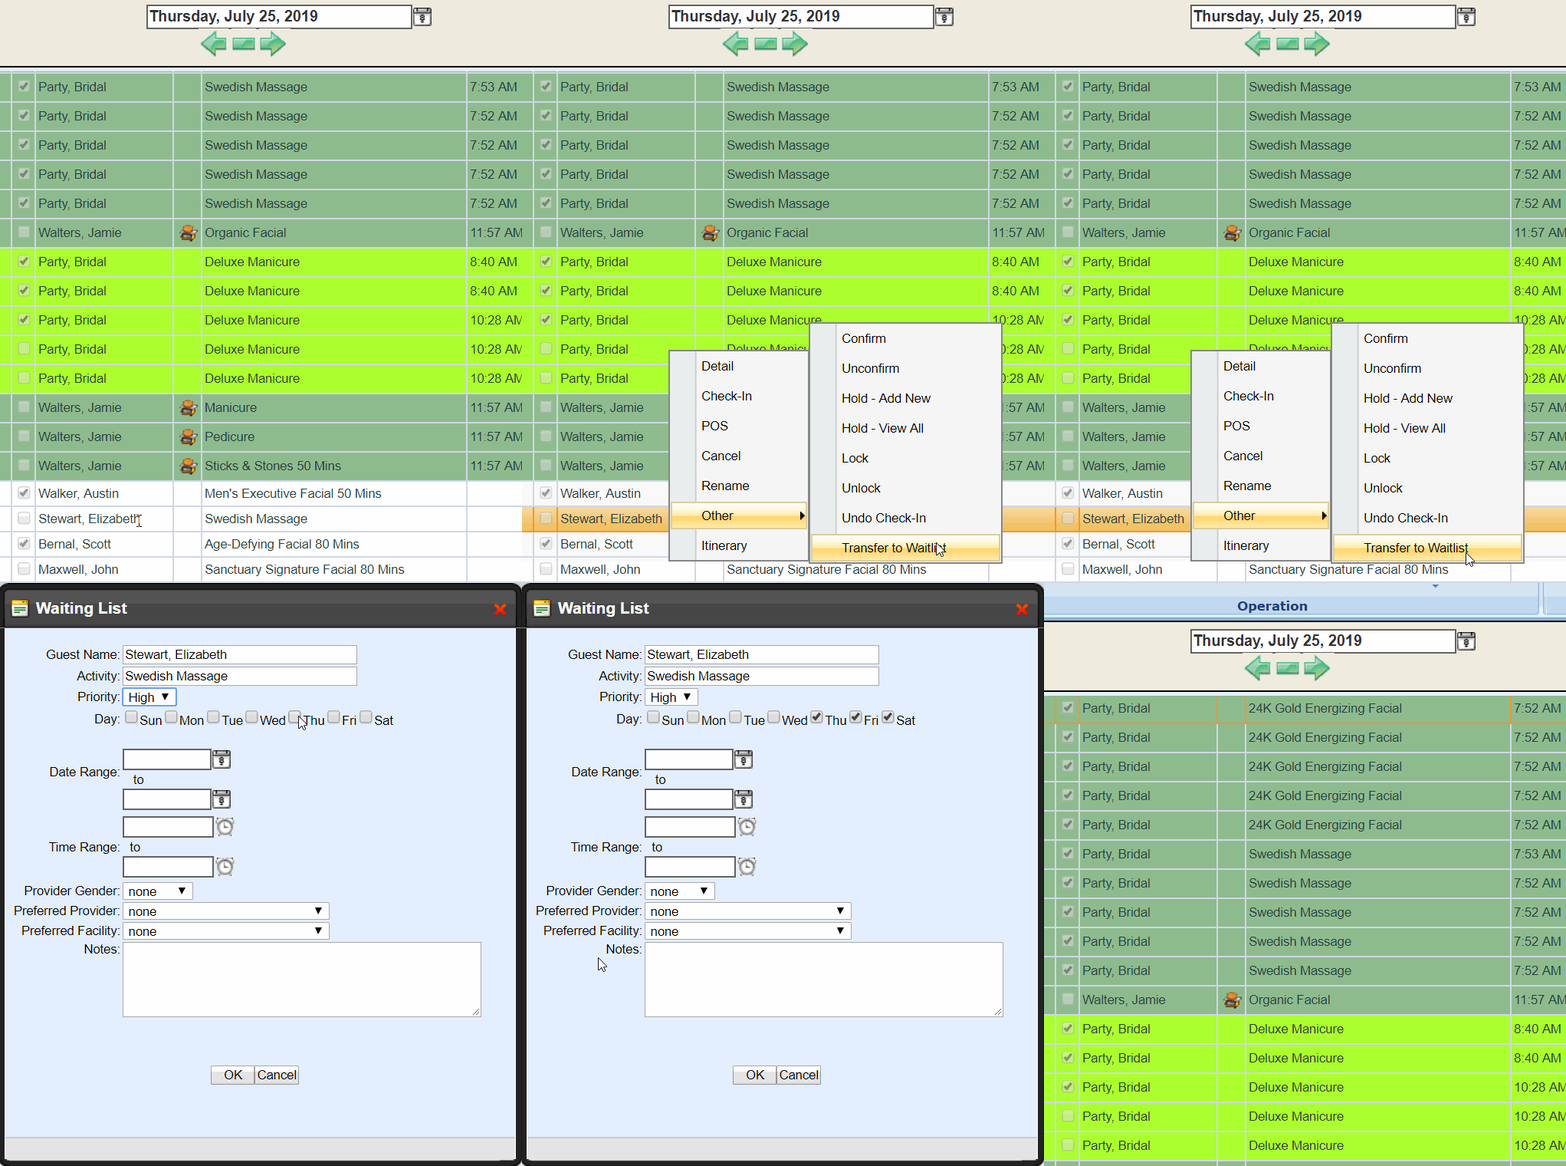
Guest Uncertain About an Appointment?
Quickly transfer an appointment to the Waitlist by navigating to Others and selecting "Transfer to Waistlist." Here you can assign various criteria such as priority & preferred day, time, and Provider to an appointment. Select "OK" to transfer to the Waitlist.
Refresh
Use this option to Refresh the Visual Book if in case any other users logged in book, edit, or cancel appointment.

