![PALUSA New Logo Transparent-1.png]](https://helpcenter.skywire.com/hs-fs/hubfs/PALUSA%20New%20Logo%20Transparent-1.png?height=50&name=PALUSA%20New%20Logo%20Transparent-1.png)
How to Set up a Share Printer
Step 1: Install local printer
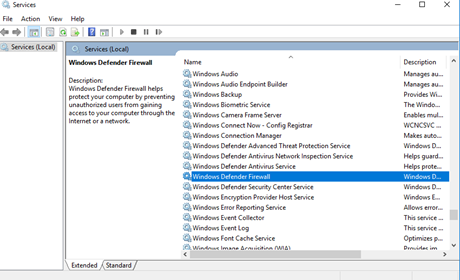
Step 2: Disable Windows defender firewall in services
- Go to start -> Run -> Type “services”
- Select “Enter”
- Right Click “Windows Defender Firewall.”
- Select “Properties.”
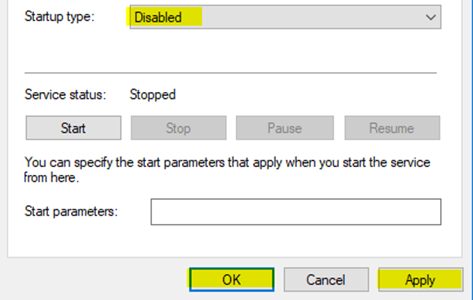
- From the startup type dropdown, select “Disabled.”
- Select “Apply.”
- Select “OK.”
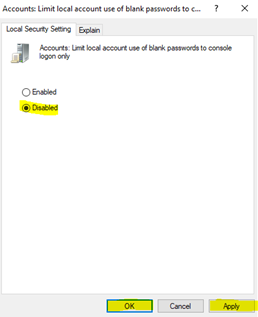
Step 3: Disable blank password local logon only
- Go to Start -> Run - > Type
- Navigate to
Local Computer Policy > Computer Configuration > Windows Settings > Security Settings > Local Polices > Security Options
- Right click on “Accounts: Limit Local Account use of blank passwords to console logon only.”
- Select “Properties”
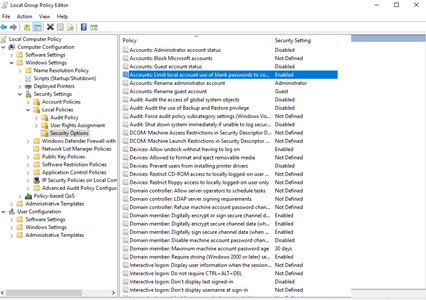
- Toggle “Disabled.”
- Select “Apply.”
- Select “OK.”
Windows 8.1, Windows 10 UNC path connection fix
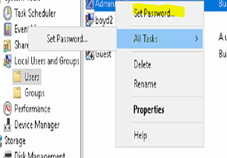
Administrator Account Name and Password Do Not Match
- Login as an administrator, create a new account. All computers must be logged in under the newly created account to create a new administrator account or change the account name.
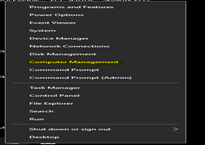
- Rename the Administrator account through the Computer Management Console (Windows 8, Windows 7, and Windows Vista only) Windows 10- Right click the start button, select computer management.
- In Windows 8, from the Start Screen Type Computer and when the icon appears right-click on it. You should now see some options appear at the bottom of the screen.
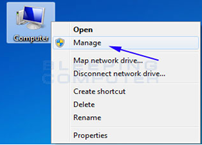
- For other versions of Windows, right-click on My Computer, if in Windows XP, or Computer, if in Windows 7 or Windows Vista, and select Manage as shown in the image below.
OR
- If prompted by a User Account Control screen, select “Yes.”
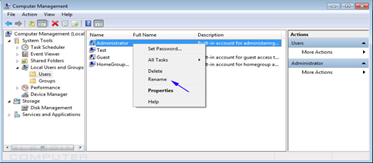
- Expand the System Tools folder, then the Local Users and Groups folder, and finally single-click on the Users folder so it becomes highlighted. In the right-hand pane, you will now see a list of the accounts on your computer, including the Administrator account.
- Right-click on the Administrator account and select Rename as shown in the image below.
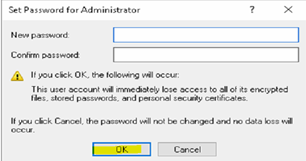
- Don’t set a password. If password is set, you will to need to remove it. Select “Proceed.”
- Select “OK.” Do not assign password.
Registry Fix for Windows 10
- Windows 10 systems in a workgroup will not have the same administrative shares as they do in domain environments. This must be done to all computers you are connecting to.
- Right click the Start button
- Select “Run.”
- Type in REGEDIT
- Select “Enter.”
- Path over to: HKEY_LOCAL_MACHINE\SOFTWARE\Microsoft\Windows\CurrentVersion\Policies\System
- Right click on “”
- Select “”
- Select “DWORD (32-bit) Value.”
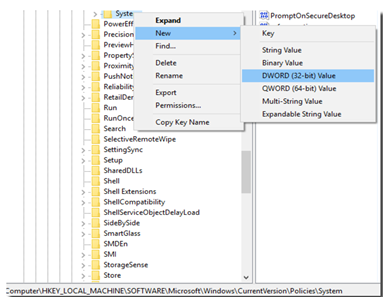
- Name the new registry value “LocalAccountTokenFilterPolicy.”
- Select “Enter.”
- Double click on the Registry Value.
- Set value data to 1.

Step 4: Disable UAC in registry
- Right click the Start button
- Select “Run.”
- Type in REGEDIT
- Path over to: HKEY_LOCAL_MACHINE\SOFTWARE\Microsoft\Windows\CurrentVersion\Policies\System
- Select “Enter.”
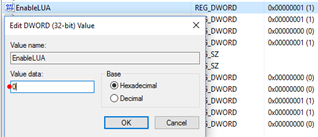
- Select “EnableLUA.”
- Right click and select “Modify.”
- Set the value data to 0.
- Select “OK.”
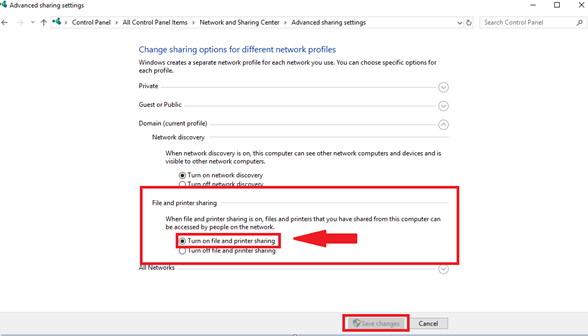
Step 5: File and printer sharing
- Navigate to the Control Panel.
- Select “Network and Sharing Center.”
- Select “Change Advanced Sharing Settings.”
- Toggle “Turn on file and printer sharing.”
- Select “Save Changes.”
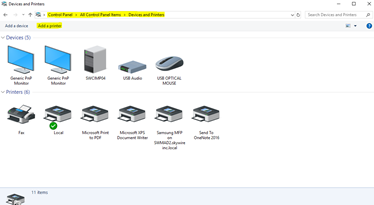
Step 6: Add share printer to other terminals
- Navigate to “Devices and Printers.”
- Select “Add a printer.”
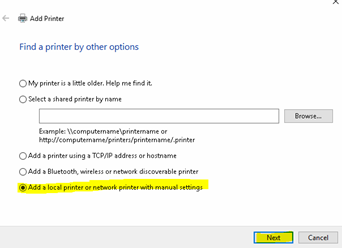
- Toggle “Add a local printer or network printer with manual settings.”
- Select “Next.”
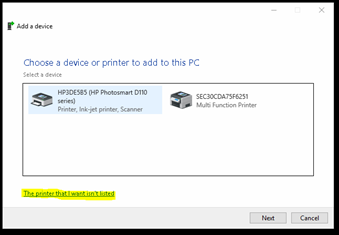
- Select “The printer that I want isn’t listed.”
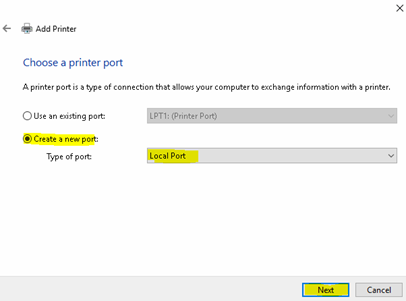
- Toggle “Create a new port.”
- Select “Local Port” for port type.
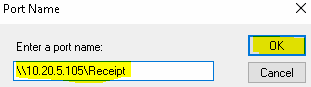
- Enter the terminal name or the IP address of the share printer and then the name of the printer
- E.g. \\10.20.5.105\Receipt or \\Server1\Receipt
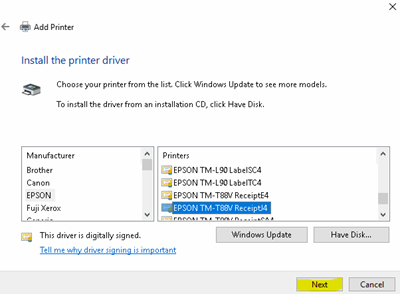
- Select applicable printer model
- Select “Next.”
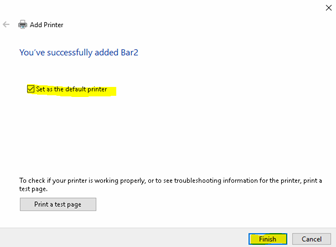
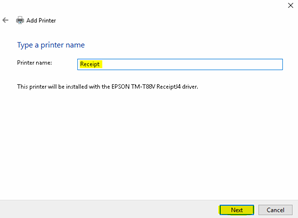
- Type the name of the printer
- Select “Next.’
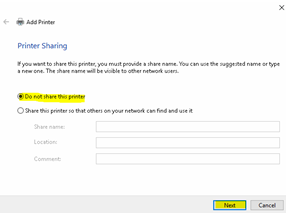
- Toggle Do Not Share this printer
- Uncheck “Set as the default printer.”
- Select “Finish.”