![PALUSA New Logo Transparent-1.png]](https://helpcenter.skywire.com/hs-fs/hubfs/PALUSA%20New%20Logo%20Transparent-1.png?height=50&name=PALUSA%20New%20Logo%20Transparent-1.png)
Install the printer driver
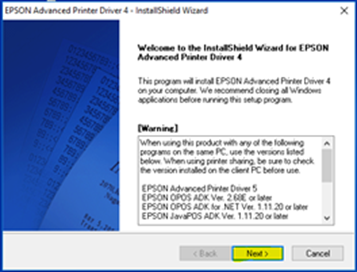
Run the APD_456E.exe Driver.
Right click the icon and select “Run as Administrator.”
Select “Next.”
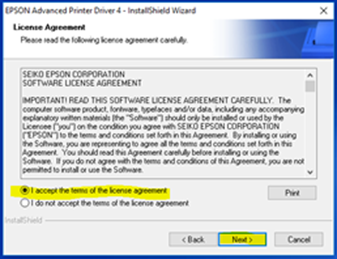
Accept the terms and select “Next.”
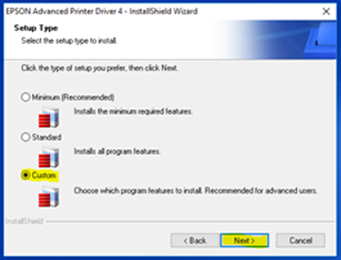
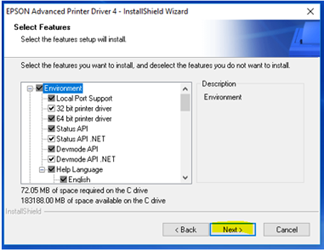
Check Custom and select “Next.”
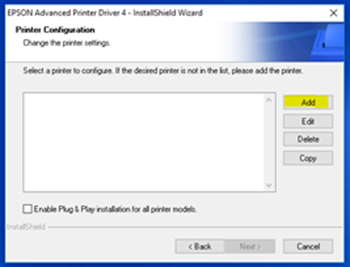
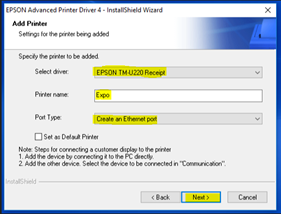
Click “Add.”
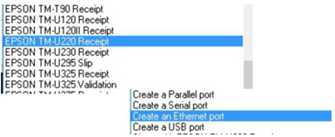
From the drop-down “Select Driver” choose the correct model.
Rename the printer. This is going to be the same name and path in Webconfig. E.g. “Expo.”
Select “Create an Ethernet port.”
Do not Check “Set as Default Printer.”
Select “Next.”
Add the IP Address of the Remote Printer.
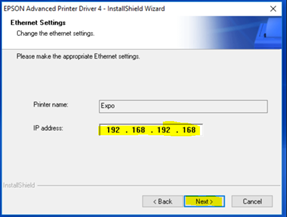
Select “Next.”
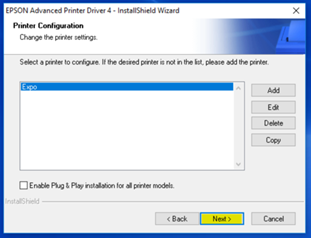
Select “Next.”
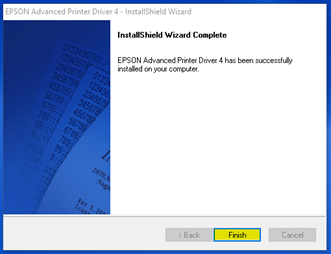
Select “Finish.”
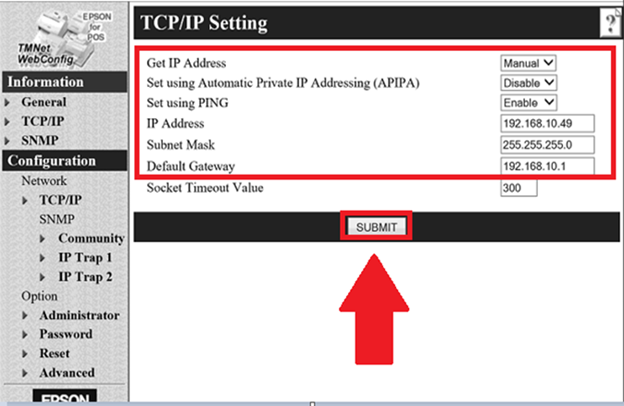
Step 2: Set an IP address on the device using Epson TMNet WebConfig
Power on the device and connect the printer via Ethernet to a PC .
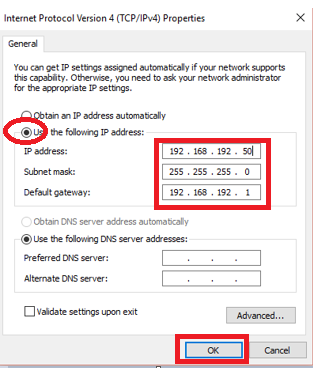
Change the IP address of the PC to an IP address on the same subnet as the printer. If this is a new printer the default IP address is 192.168.192.168.
Select “OK.”
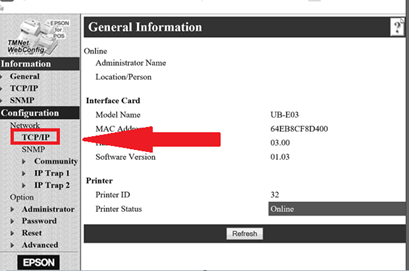
Open an internet browser and navigate to the IP address currently configured on the device. Remember, new printers will default to: 192.168.192.168.
The username is "Epson" and the password is "Epson", if prompted.
Select TCP/IP, located under Configuration on the left-hand side.
Get IP Address – Set to “Manual”
Set using (APIPA) – Set to “Disable”
Set using PING – Set to “Enable”
Enter the same IP address from the driver install
Enter Subnet Mask and Default Gateway
Select “Submit.”
Power the printer off and on
Confirm the IP address by holding the small button on the back of the printer down for 30 seconds. You will need a pen or a small screwdriver to fit in the button.
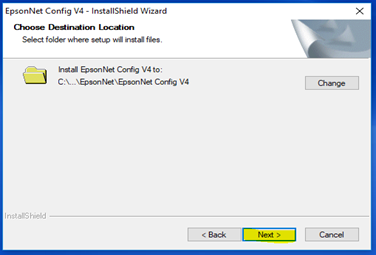
Step 3: Setting an IP address on the printer using the Epson Utility
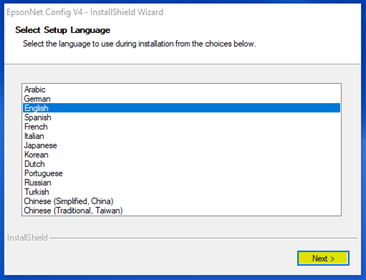
Download the EpsonNet Config Utility from Confluence
Unzip the folder.
Navigate to the installer folder.
Right click on exe and select run as administrator.
Select “Next.”
Select “Next.”
Accept the terms and select “Next.”
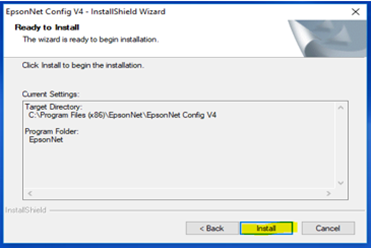
Select “Next.”
Select “Install.”
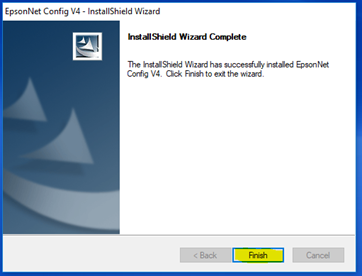
Select “Finish.”
Open the EpsonNet Config utility.
Note: You can type EpsonNet Config into the run command or navigate to the folder path selected during the install.
All the printers on the network will display.
Select the applicable printer.
Select “Configuration.”
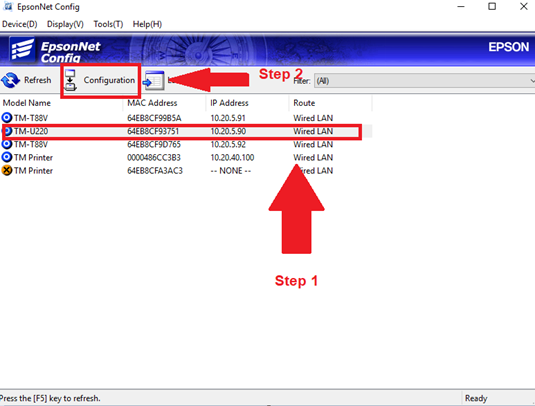
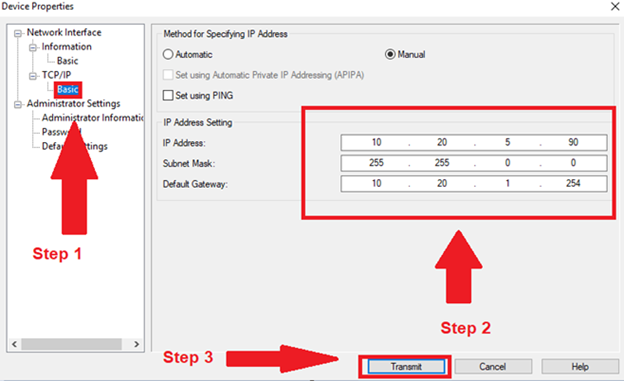
Select “Basic.”
Enter the IP address.
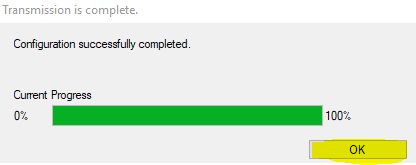
Select “Transmit.”
Select “OK.”

Select “OK.”
Step 4: Add the printer in WebConfig
Creating a remote device
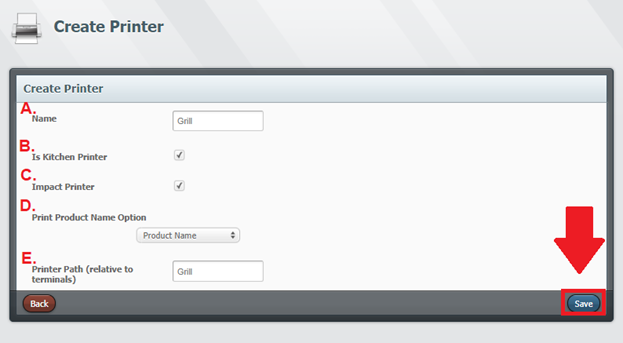
A: Name: Enter the name of the printer.
B: Is a Kitchen Printer: Check this box for network / remote printers.
C: Impact Printer: Select this option if you are using an impact printer. This will need to be checked to print modifiers and special requests in red.
D: Print Product Name: Select an option for name printing. Options include: Product Name, Short Name or Product and Short Name.
E: Printer Path: This will be the name of device on the POS terminal.
Select "Save."
Step 5: Add the Printer Group in Webconfig
Select “Printer Groups.”

Select “Create.”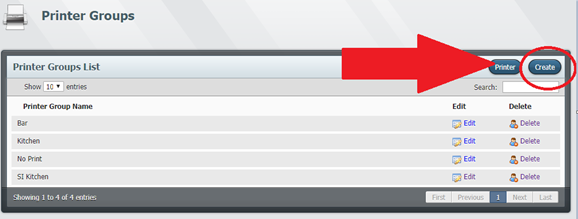
Printer Groups
A: Printer Group – Groups are attached to products and the name needs to reflect the devices that exist in the group.
B: Print Style – Options include “grouped” or “single.”
-
- Grouped – Consolidates products.
- Single – Does not consolidate products.
C: Chosen Printers – Select all printer that need the product assigned to this group to print.
Select "Save."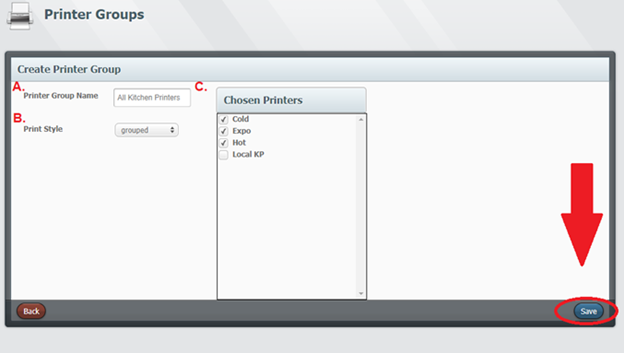
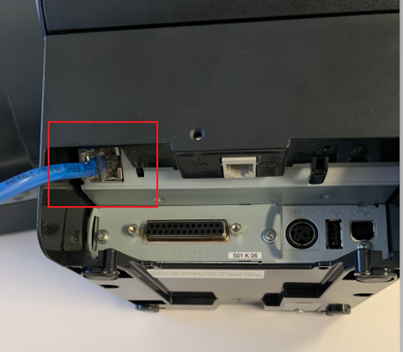
How to Install a T88-VI as a Remote Printer
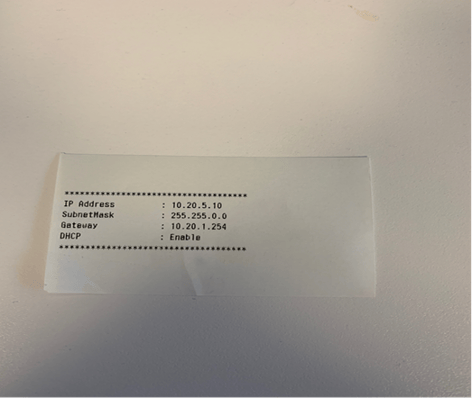
Locate the wired connection port on the back of the printer and connect an ethernet cable. After a few moments, the printer will print a sheet with its IP Address, Subnet Mask, Gateway, and DHCP.
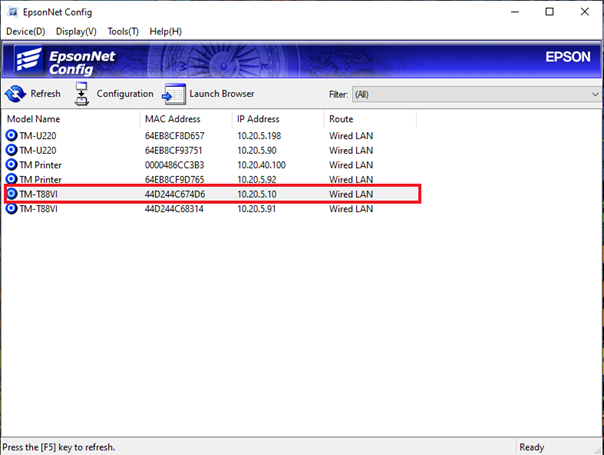
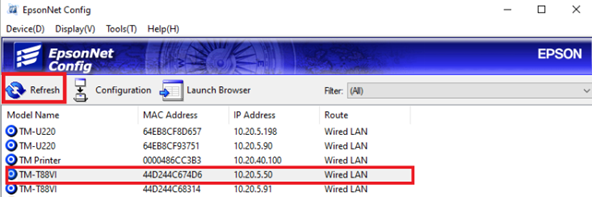
Open the EpsonNet Config tool.
A window will appear with all available printers. Select the printer that matches the IP address printed out by the T88-VI you are configuring. Double click the printer.
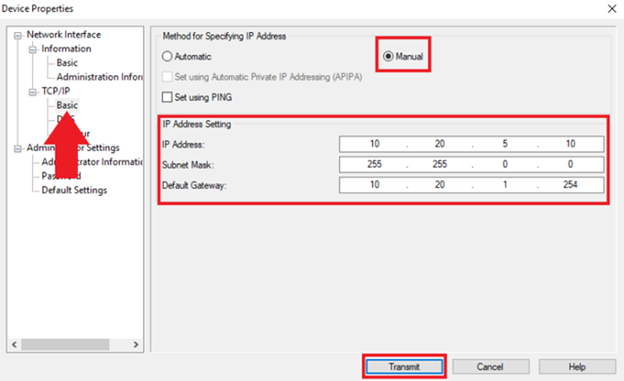
A device settings window will appear after selecting your printer. Select the “Basic” tab under the “TCP/IP section. Select “Manual”. Configure IP Address, Subnet Mask, and Default Gateway to the specified values given by the clients. Select “Transmit” when finished to apply the changes.
A window will appear asking the user to confirm the printer is idle. After confirming the printer is idle, select OK.

After selecting OK, wait a few moments and hit the refresh button. The printer should reappear on the list along with the new IP Address.
The printer is now configured for remote printing.
Note: To reset the printer back to the default settings, select “Default Settings” on the device properties list and then select “Execute.”
