-
General
-
Notes
-
Preferences
-
Relations
-
Purchases
-
Liabilities
-
Biz Center Information
-
Address
-
Others
-
Others-Guest Customized Fields
-
Others - Guest Auth Card(s)
General
The General tab allows you to add, edit, and view basic information about a Guest.

You can set a profile as a Guest or Company, and select which Site/Business Center they pertain to.

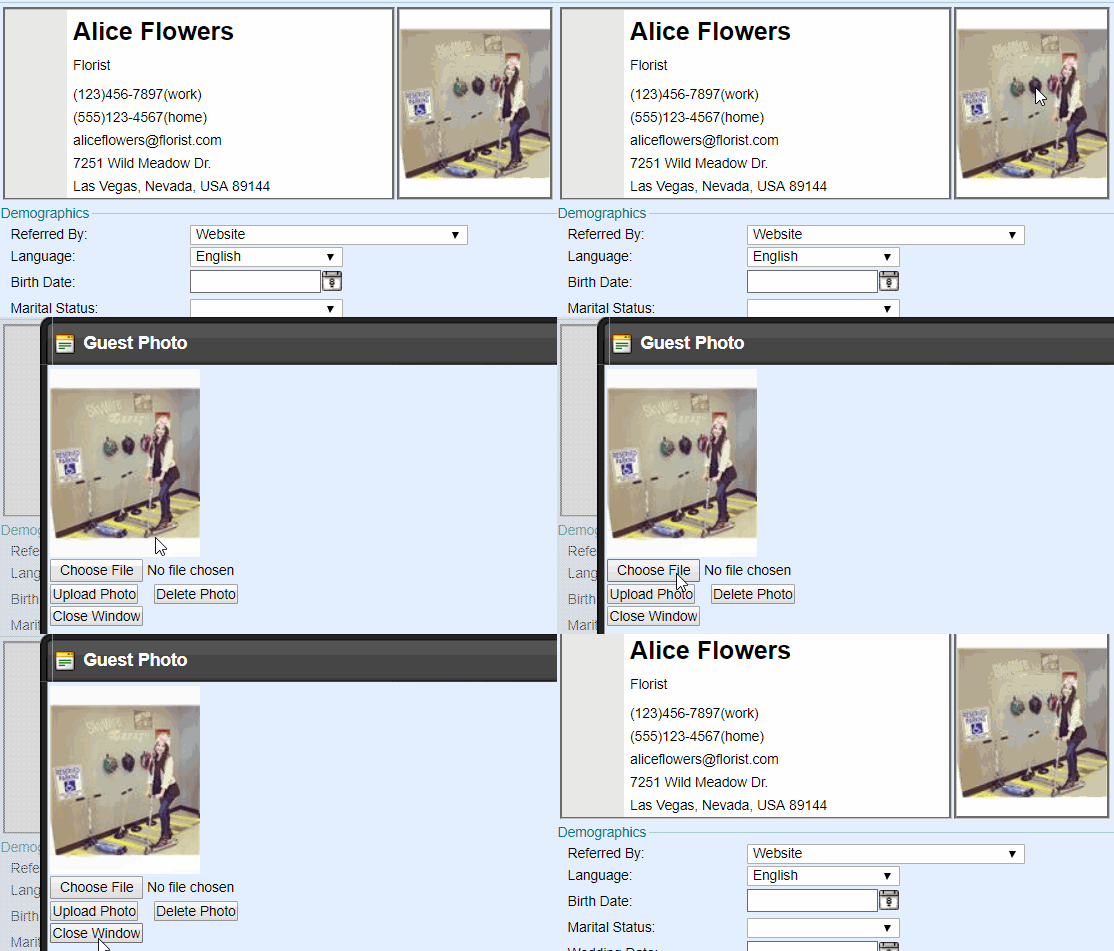
View an image of the Guest and quick contact card
To add an image select the Guest Management icon, choose a file, select Upload Photo, and finish with Close Window.
Contact Information & Communication
View general information, phone numbers, email, and address.
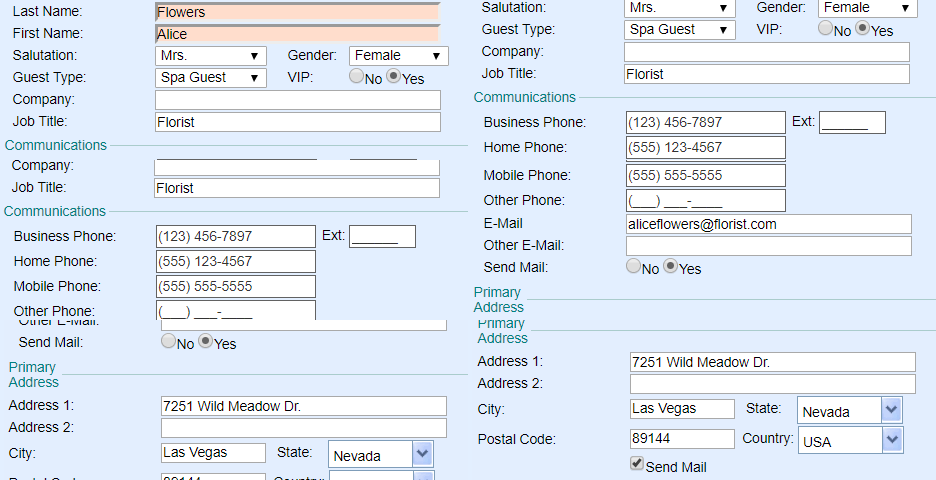
Demographics
Define important dates, language, and references that can be used to generate CRM lists.

Discounts
These discounts are automatically applied to this Guest account ONLY. All sales that are transacted at Point of Sale under this Guest will receive the discounted percentage applied to either Activities or Products.

Summary Information
View a quick snapshot of this Guest's latest activity and spending - fields will automatically populate.

Remember to select “Save” any time you make any edits to this screen
Notes
Here you can create notes that involve this guest i.e. allergies, sensitivities, or anything needed to be addressed.

To Add a Note
Step 1:
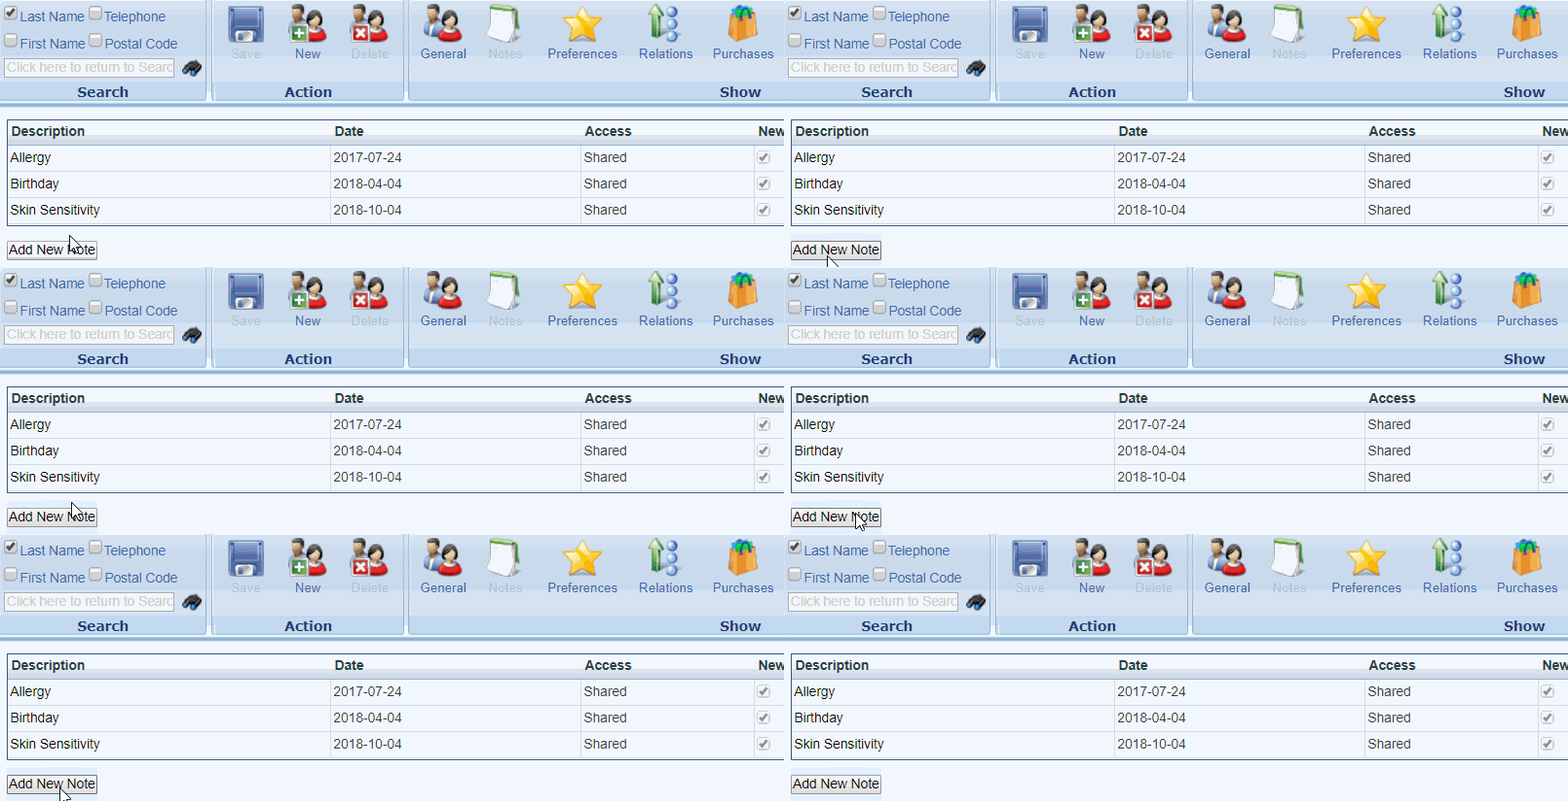
Select "Add New Note"
Step 2:
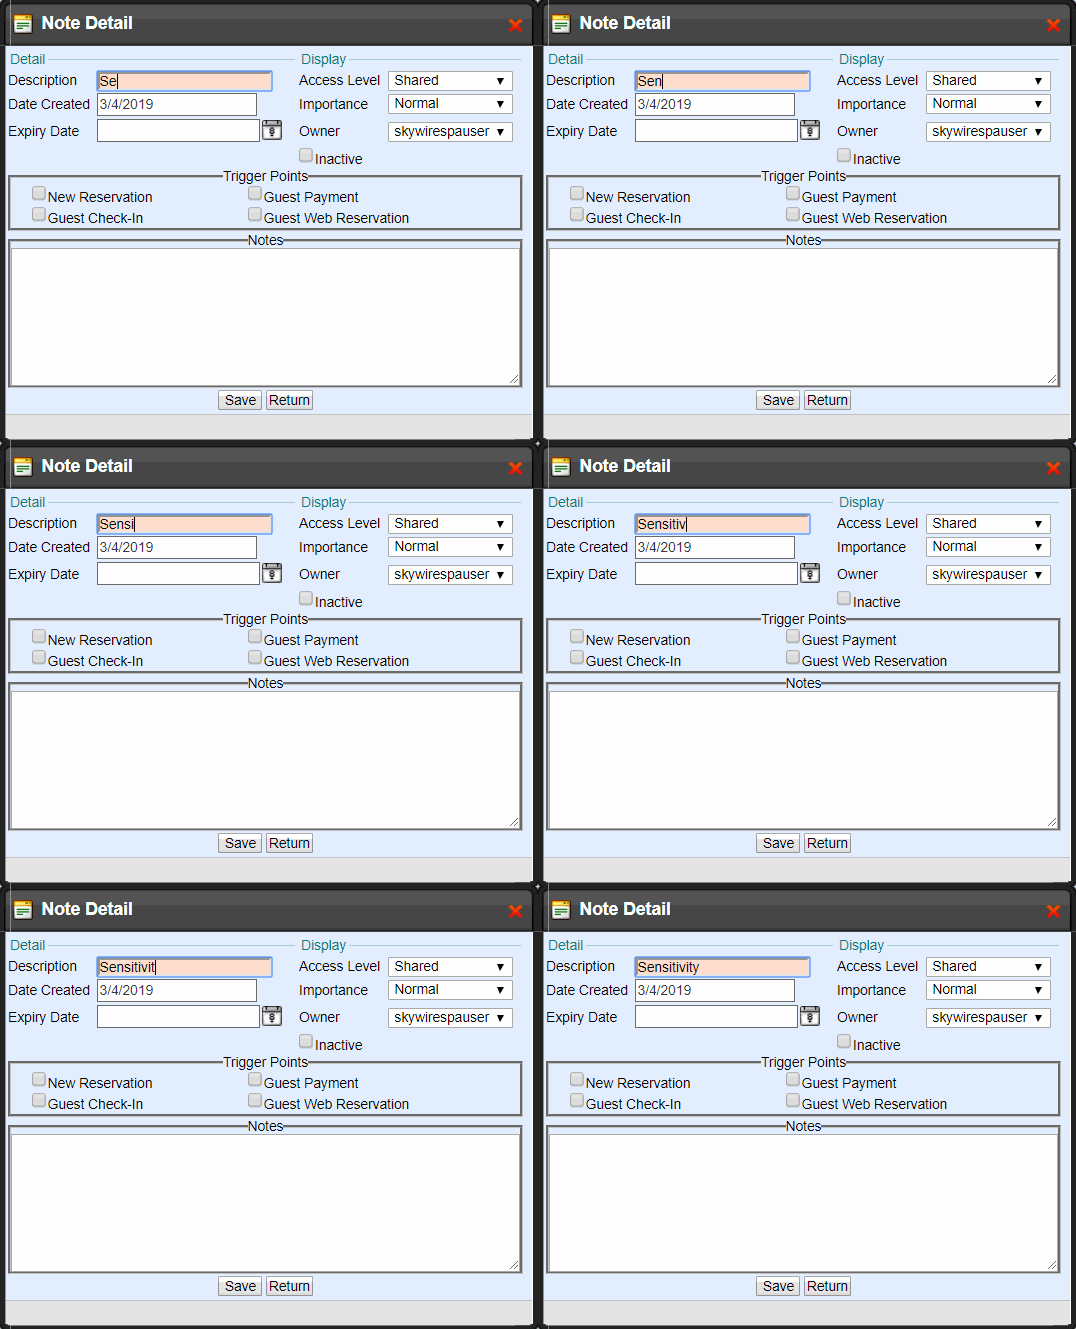
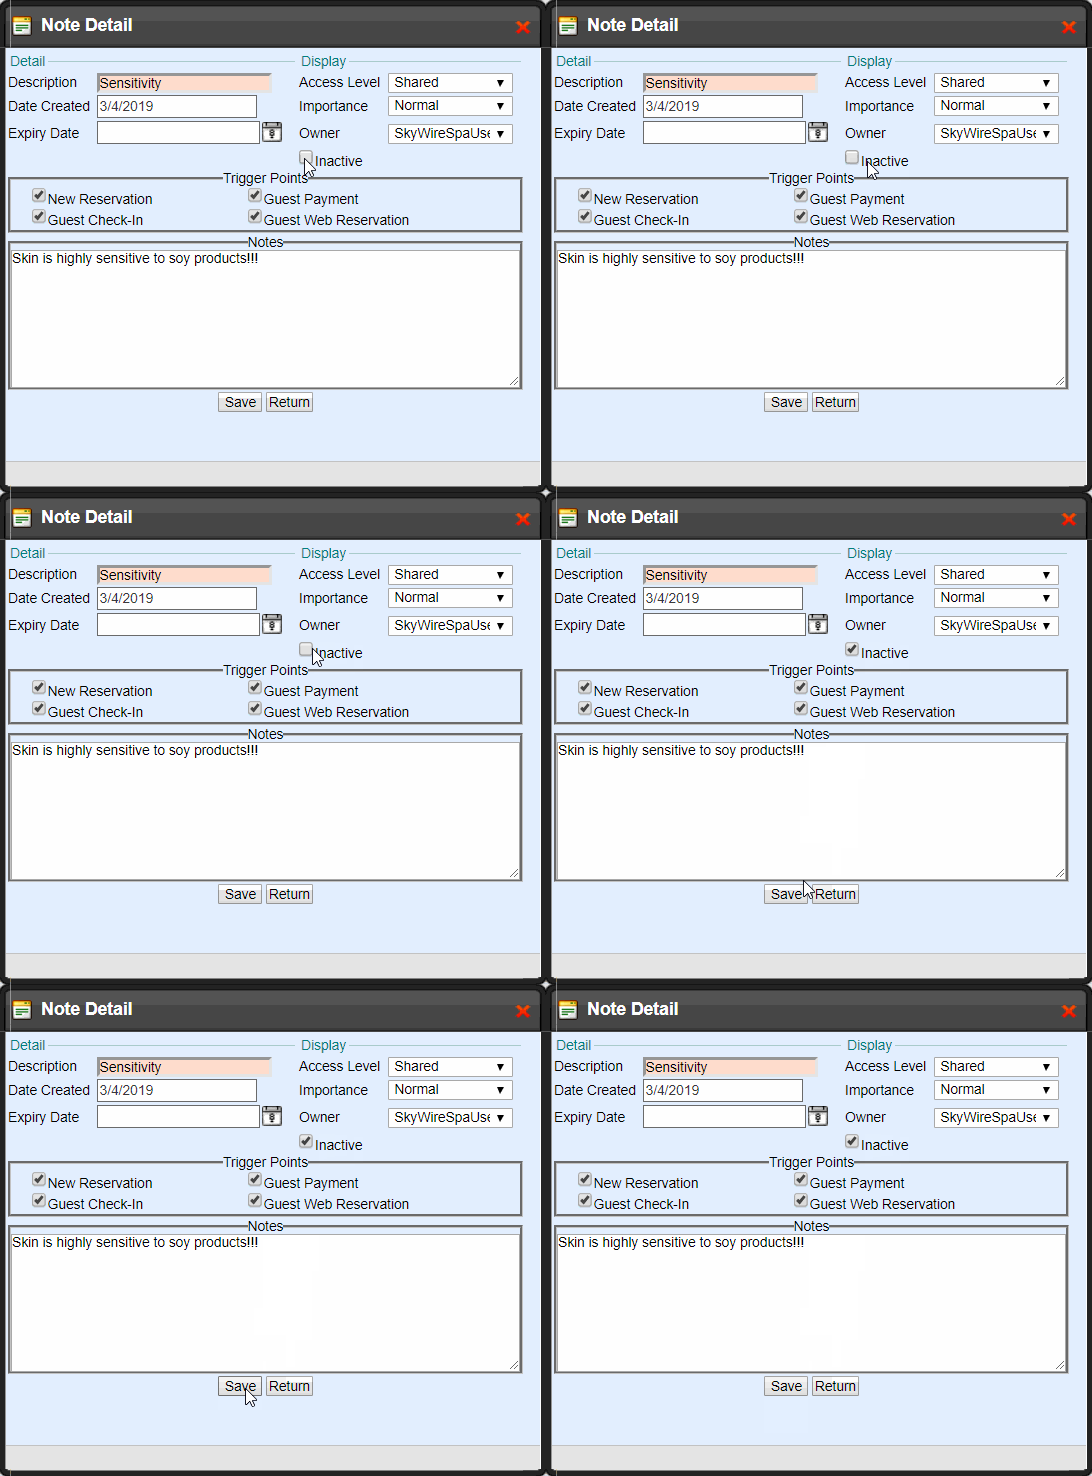
Enter a Description of this note, the date will automatically populate to the current date
Step 3:
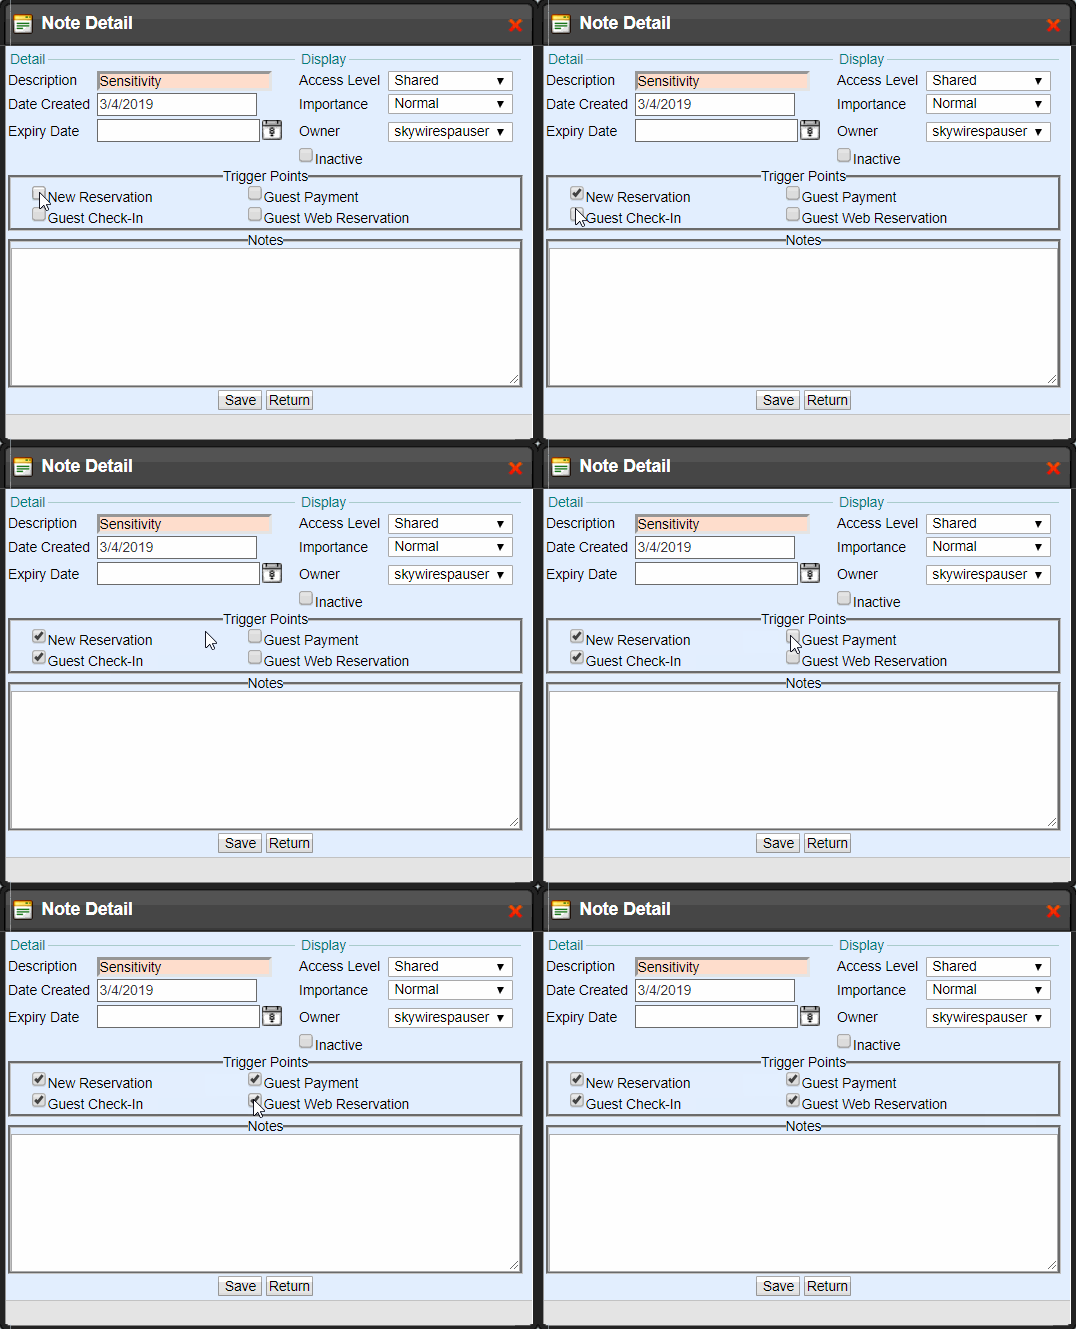
Select the appropriate Trigger Points
NOTE: You can set notes to be alerted at different times of visit, which is what we call Trigger Points
Step 4:
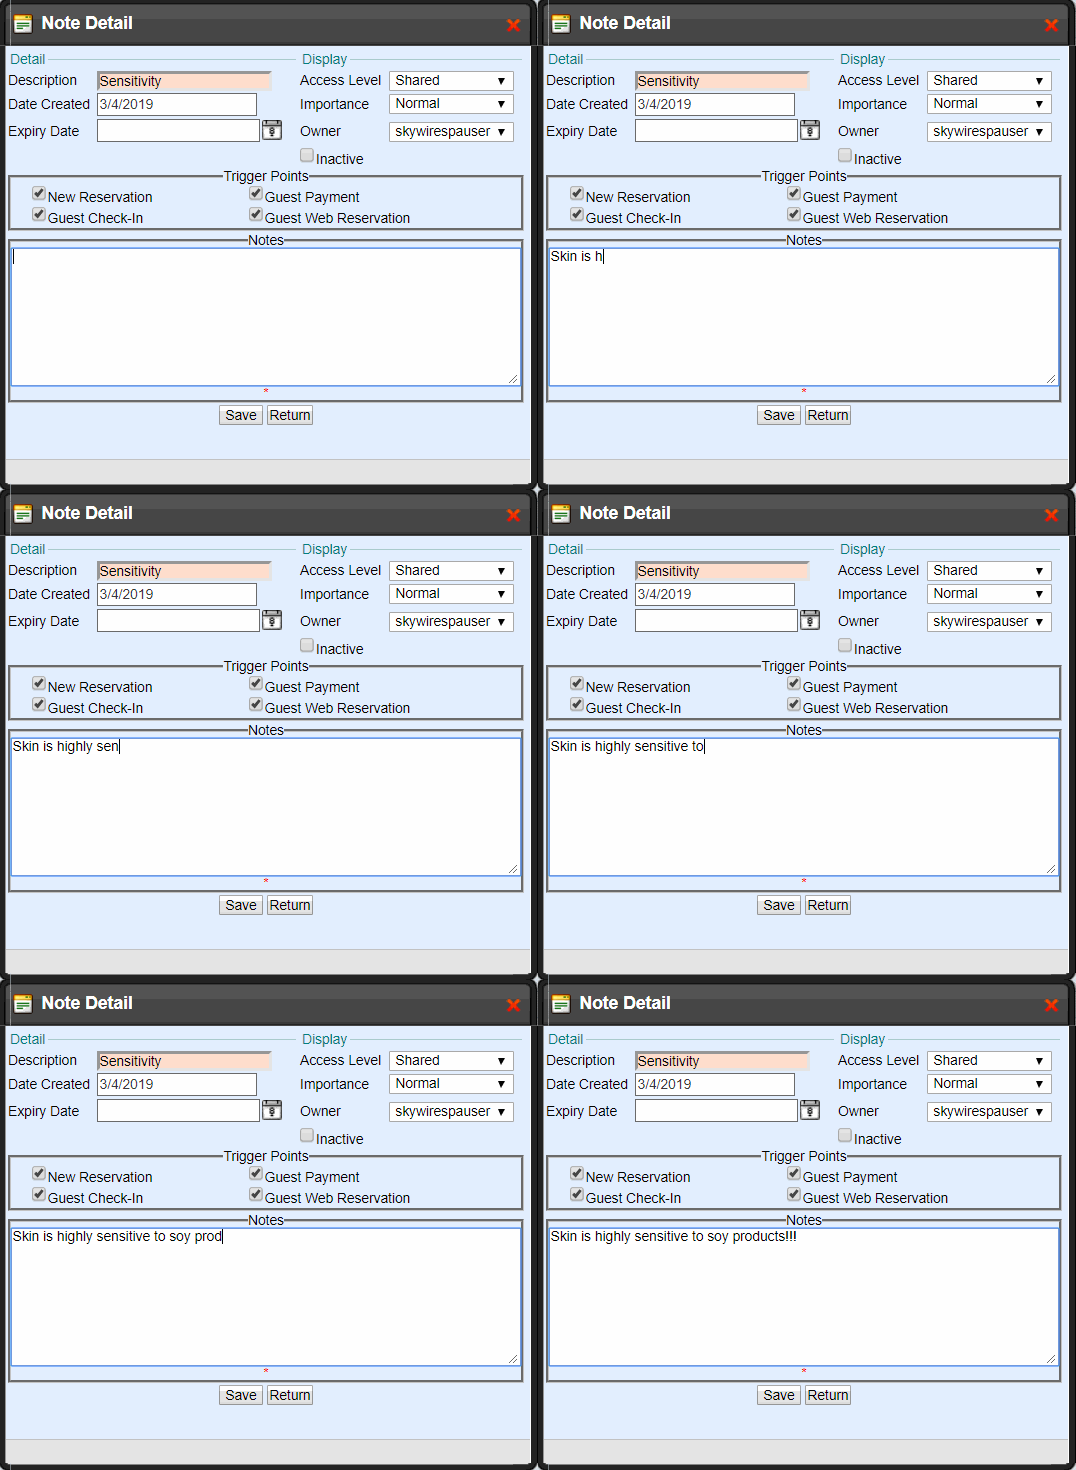
Enter the body of the Note
Step 5:
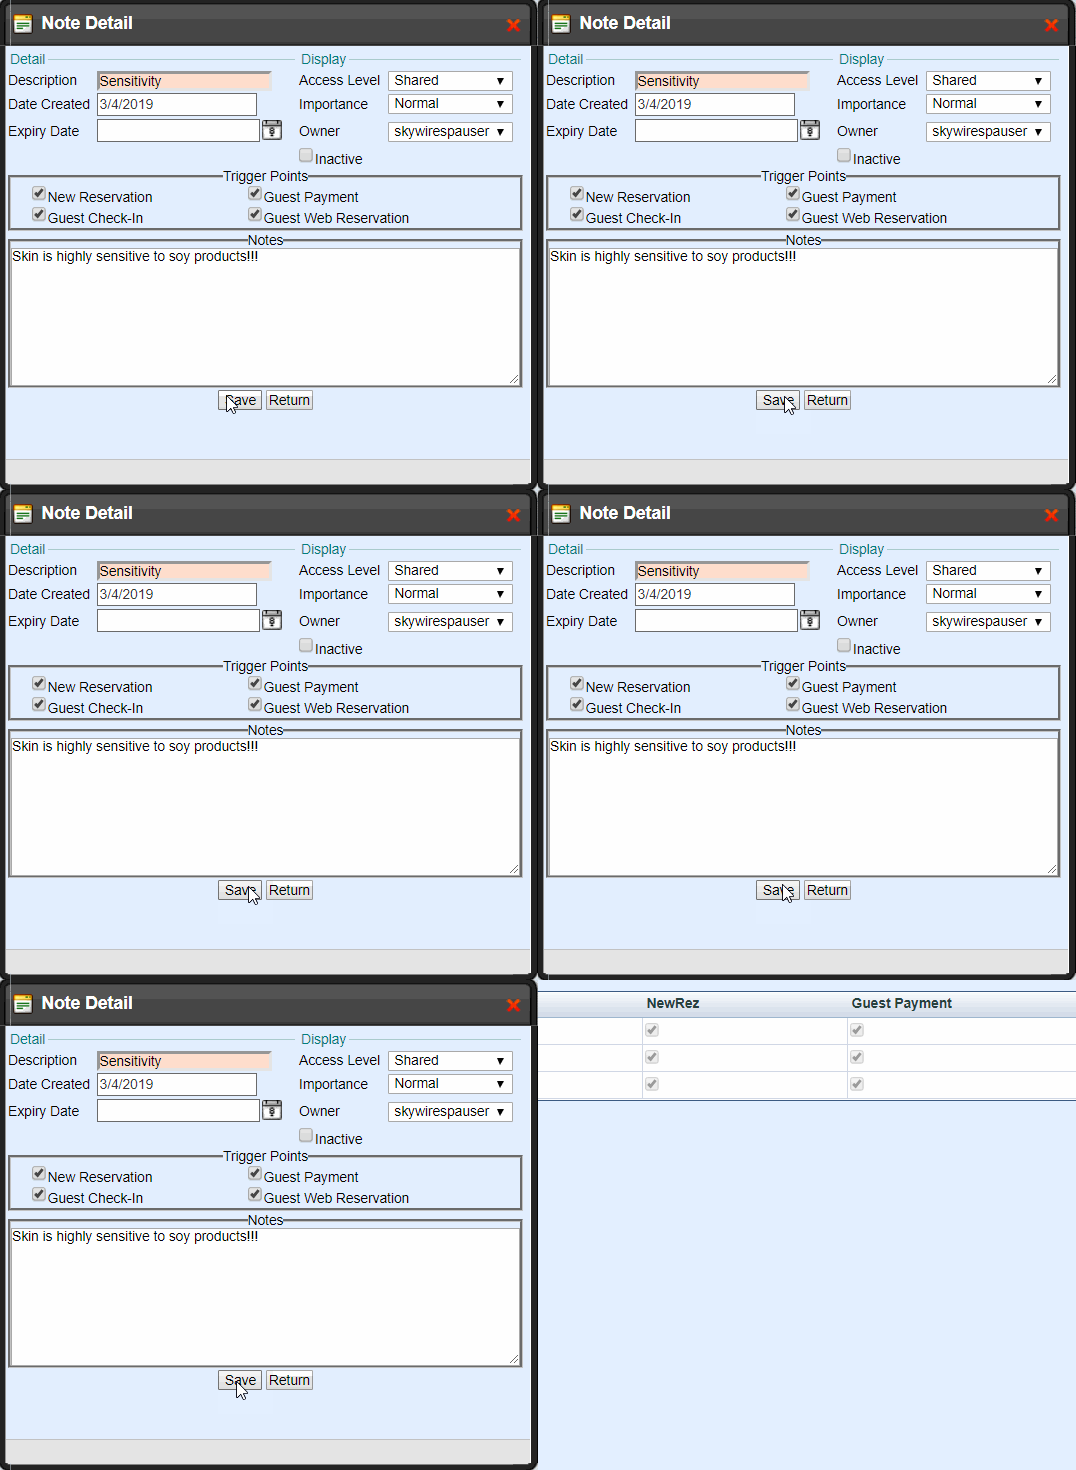
Select "Save" - you have added a Note!
Optional
Enter an expiration date if this is a time-sensitive note

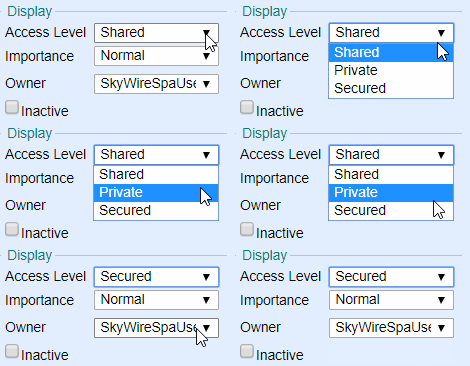
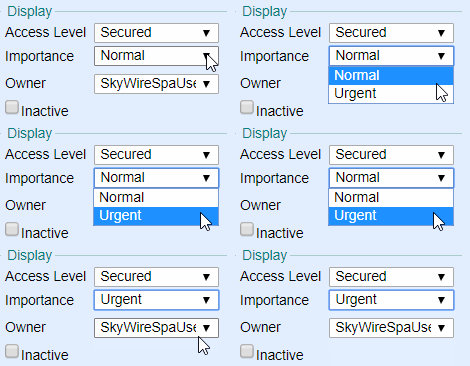
Assign an Access Level
- Shared: Users who have the permission to view Notes can view
- Private: Only the Owner (you) can view
- Secured: Only Users with the permission to view Secured Notes can view
Assign Importance – For informational purpose only
- Normal
- Urgent

Delete a Note
Select “remove” to completely delete the Note.
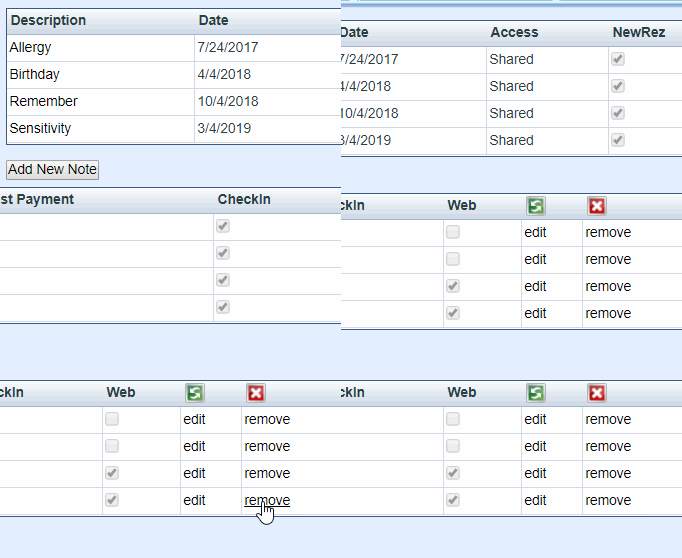
Select “edit” and flag as Inactive to keep the record of the Note.
Preferences
Preferences are specific Activities and requests that this Guest favors.

To Add a Preference
Step 1:
Select “Add New Preference”

Step 2:
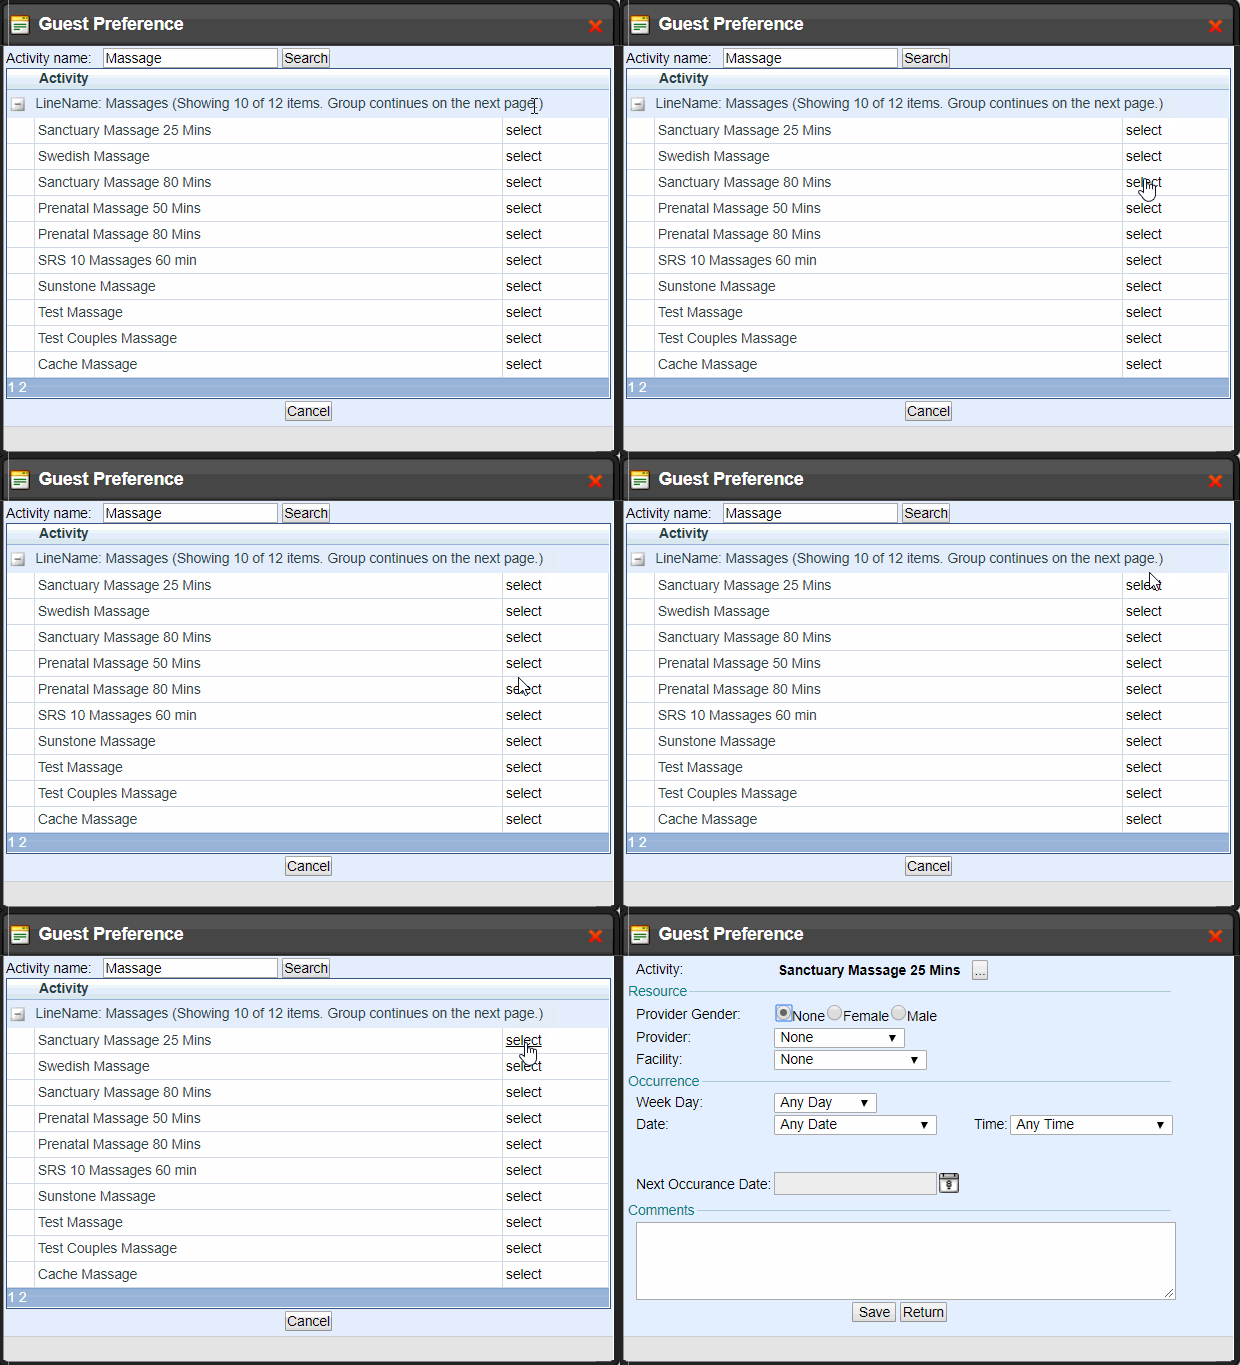
Search the Activity name
NOTE: All search functions have the option to search all fields. Leave the search box blank and select “Search” – this will populate all items within that field
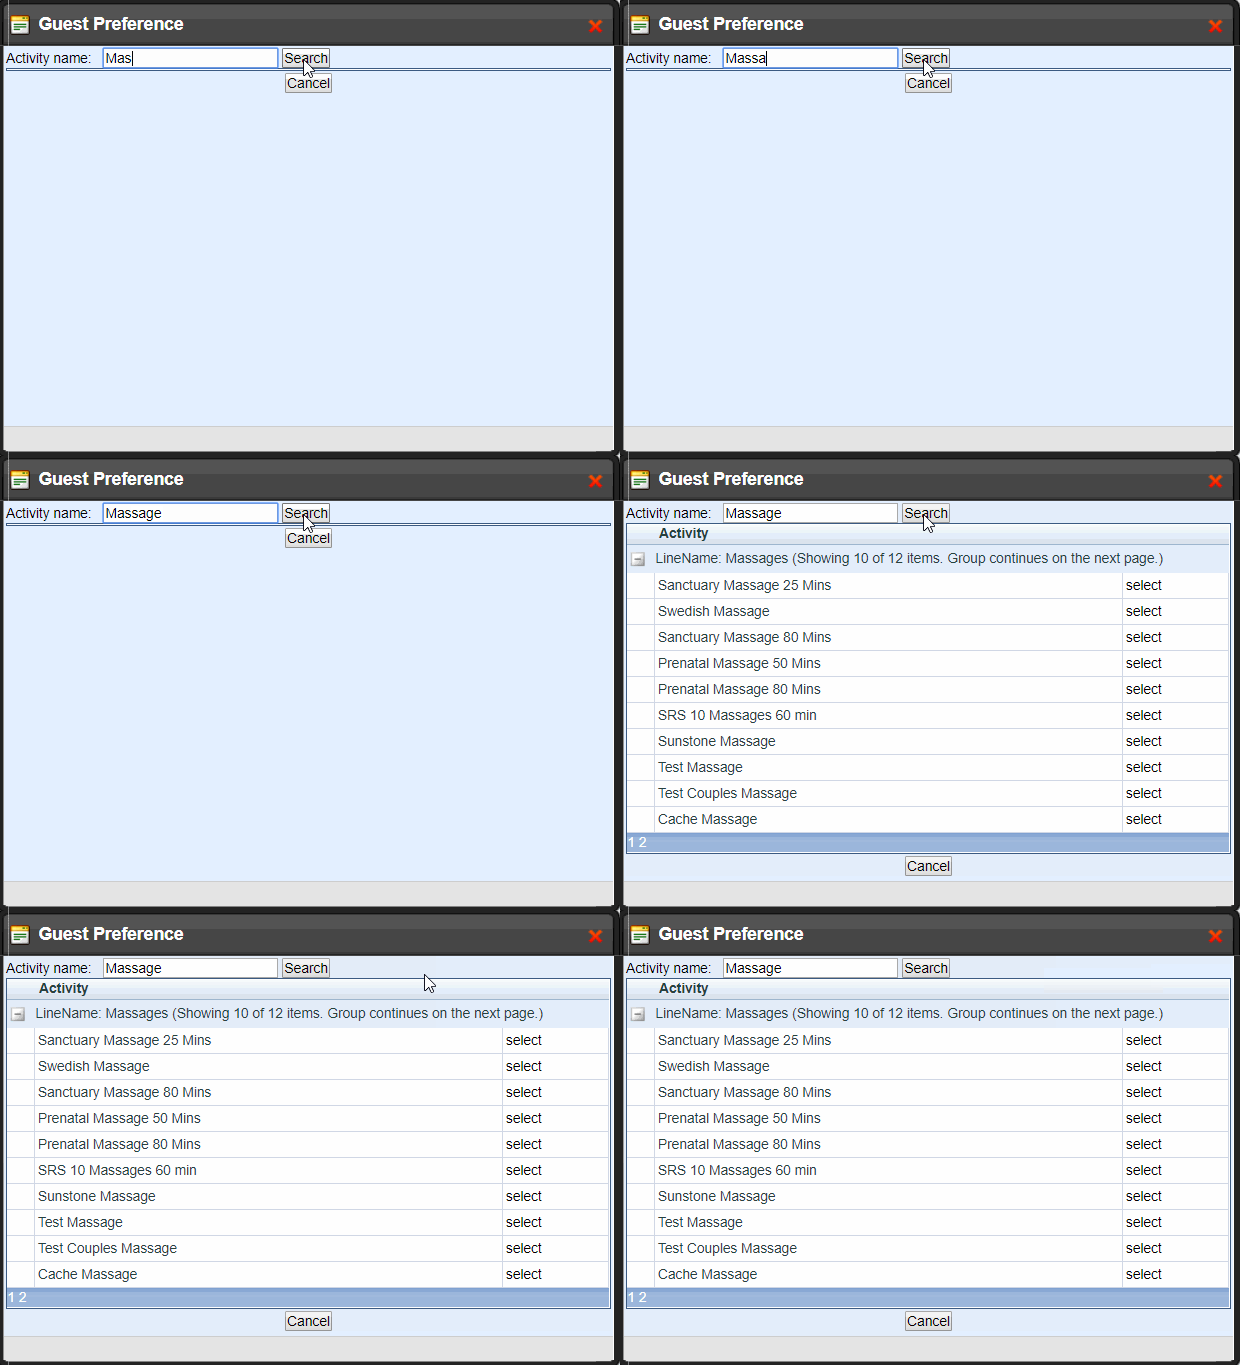
Step 3:
Select the preferred Activity
Step 4:
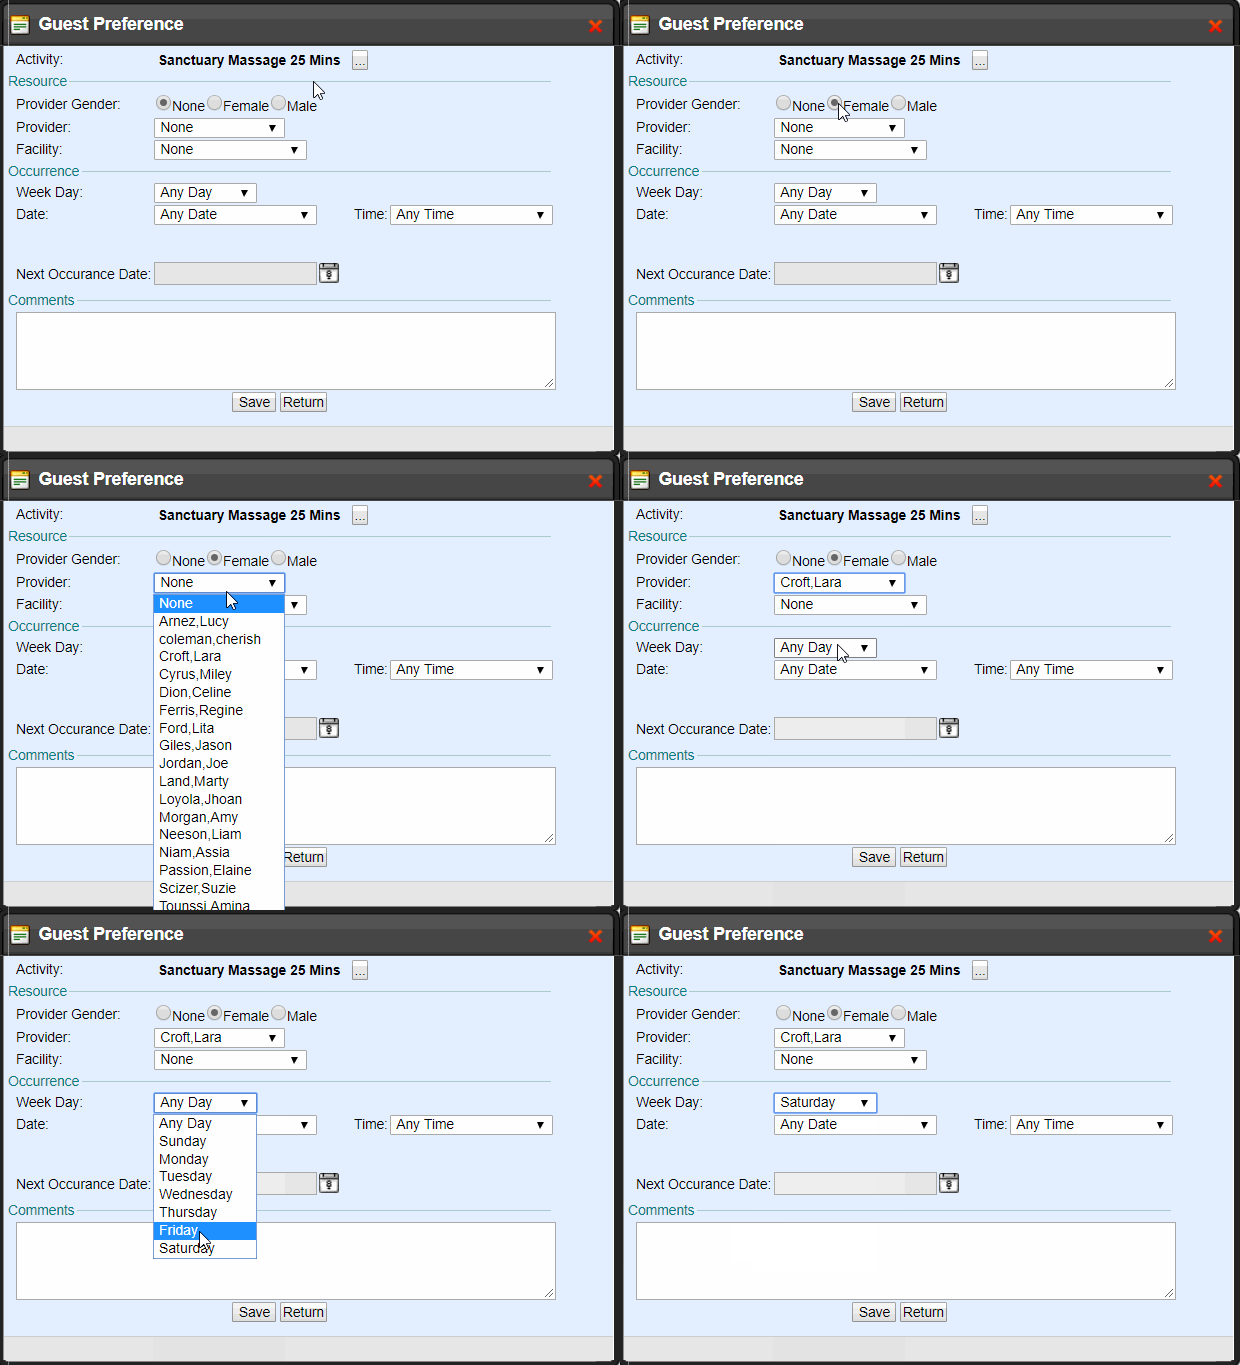
Time to get detailed - you have the option to specify whether the Guest prefers a Female or Male Provider, the specific Provider, the specific Facility, and even the preferred date and time!
NOTE: These fields are optional and are not required to continue
Step 5:
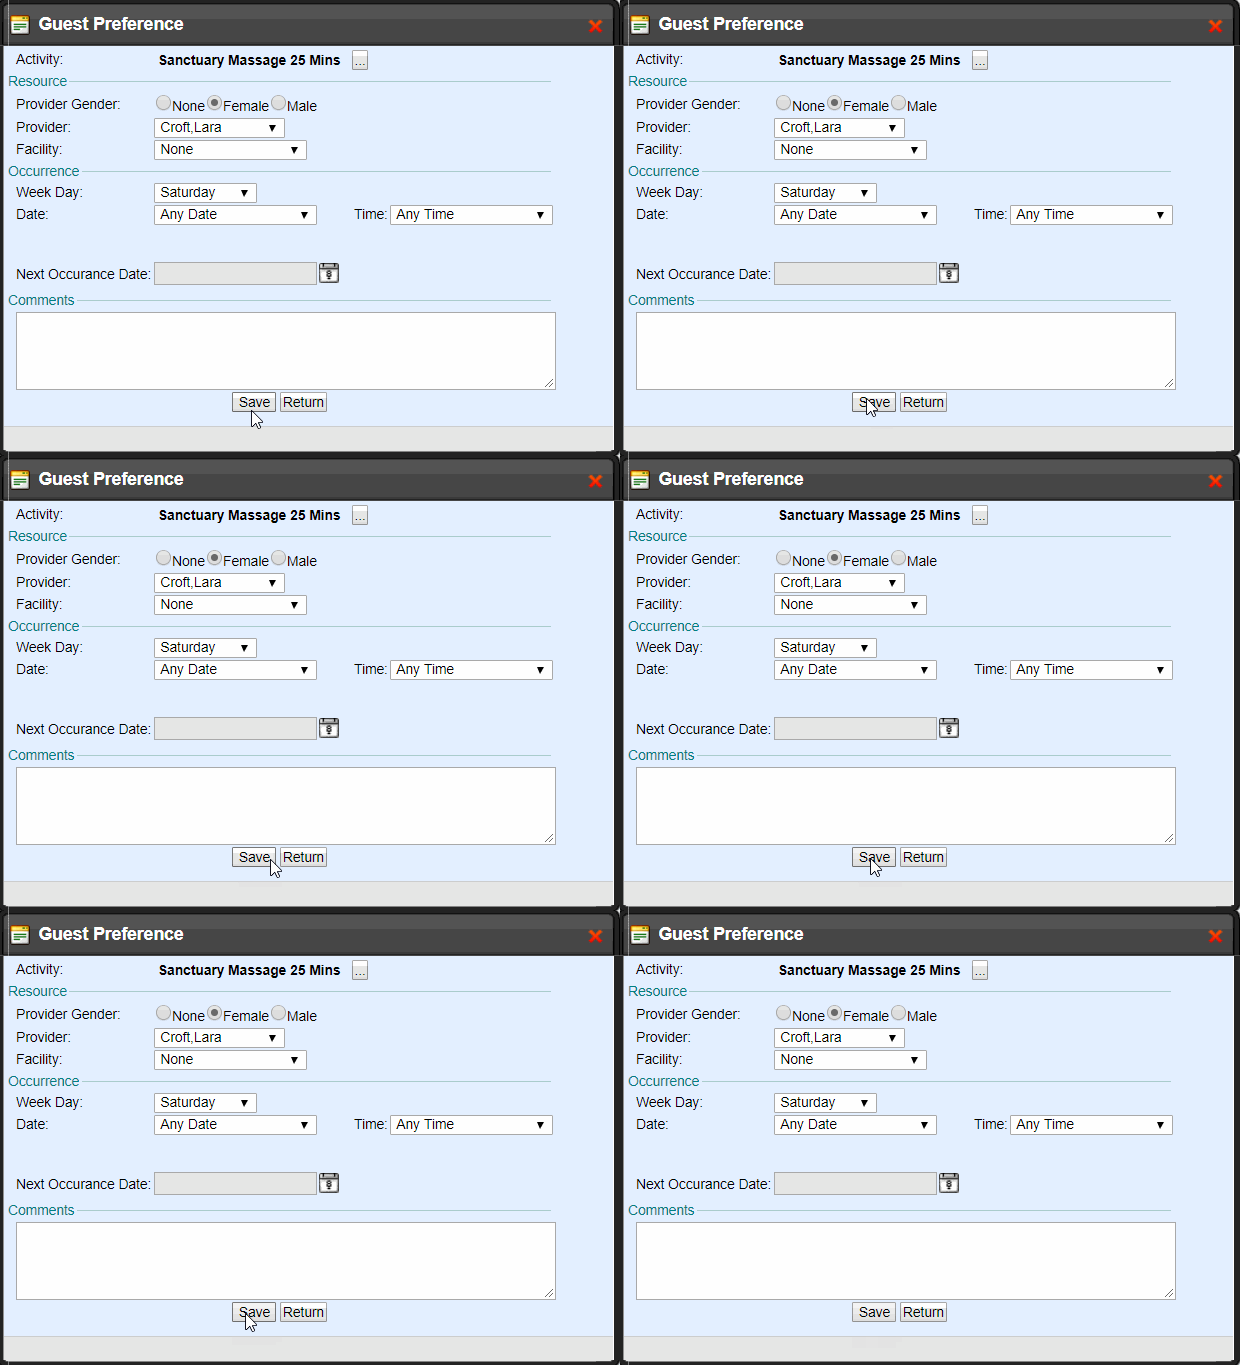
Select "Save" - you have added a Preference!
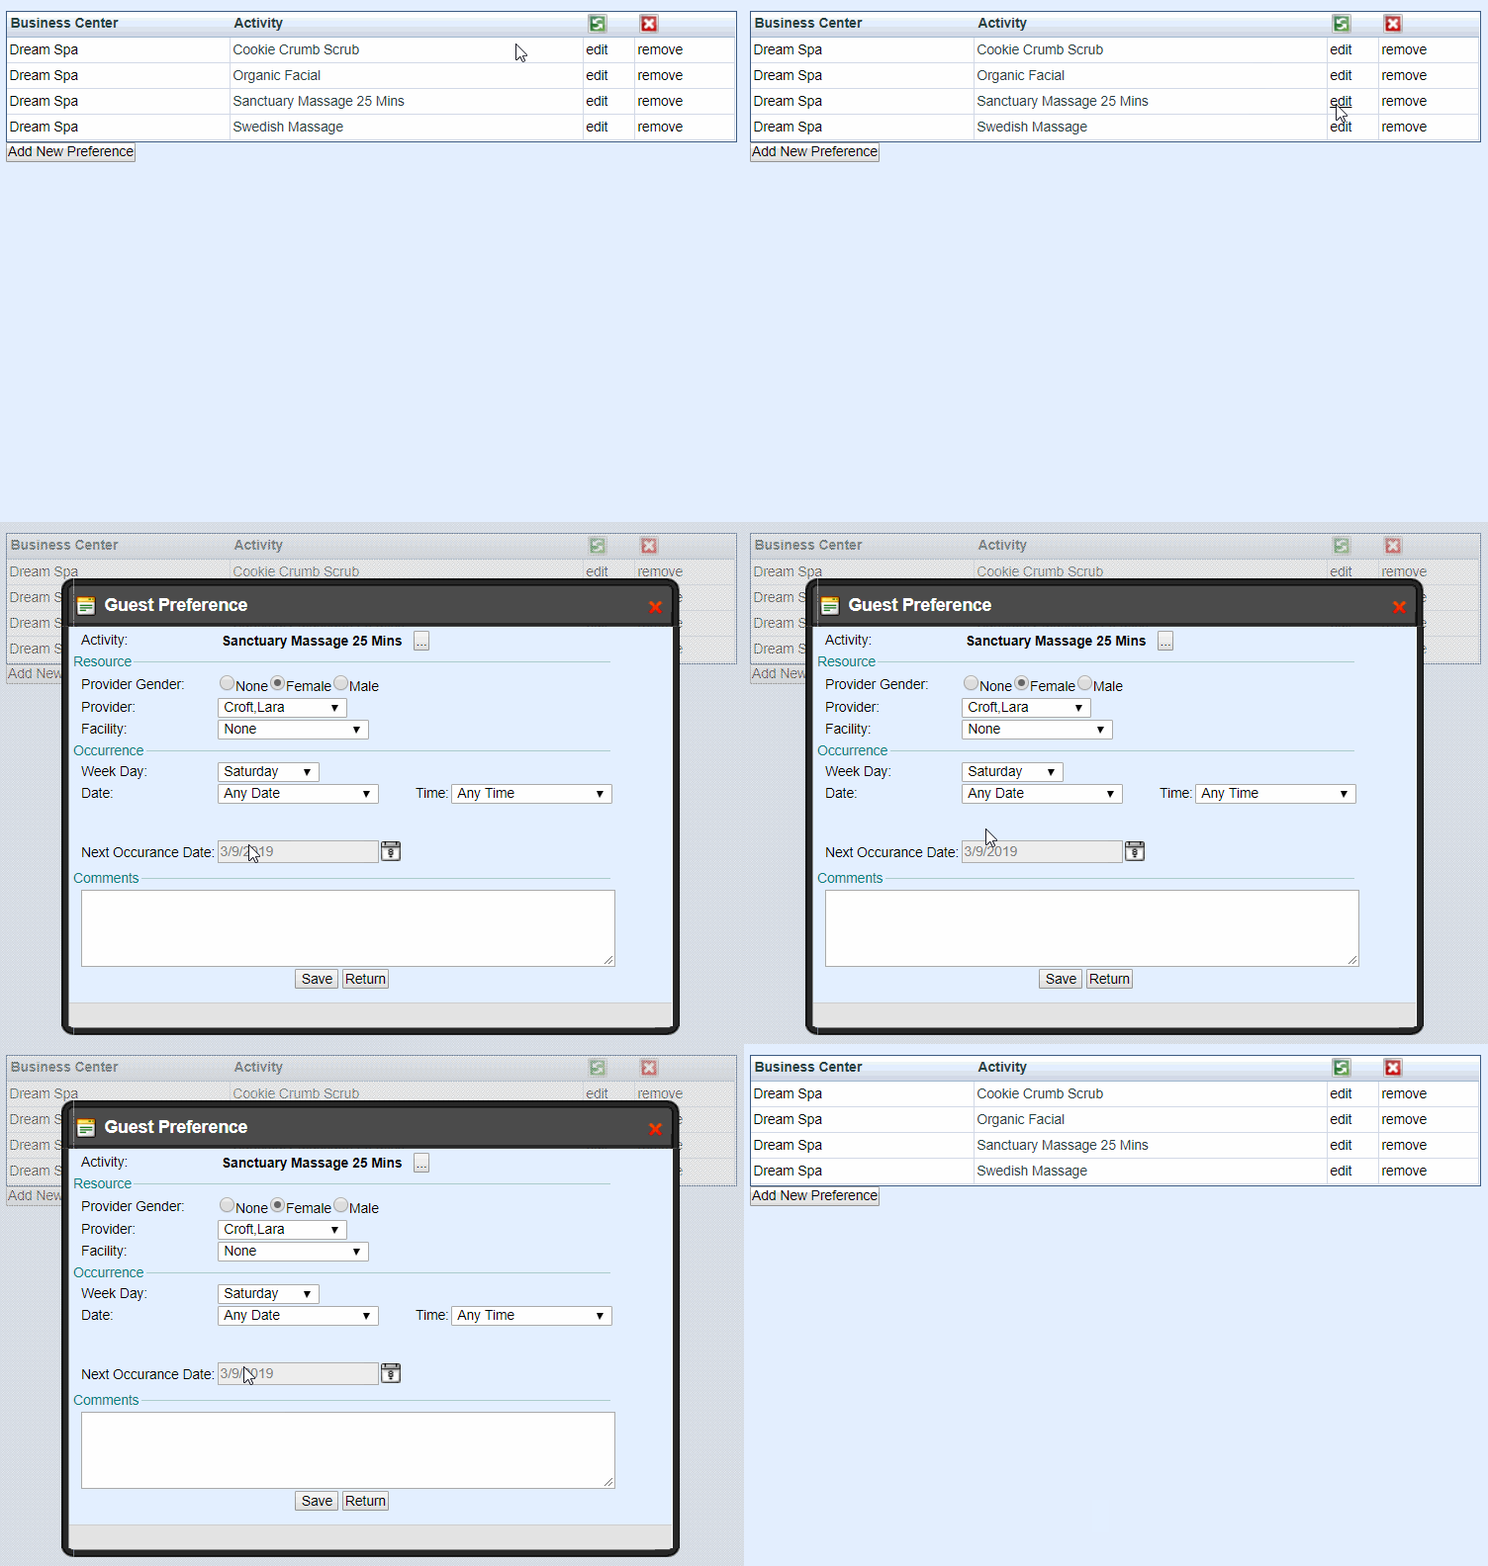
Make Use of this Tool
To view the next suggested occurrence, select the Activity from the Preferences list and refer to the "Next Occurrence Date."
Relations
Here you can define relationships between Guest Profiles.

To Add a Relationship
Step 1:
Select “Identify New Relationship”

Step 2:
Search an existing Guest by Last Name, First Name, Telephone, or Zip Code
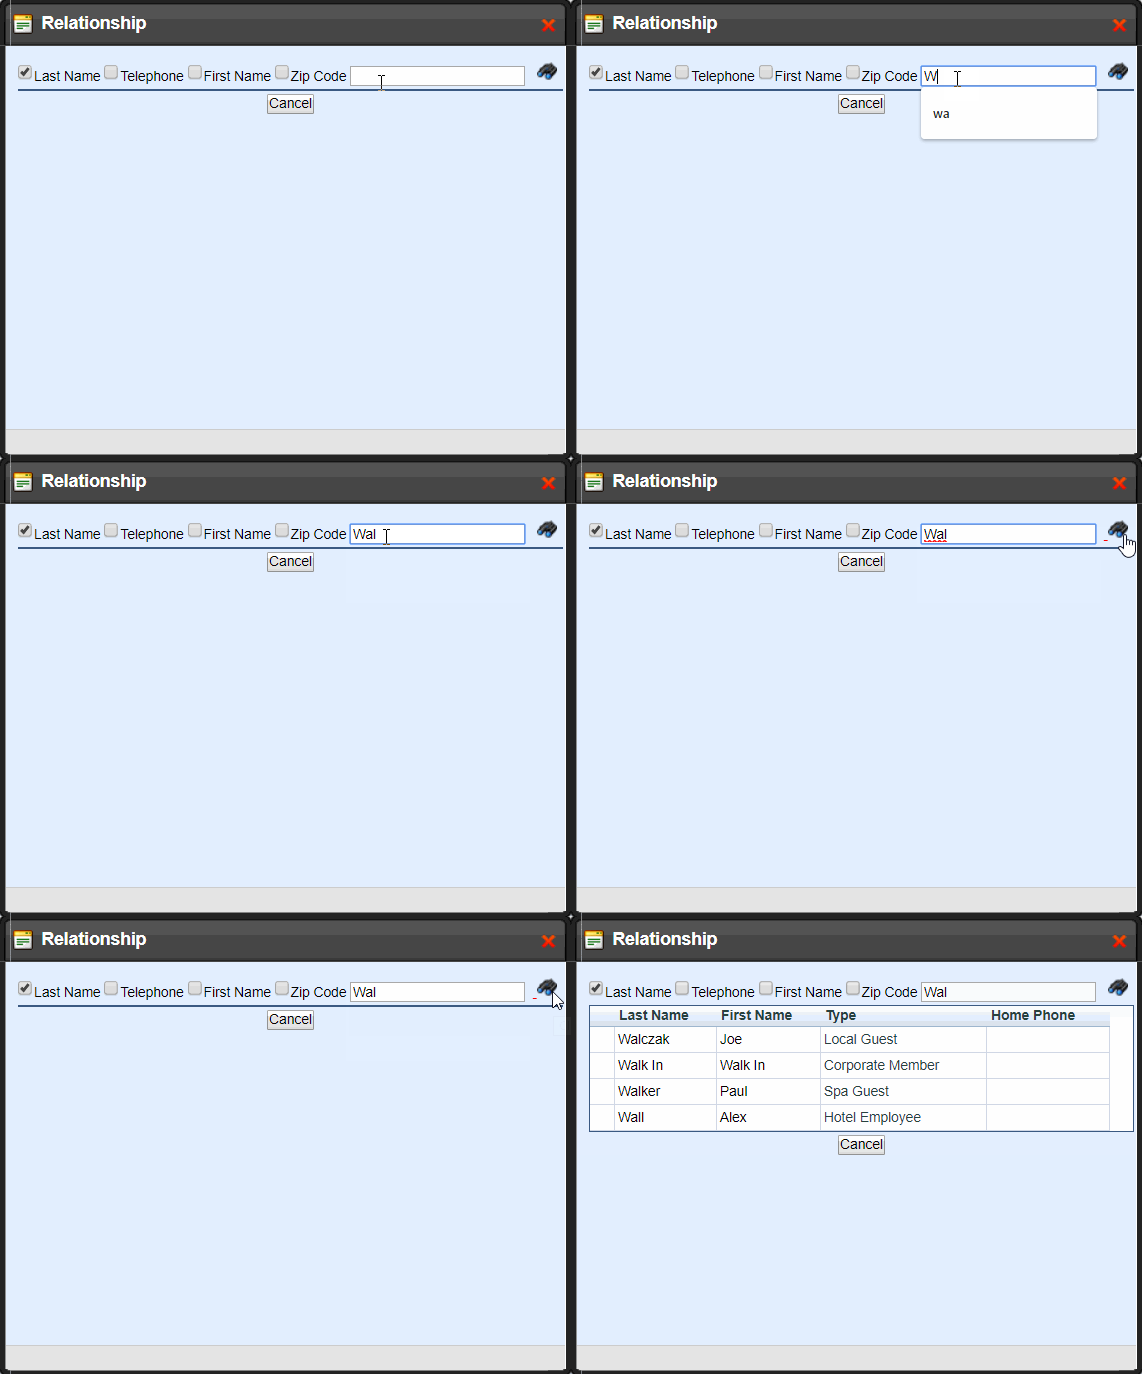
Step 3:
Select the Guest First or Last Name
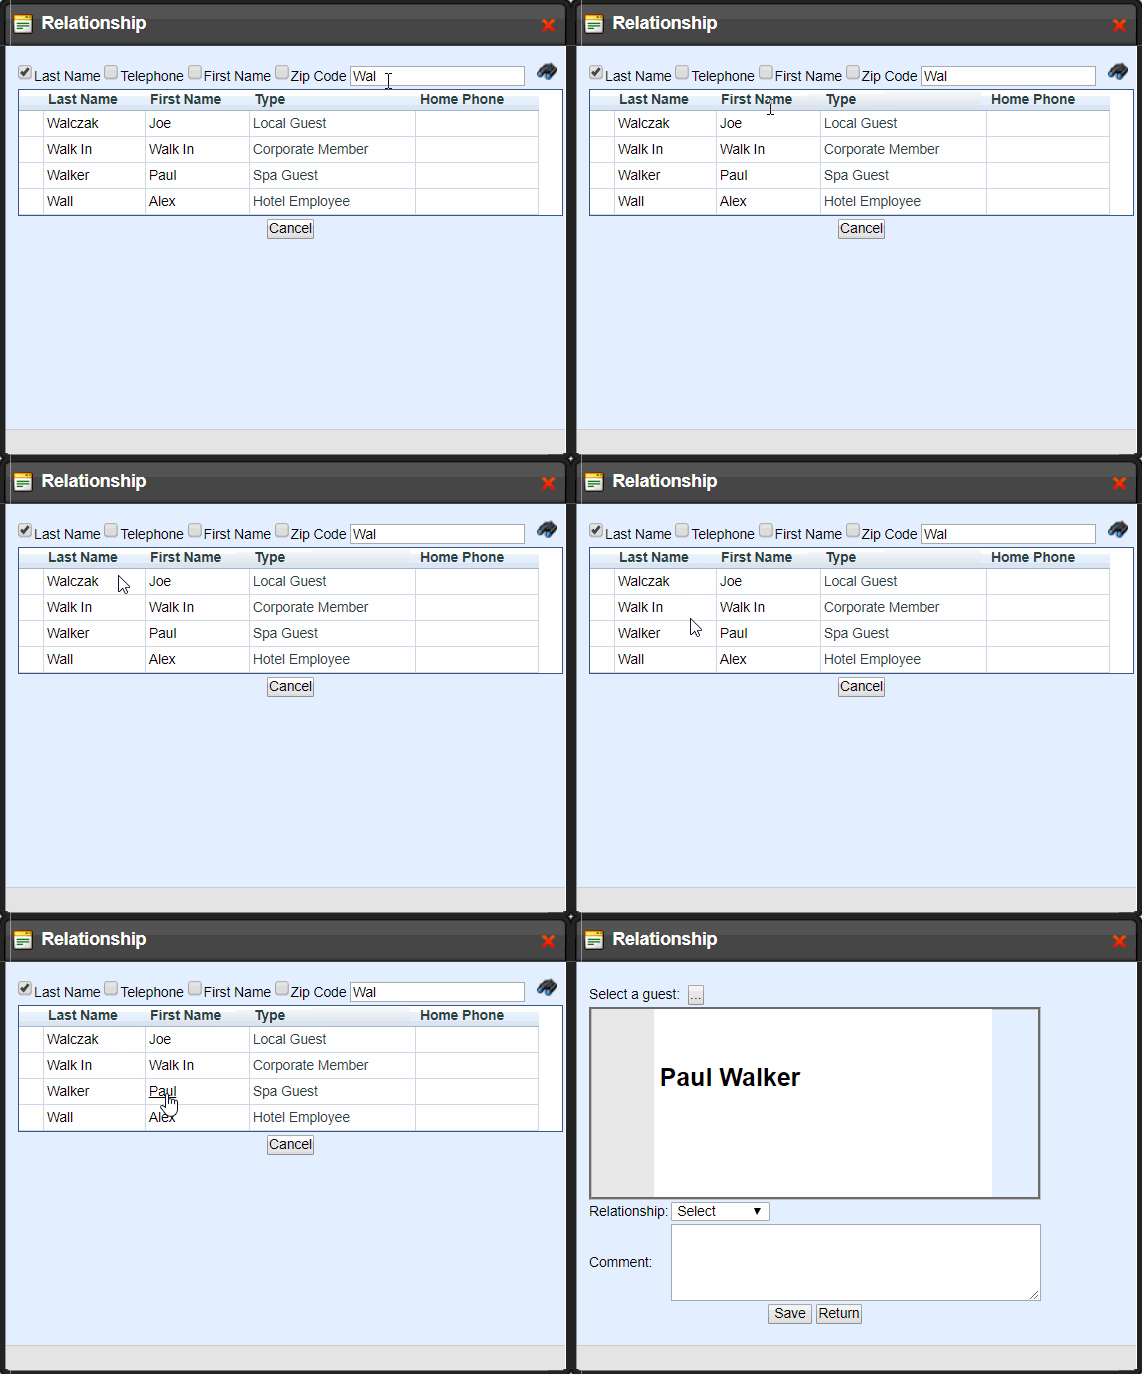
Step 4:
Select the relationship from the drop-down list and enter a comment if you wish
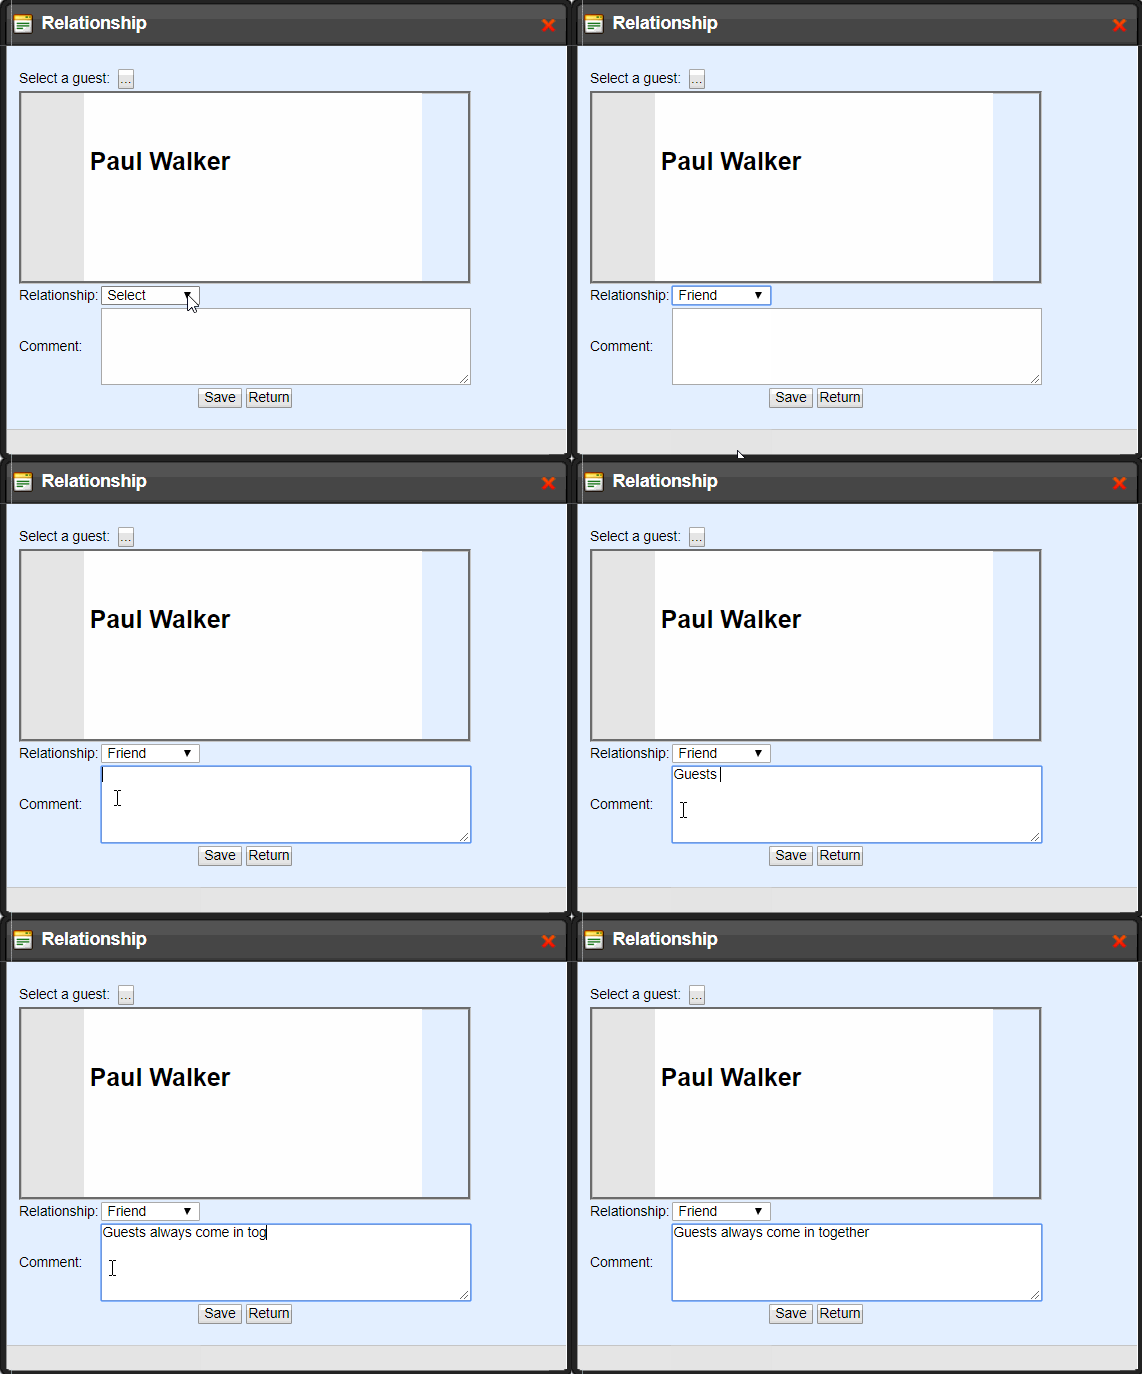
Select “Save” - you have defined a relationship!
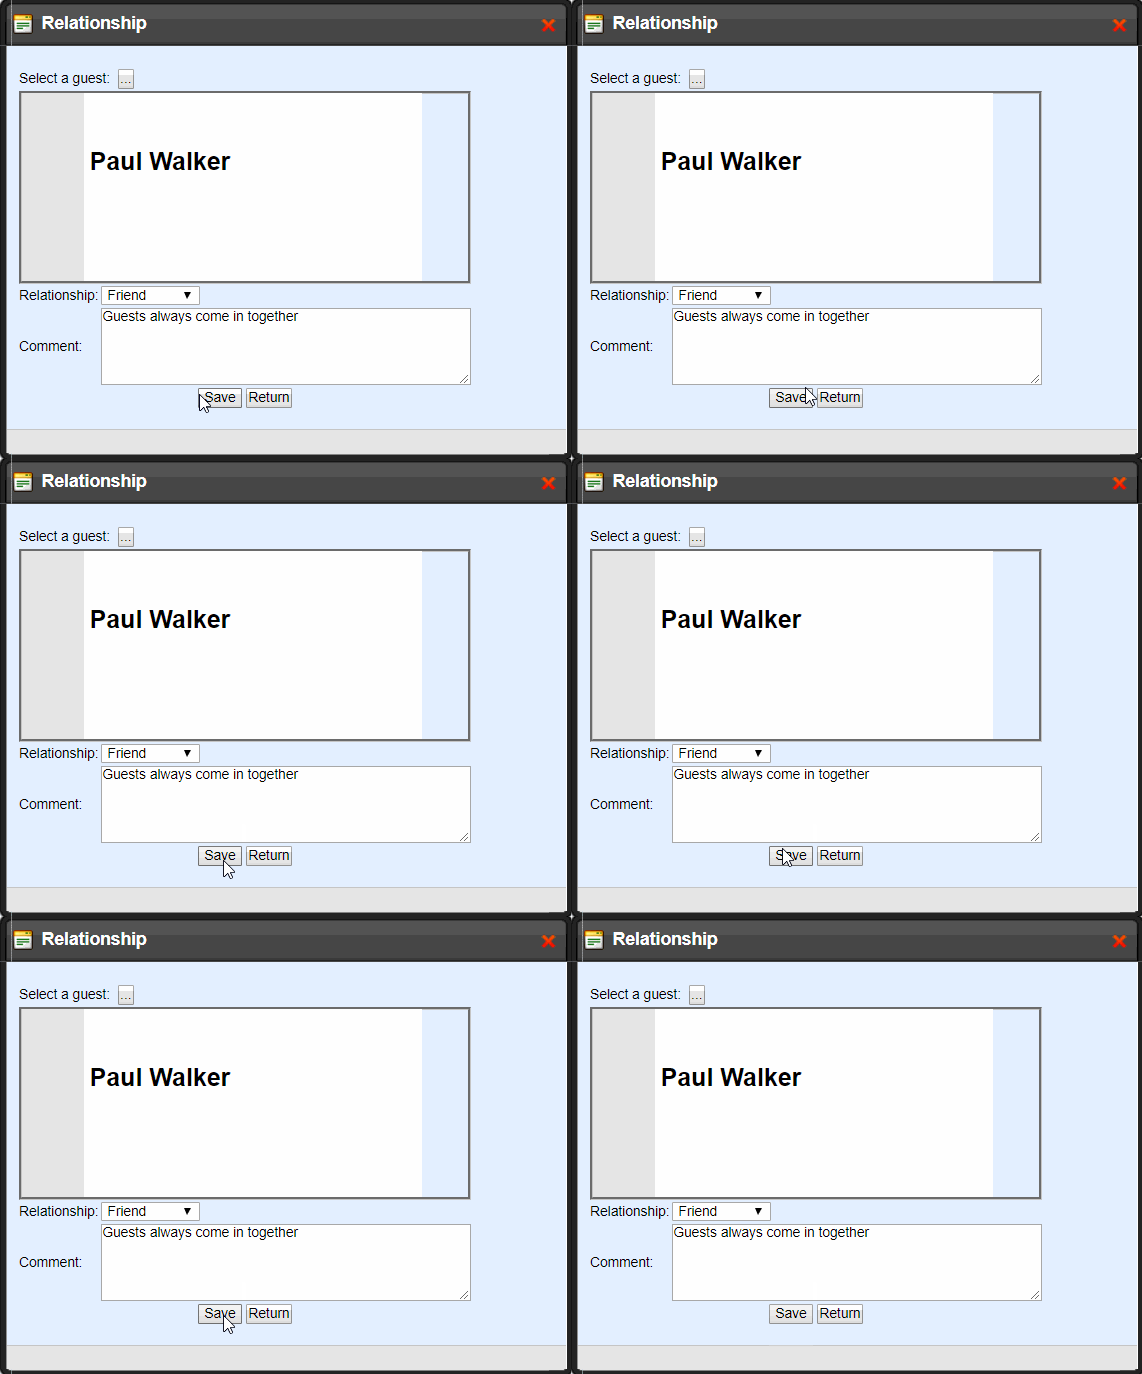
NOTE: These relationships do not automatically post on the associated Guest's profile. You must define the relationship in both.
Purchases
Here you can view all past Activity and Retail purchases this Guest has made.

Activity Tab
Find helpful information like the date of the Activity, invoice #, Activity name, and total for each through a list view.
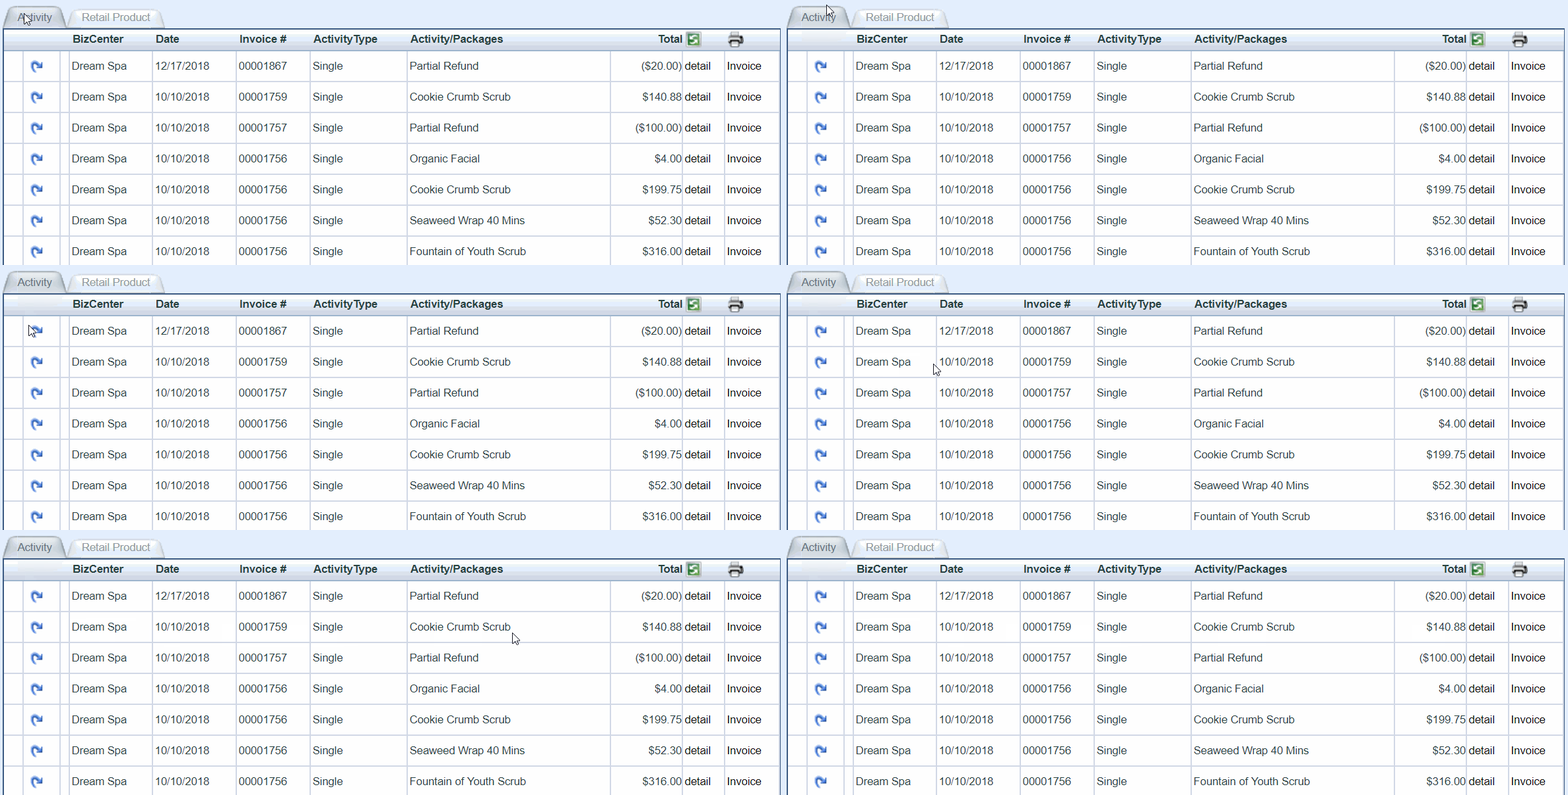

Detail: View specific details pertaining to this Activity like the charge breakdown and Resources assigned

Invoice: Generate an invoice copy of this transaction to save or print
Closed a sale with incorrect Resources assigned to it?
You have the option to quickly edit Resources after a transaction has been closed!
The Detail screen allows you to edit:
- Sold By (User)
- Performed By (Provider
- Facility
- Equipment
- Request
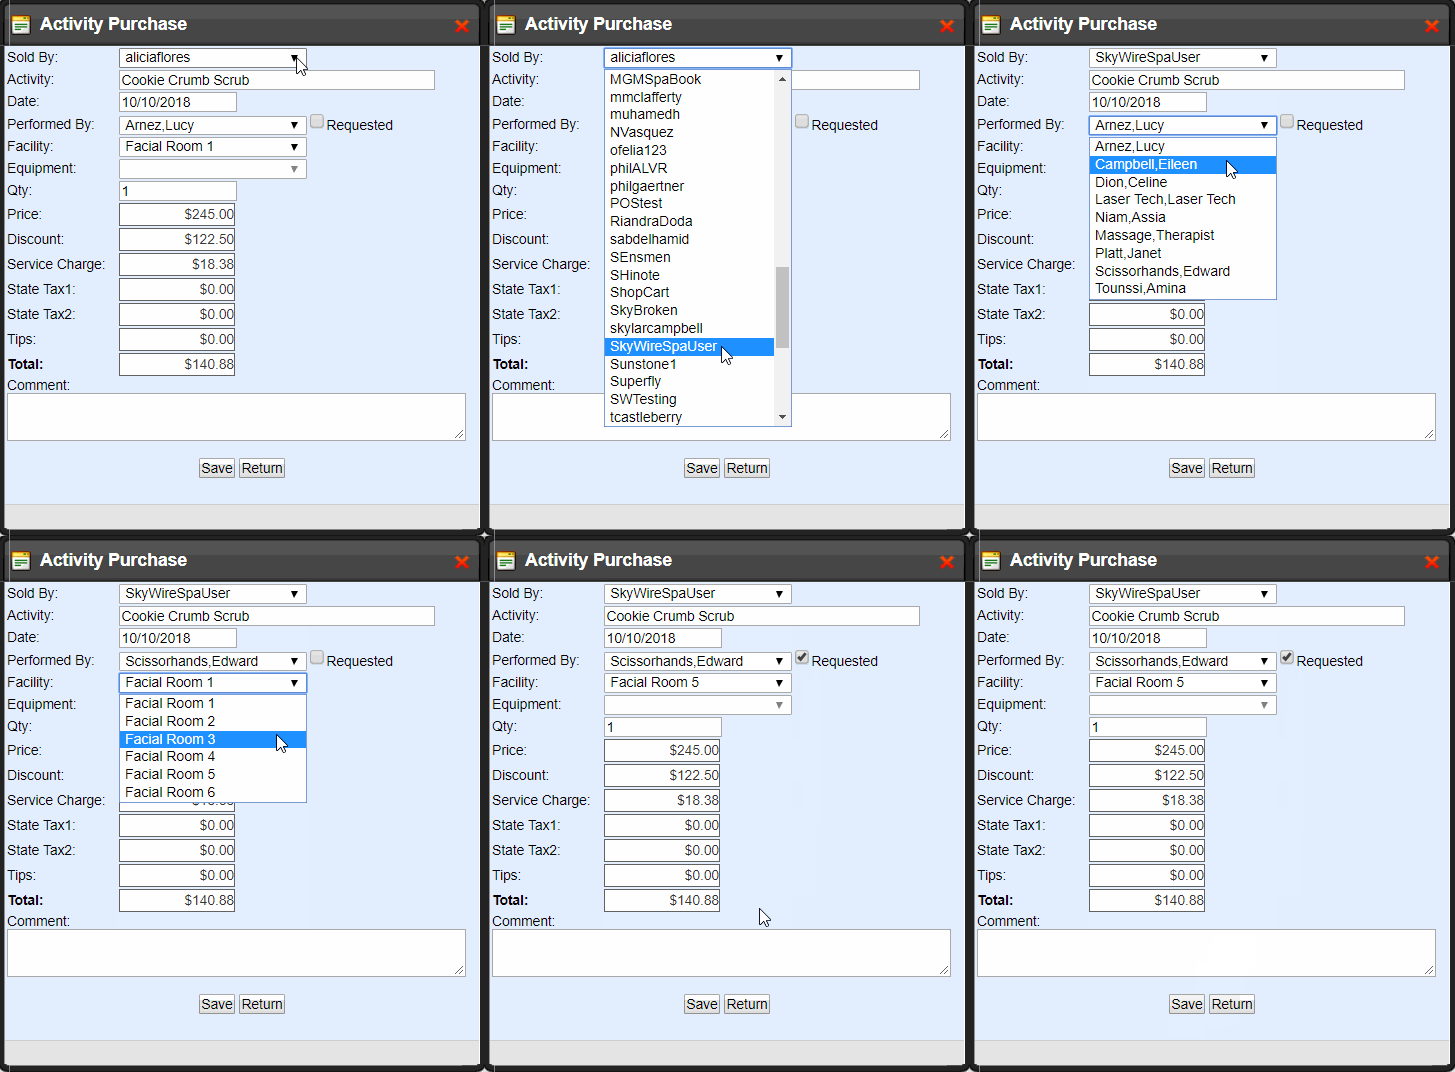
NOTE: Once you Save, make sure to rerun Reports to reflect changes
Retail Tab
Find helpful information like the date of the sale, invoice # and total price for each Product through a list view.


Detail: View specific details pertaining to this Activity like the charge breakdown and Resources assigned

Invoice: Generate an invoice copy of this transaction to save or print
Closed a sale with incorrect Resources assigned to it?
You have the option to quickly edit Resources after a transaction has been closed!
The Detail screen allows you to edit:
- Sold By (Provider)
- Assisted By (User)
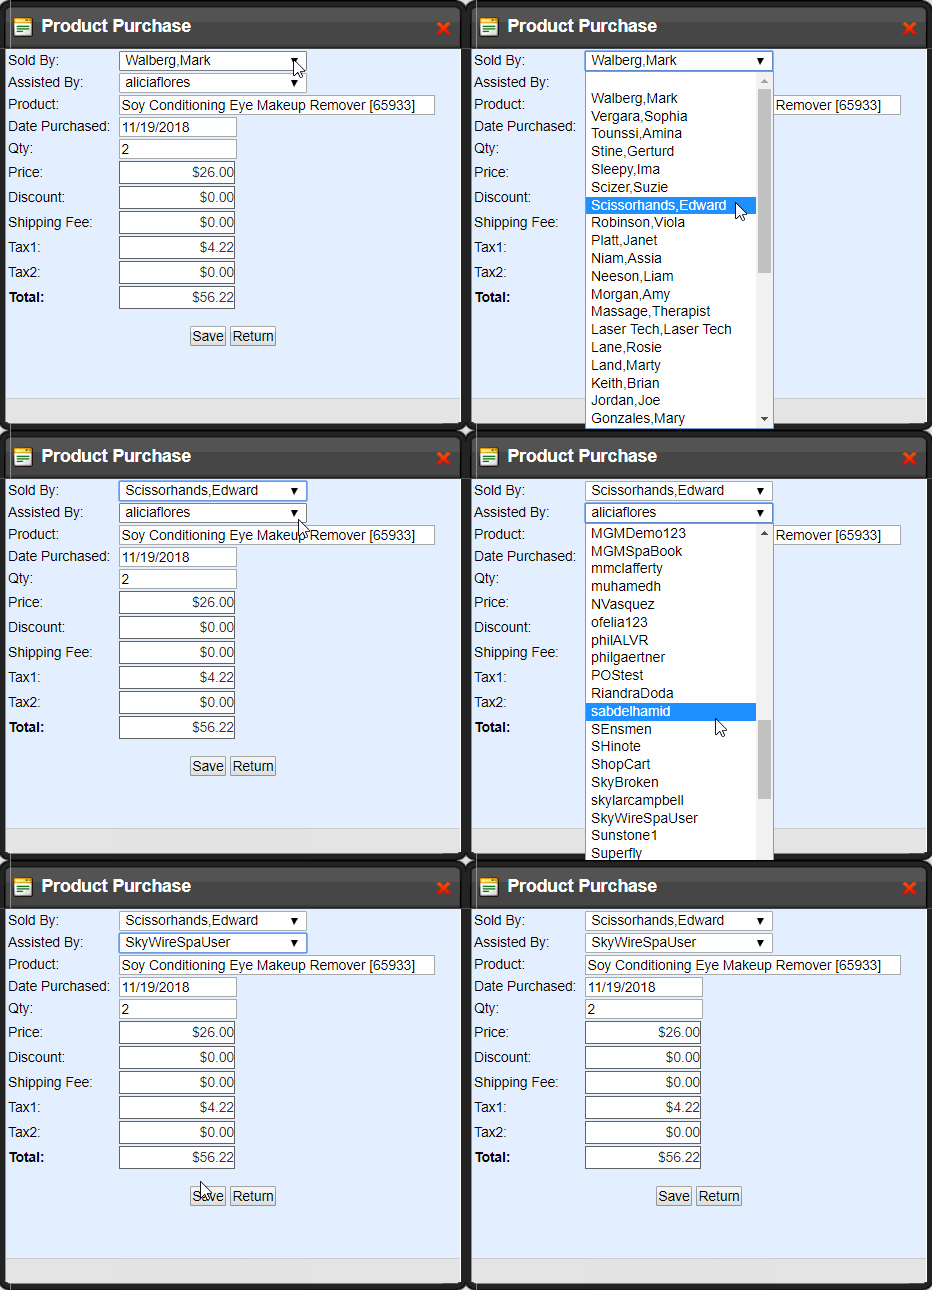
NOTE: Once you Save, make sure to rerun Reports to reflect changes
Liabilities
Here you can view all past Gift Certificate Purchases this Guest has made.

Gift Certificates
Liabilities are another term for Gift Certificates. Find helpful information like the purchase date, expiry date, Gift Certificate number, and the outstanding amount.
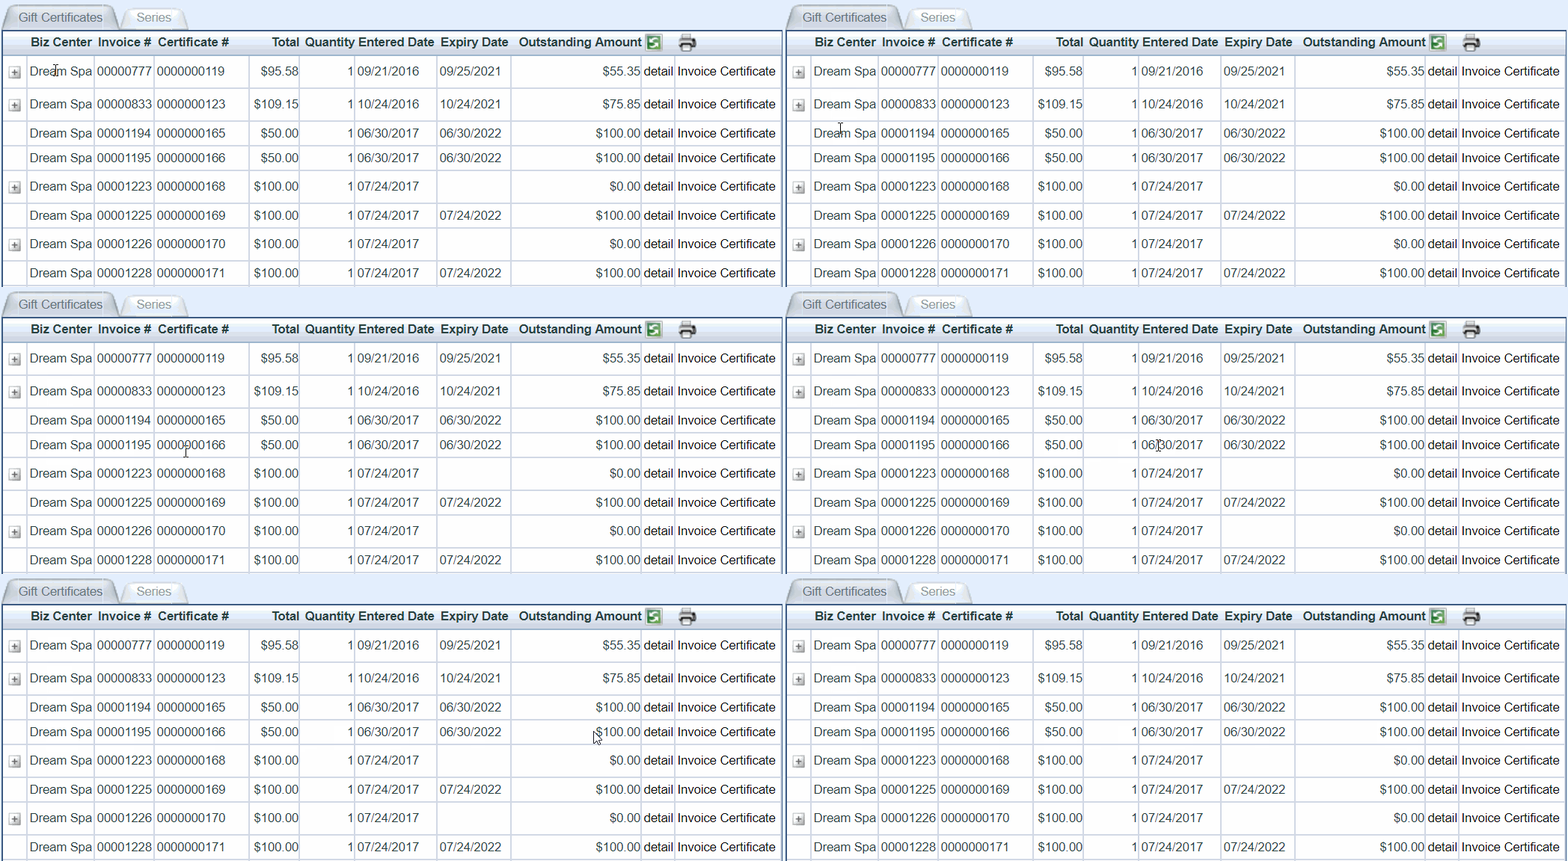

Detail: View specific details pertaining the Gift Certificate like charge breakdown and recipient

Invoice: Generate an invoice copy of this transaction to save or print
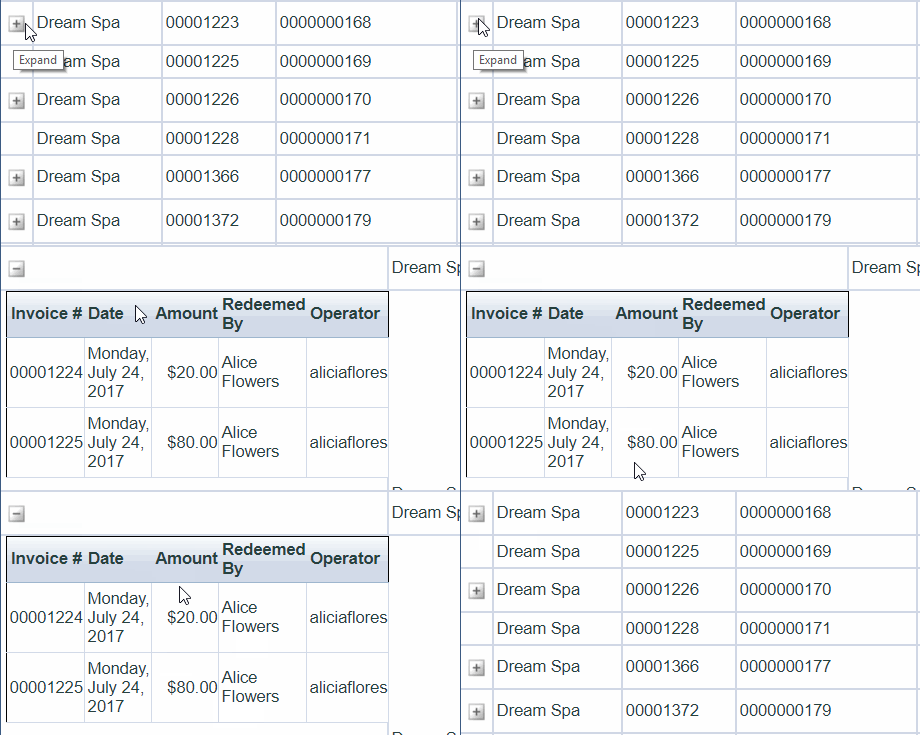
Redemption History
Select the + to expand the Gift Certificate and view the redemption history.
Resend or Print
Select "Certificate" to resend a Gift Certificate via email or to print another copy.
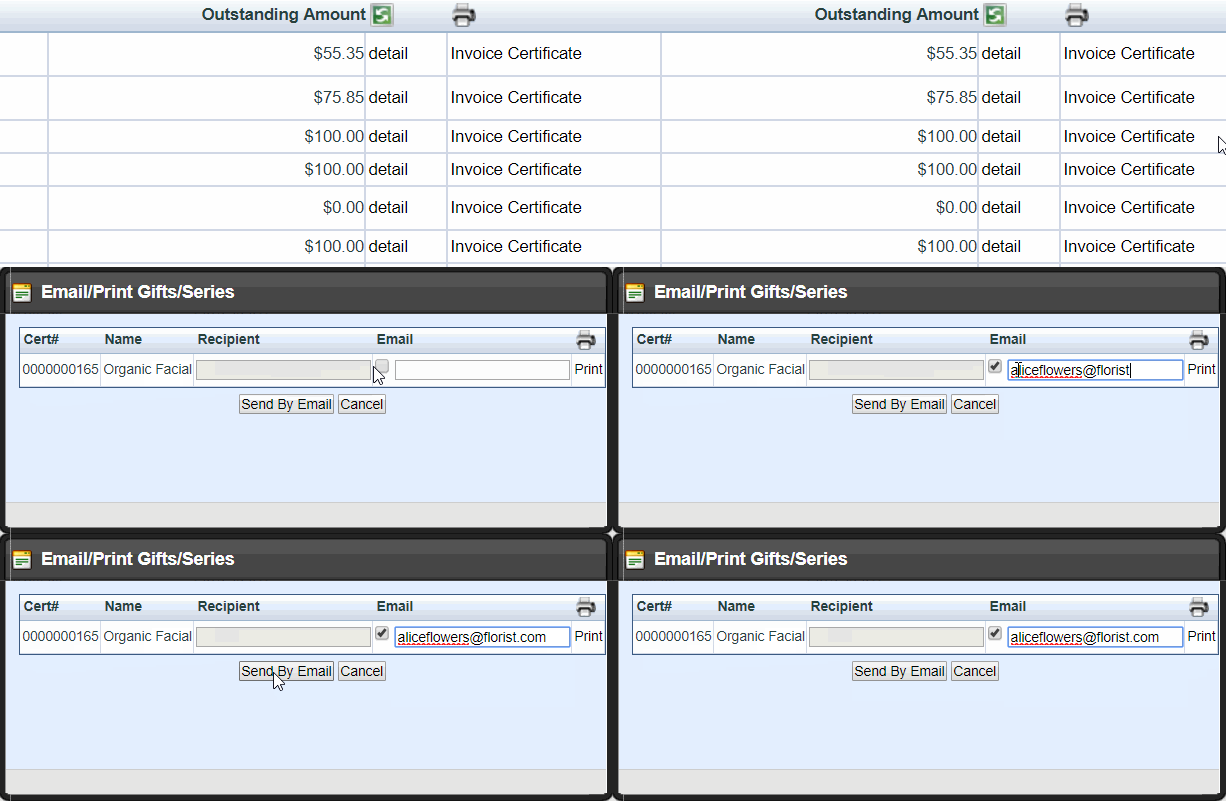 .
.NOTE: You can view the Recipient but CANNOT change - recipient name must be attached at Point of Sale
Update Expiration Date
Select "Detail" to view Gift Certificate details. Select a new expiration date and select "Update Expiry Date."
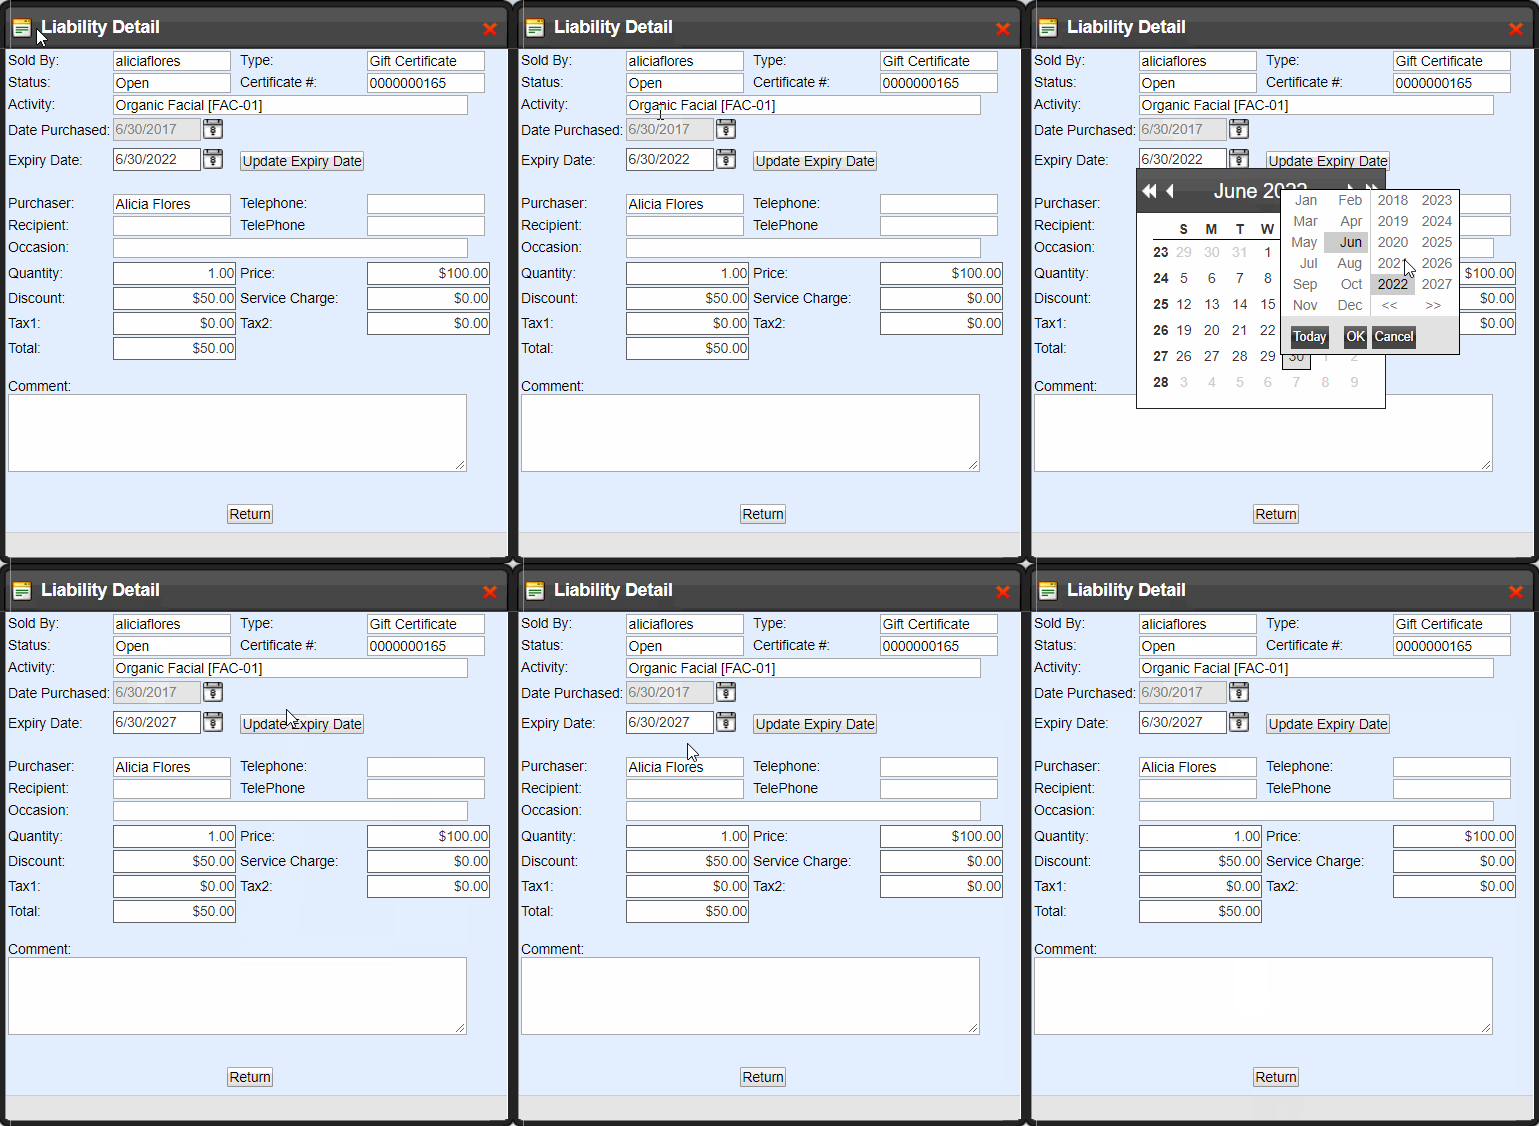
NOTE: Must have the permission to edit Expiration Dates
Biz Center Information
Here you can view a variety of Business Center information.

View summary information about which Business Center(s) your Guest has visited within your Corporation. View a list of summary details such as the first visit, last visit, total visits, and total cancellations.

Business Center Info
Select "Detail" to view a breakdown of Activity and Retail spending for each Business Center.

Address
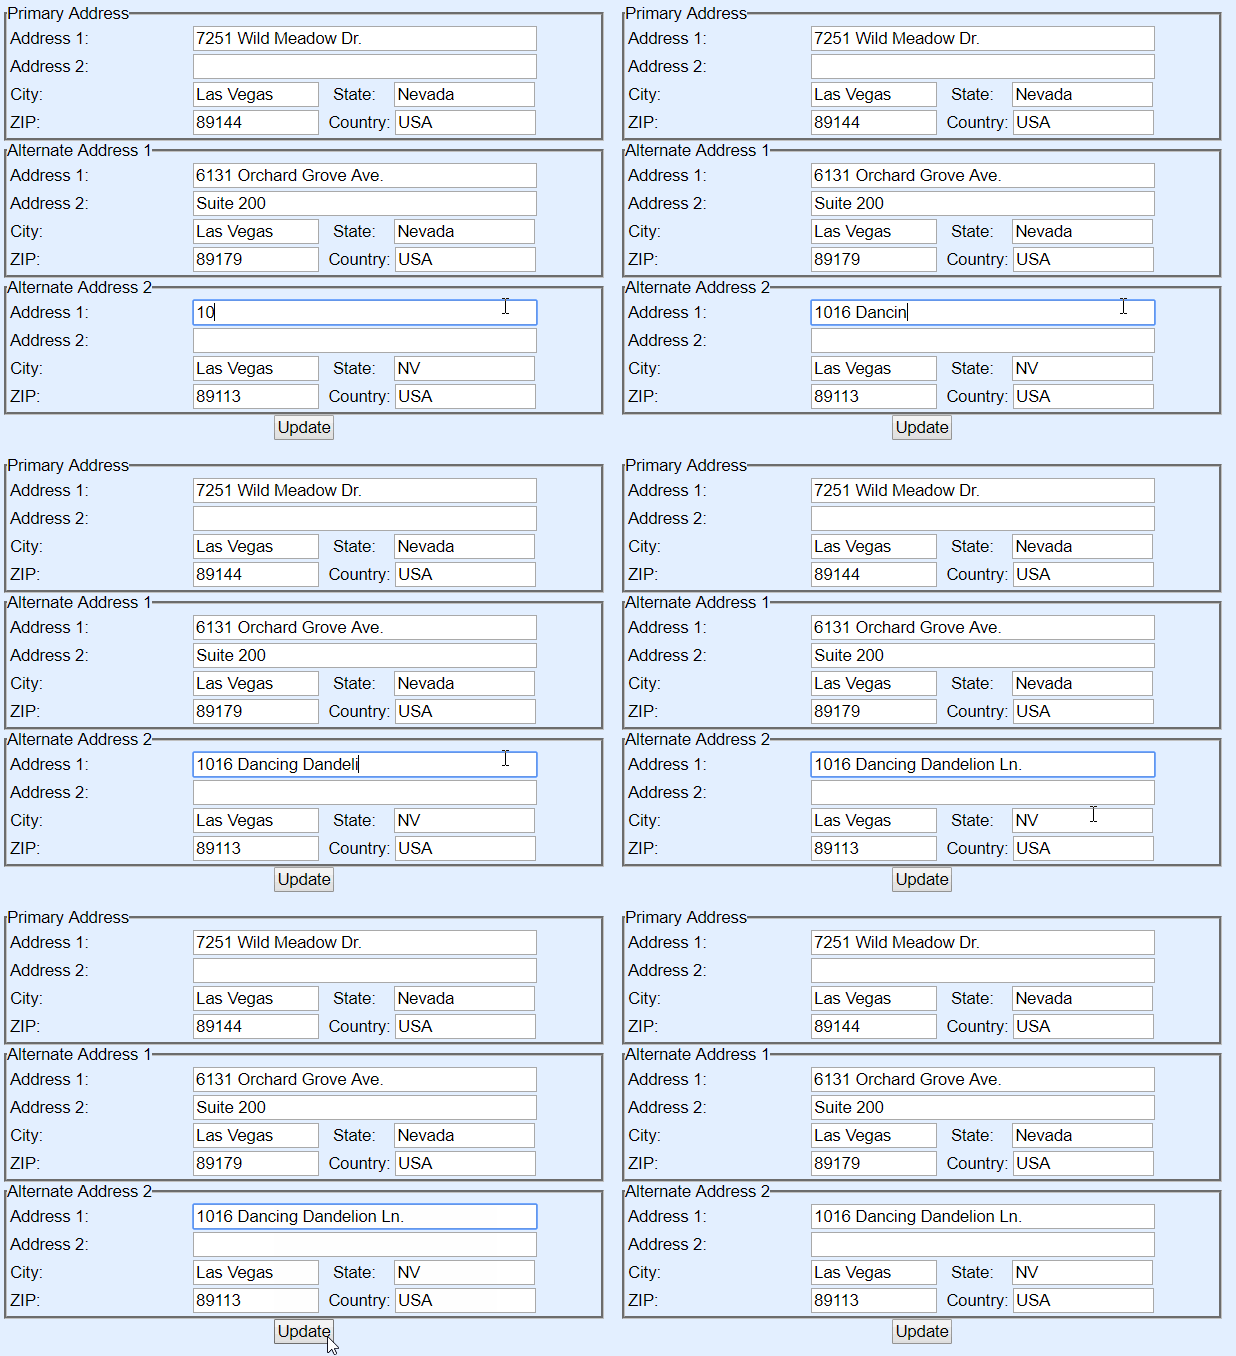
Add additional addresses.

Here you can capture up to 3 more addresses for this Guest.
Others
Here you can find variety of handy tools to further investigate Appointment information.

Guest Future Appointments
View a list of all future appointments this Guest has booked. Quickly see appointment details like the Activity, start & end times, reservation number, and status.
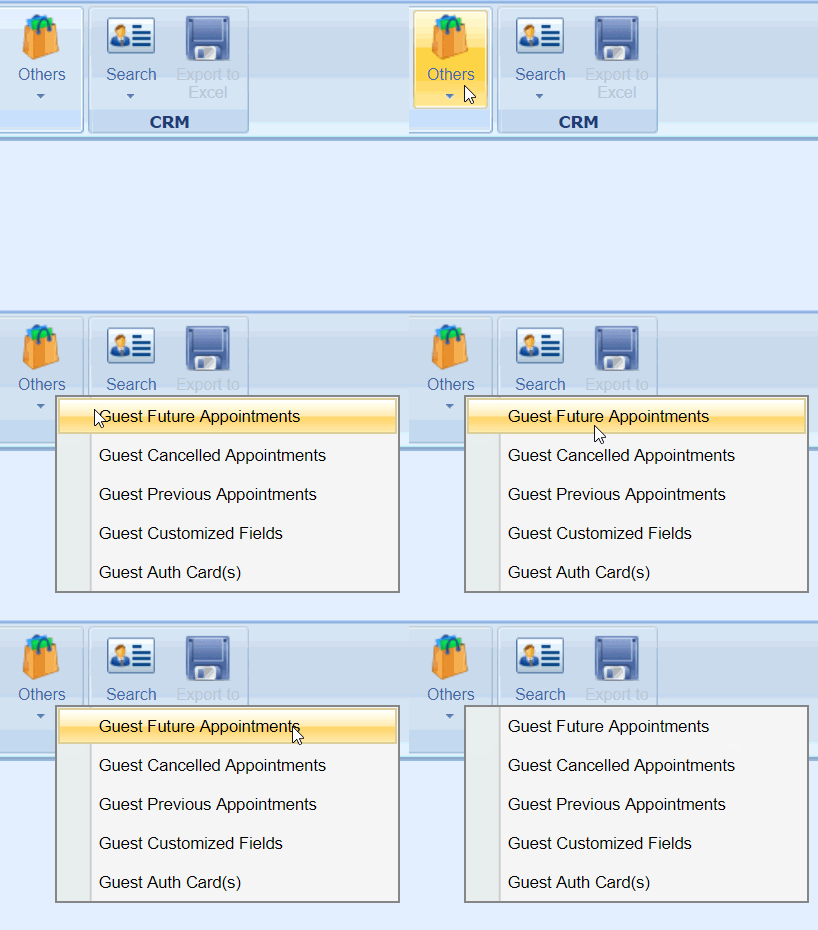
Select the + to see Resources assigned.

Guest Cancelled Appointments
View a list of all appointments this Guest has cancelled. Quickly see appointment details prior to the cancellation like the Activity, start & end times, reservation number, and status.
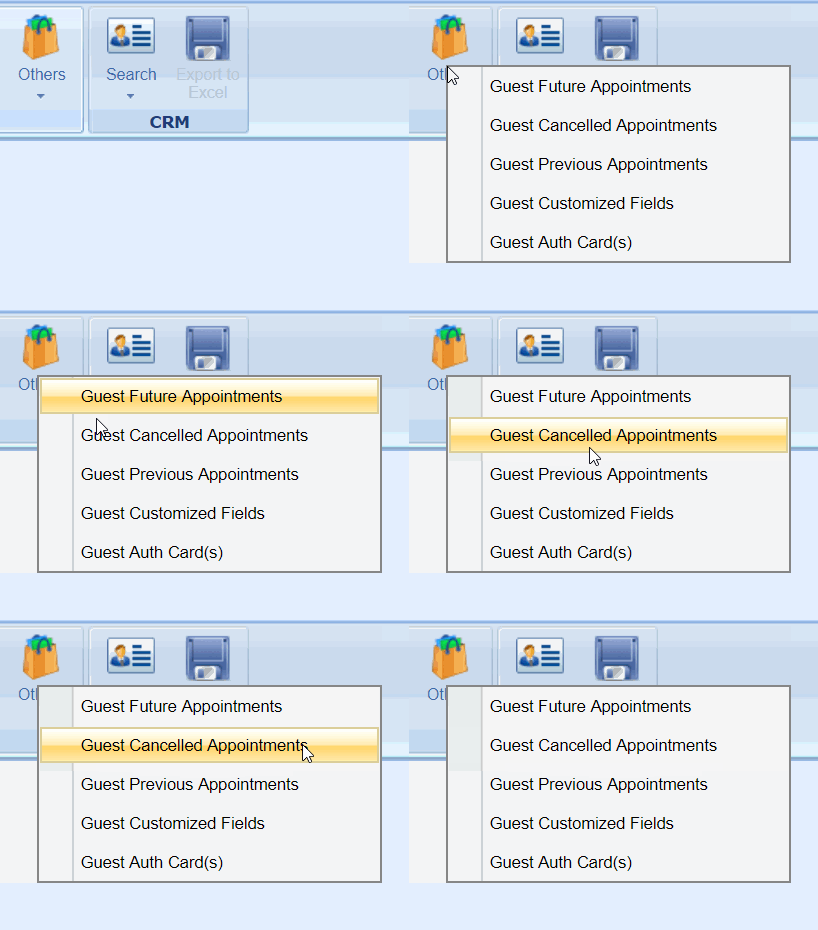
Select the + to see details of the cancellations

Guest Previous Appointments
View a list of all previous appointments this Guest has booked. This is similar to Purchases, except here you can look at more specific appointment details like start & end times, reservation number, and status.
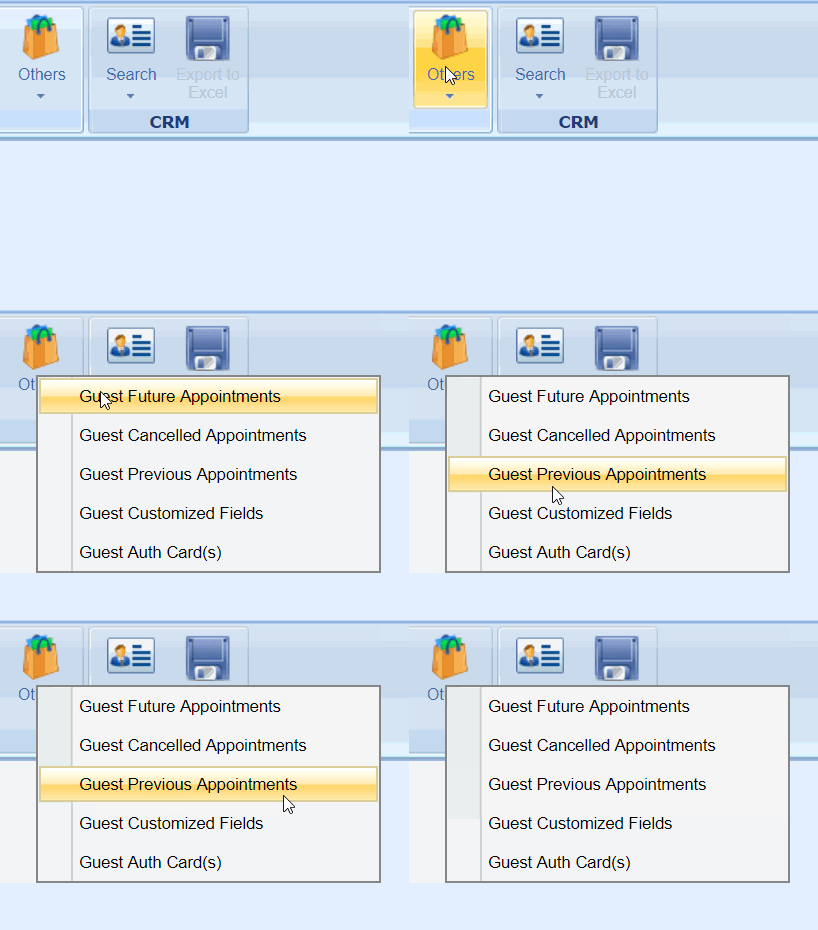
Select the + to see Resources assigned.

History
You can find the "History" in each screen above. This is a great tool used for tracking every action of the specified appointment.
View a full audit trail of each action performed such as booking, confirming, price changes, cancelling, and tendering payment.

Others - Guest Customized Fields
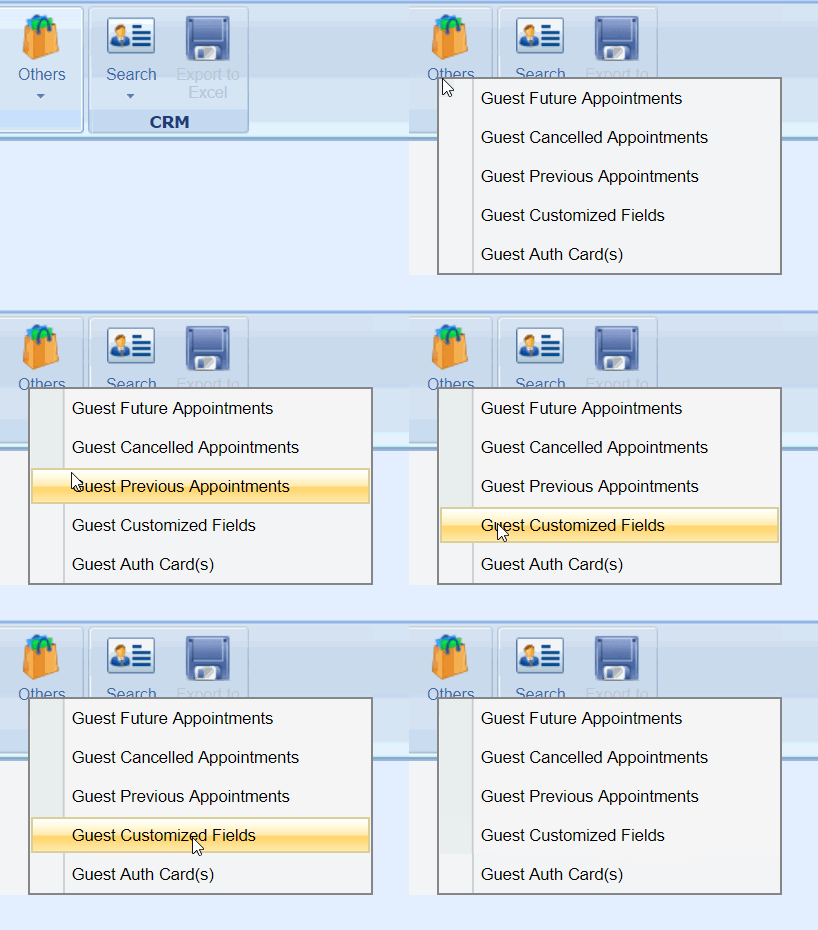
Custom Fields
The Guest Customized Fields option allows you to capture any additional information that is tailored to your business.
NOTE: These fields are pre-configured in the Configuration Module
To add a Custom Field
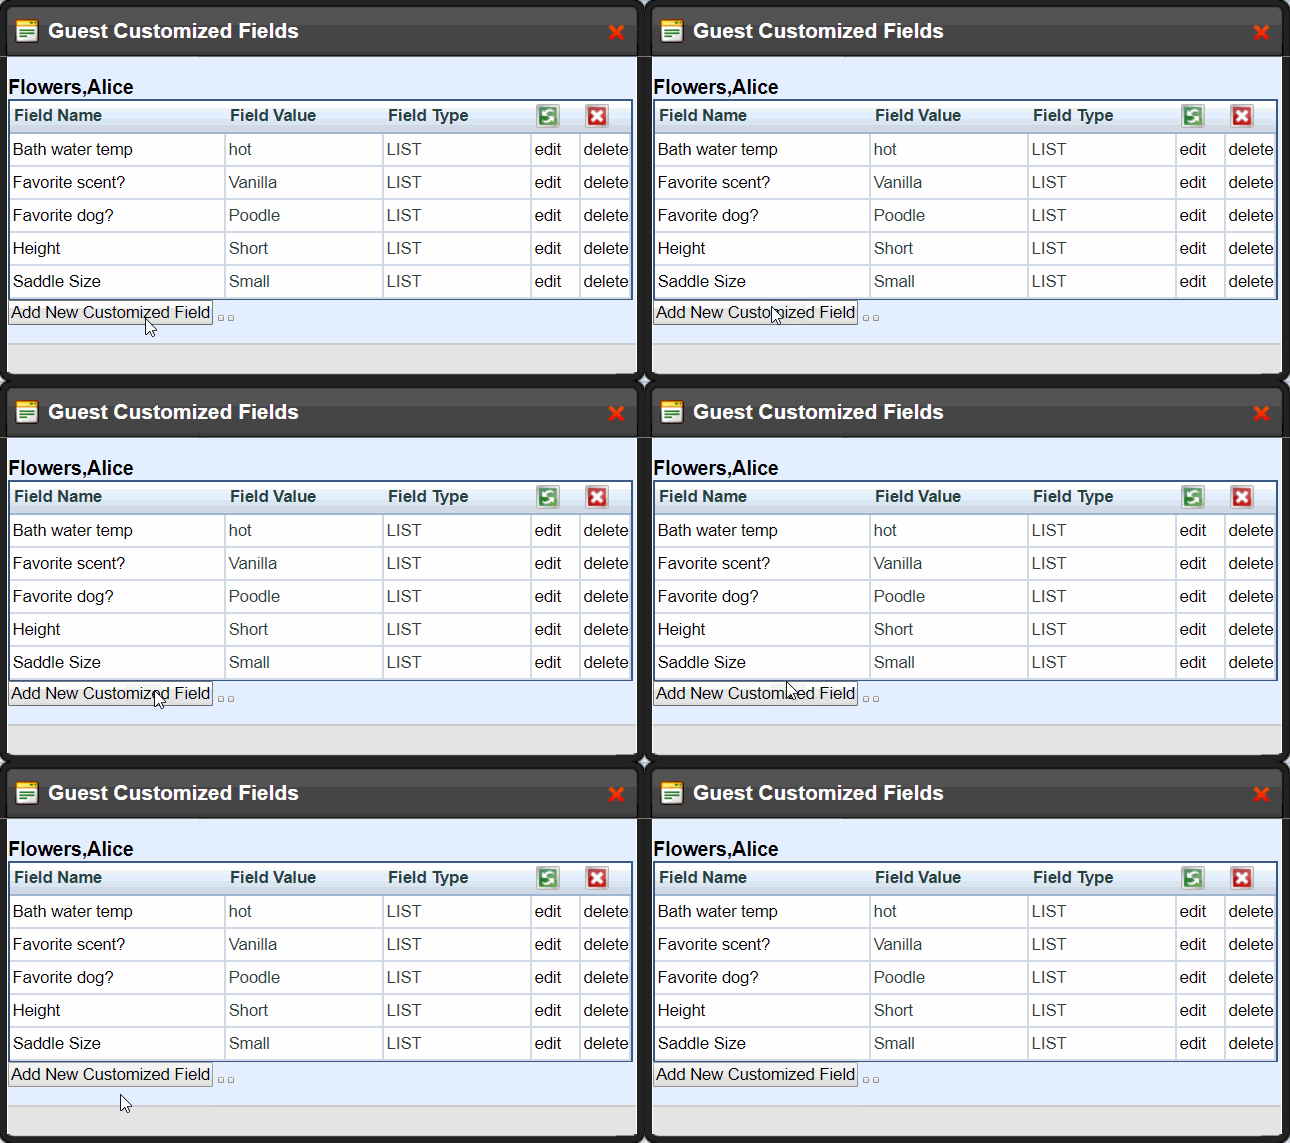
Step 1:
Select “Add New Customized Field”
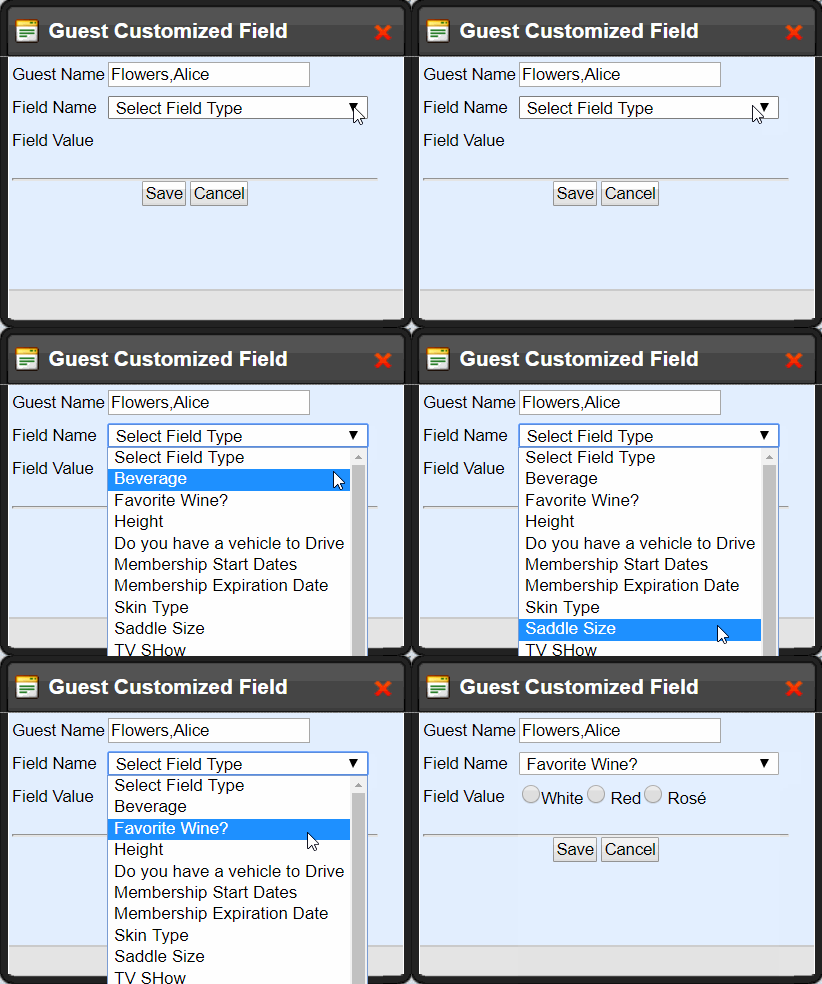
Step 2:
Select the Field Name from the drop down options
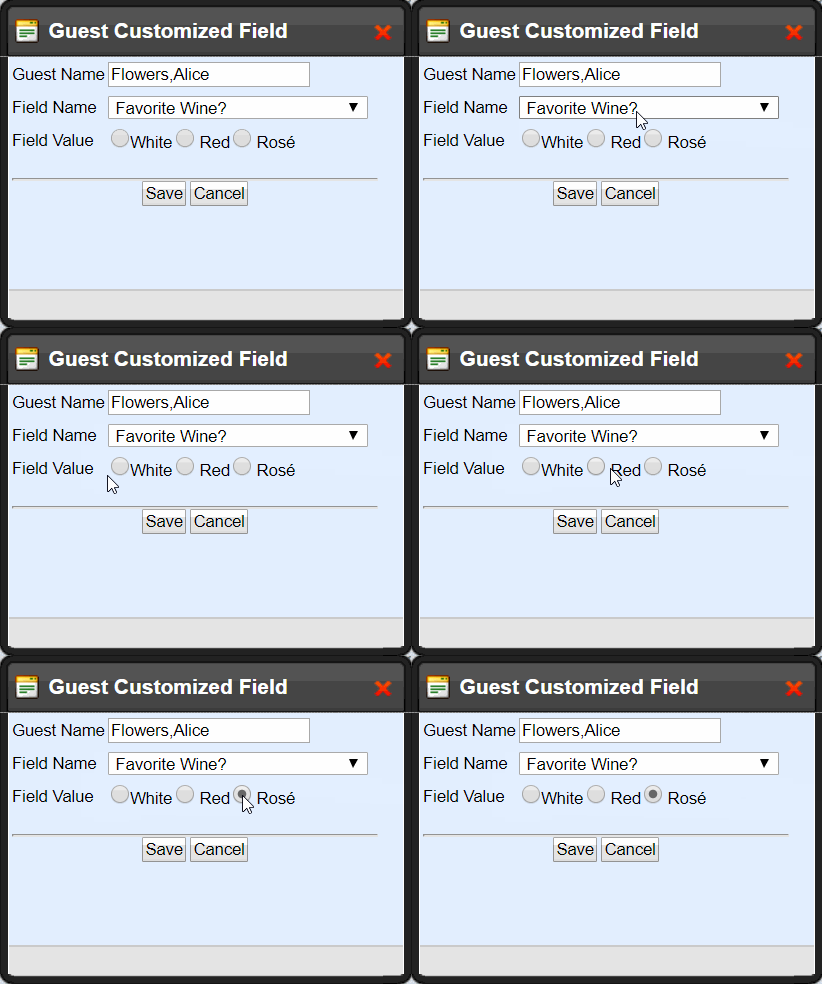
Step 3:
Select the desired value
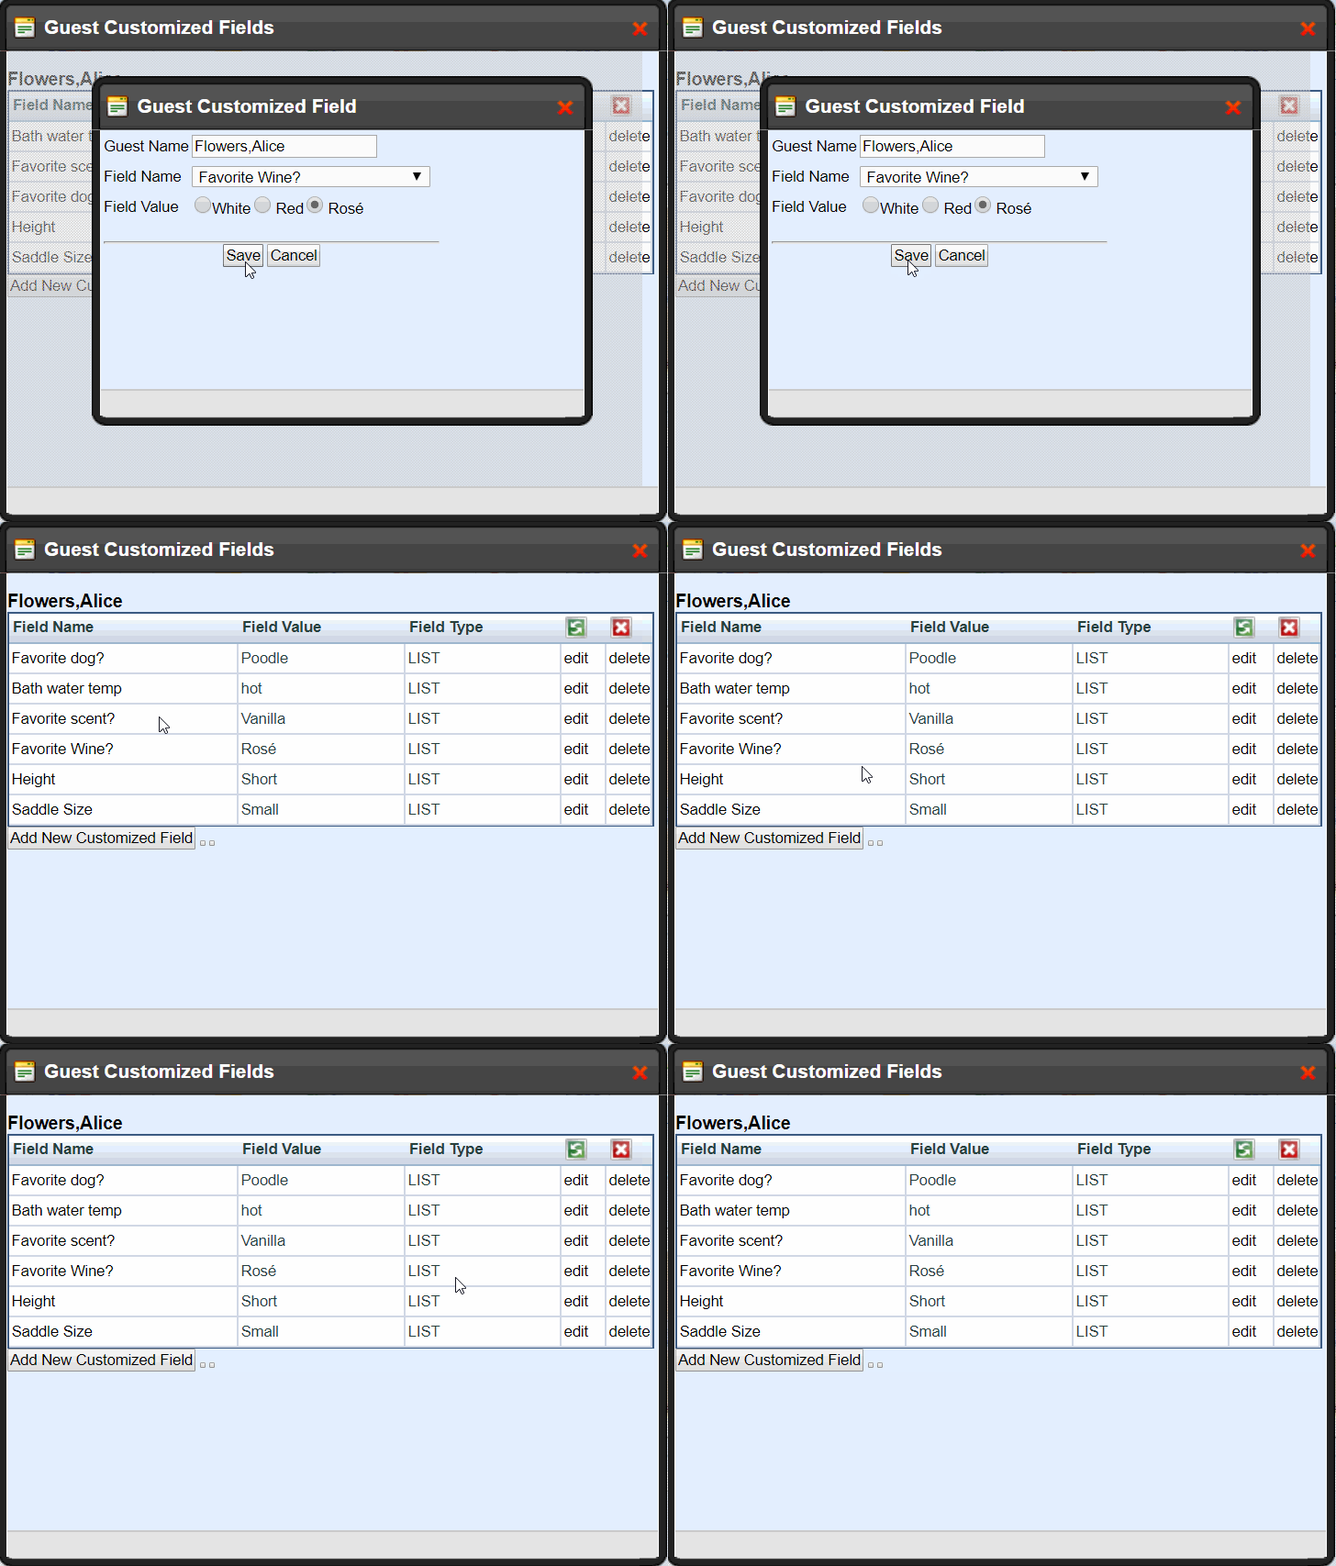
Step 4:
Select “Save” - you added a Custom Field!
Others - Guest Auth Card(s)
Cards on File
Here you can manage all credit cards that this Guest has on file. View (only the last 4 digits), add, or delete credit cards.
NOTE: Cards are stored using our secure Payment Safe that saves them as encrypted tokens
NOTE 2: You must be registered to a POS terminal to complete this process
To Add a Card on File
Step 1:
Select Add New Card

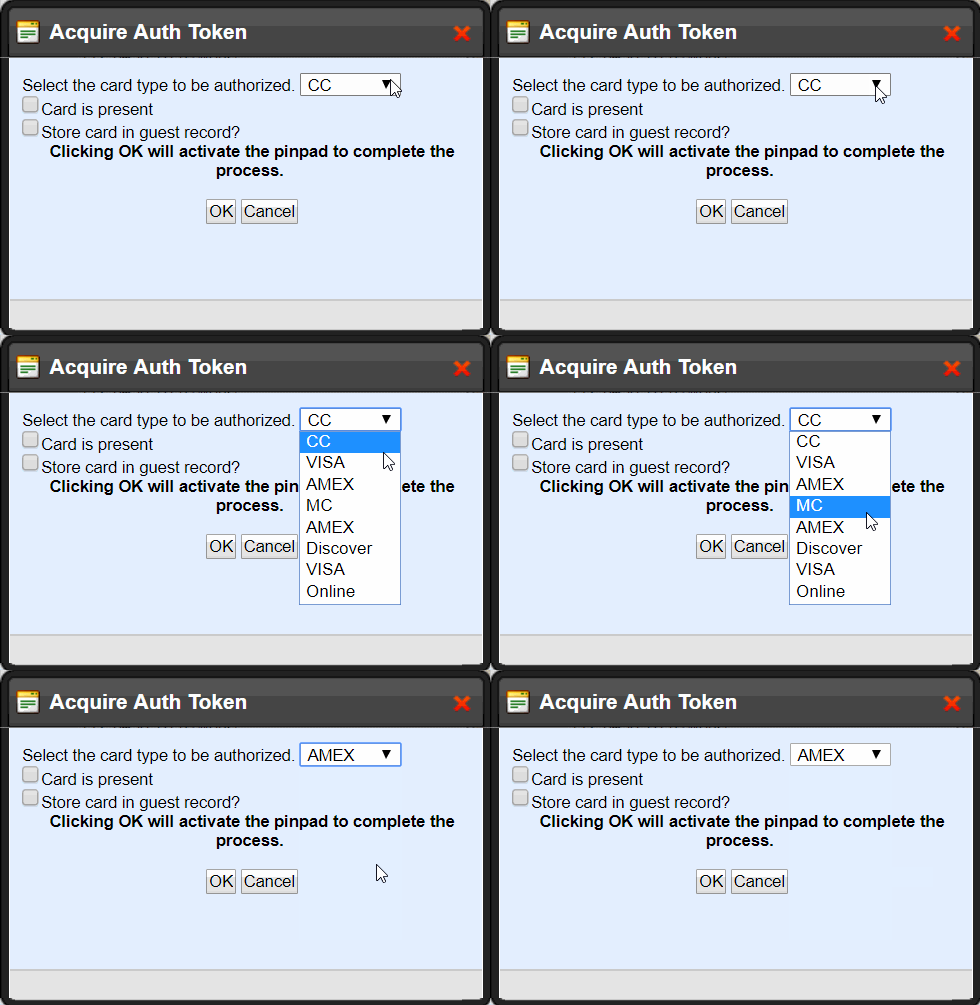
Step 2:
Select the type of credit card from the drop down list
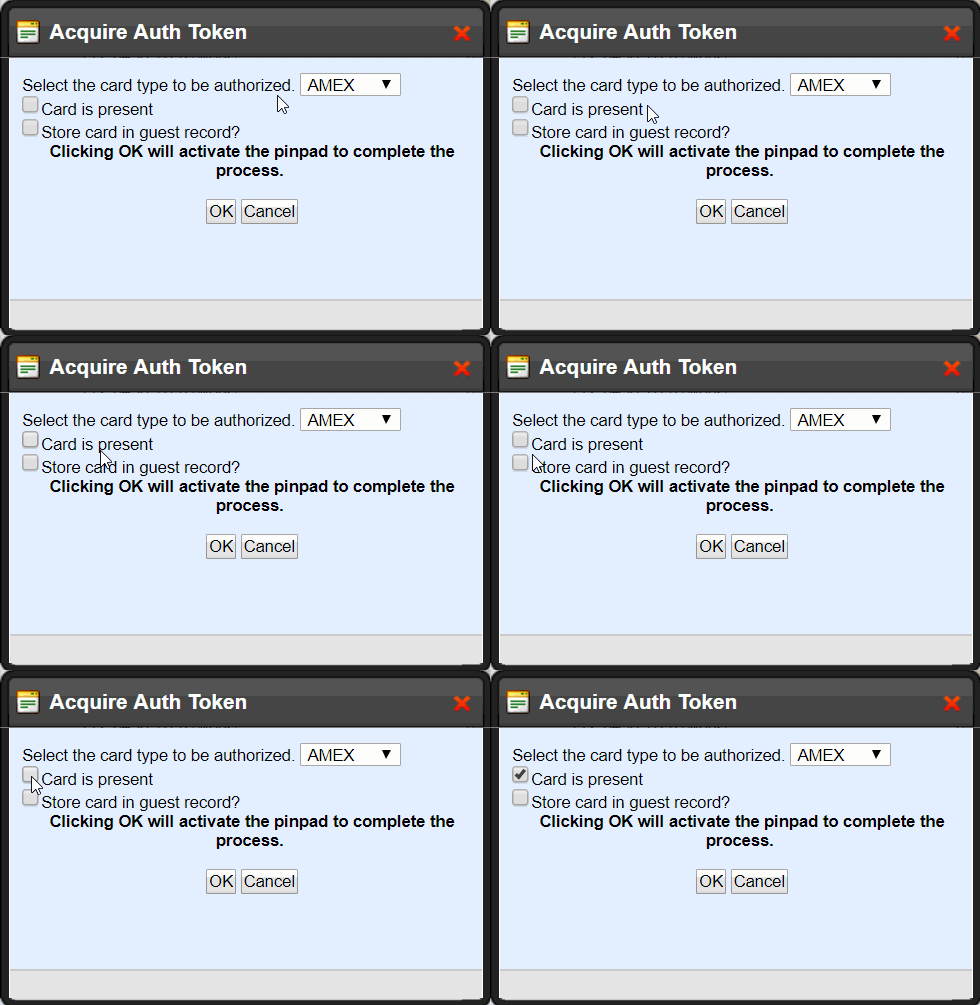
Step 3:
Select “Card is present” if the physical card can be swiped with the credit card reader - leave the box blank if the card needs to be manually punched in using a pin pad
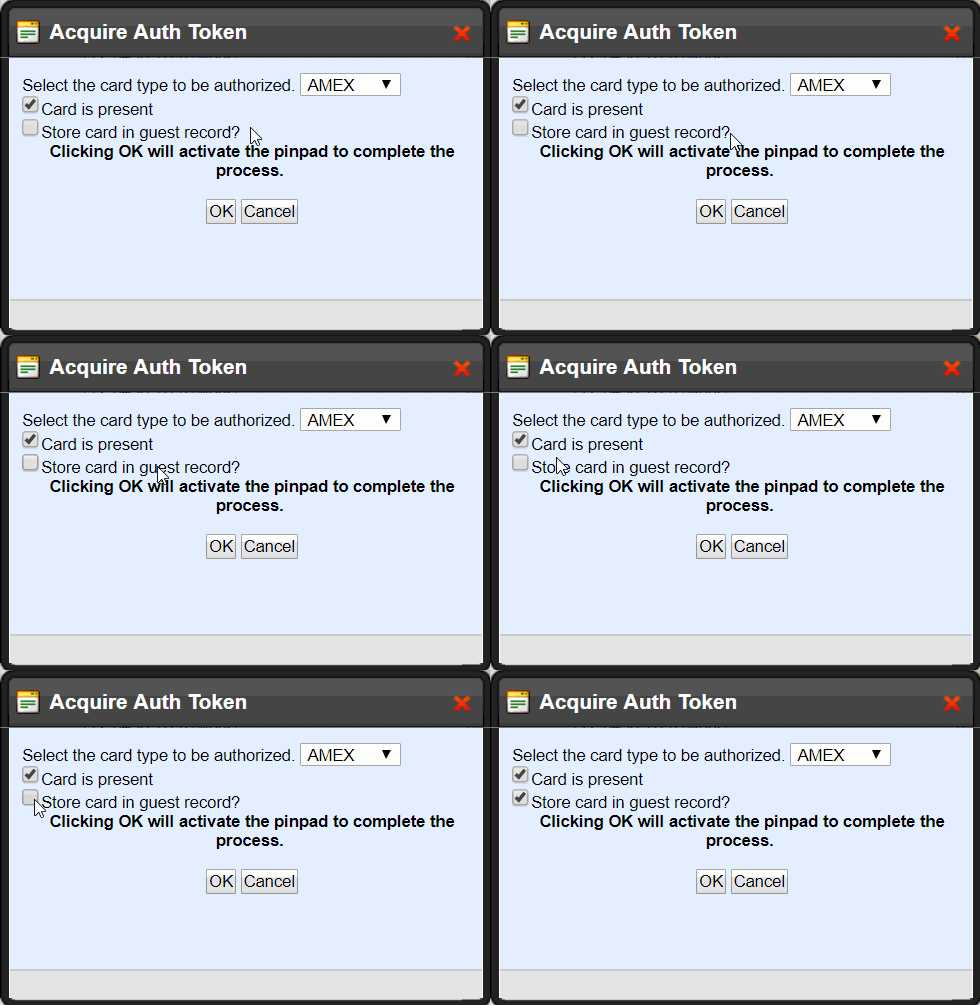
Step 4:
Select “Store card in guest record”
Step 5:
Select "OK"
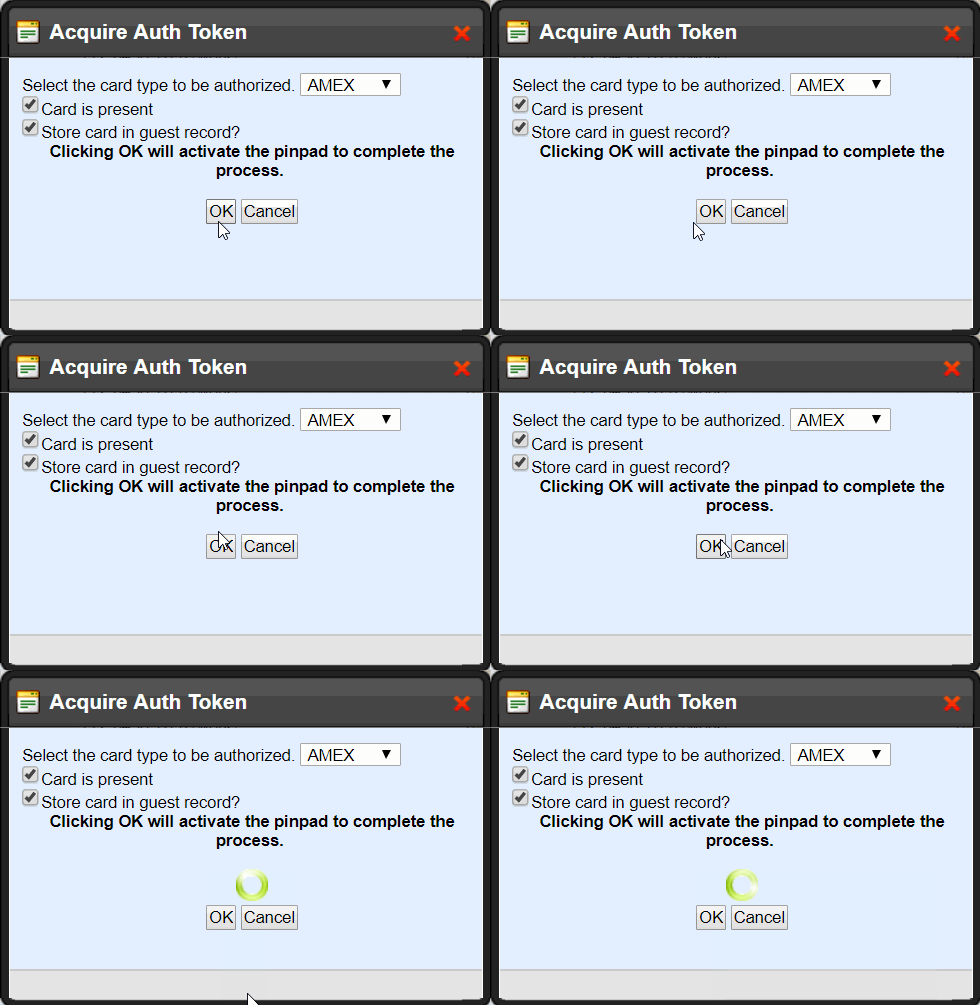
Step 6:
Wait for the success message - you added a card on fine!
You can now use this "token" to pay for future purchases

NOTE: Must be processing payment through an authorized payment processor that is authorized by SkyWire. For your safety we do not store credit card information in plain sight, we store them as encrypted tokens which you can then use to process payment.
