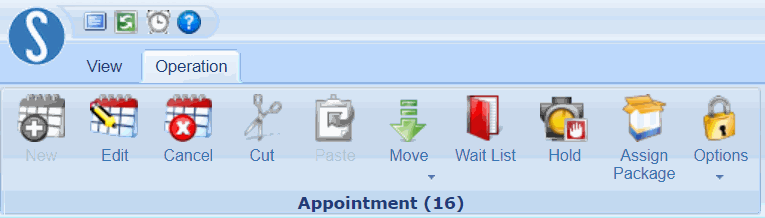
![PALUSA New Logo Transparent-1.png]](https://helpcenter.skywire.com/hs-fs/hubfs/PALUSA%20New%20Logo%20Transparent-1.png?height=50&name=PALUSA%20New%20Logo%20Transparent-1.png)

NOTE: If you are booking on a touch-screen tablet, you will have to highlight the timeslot and select “New”
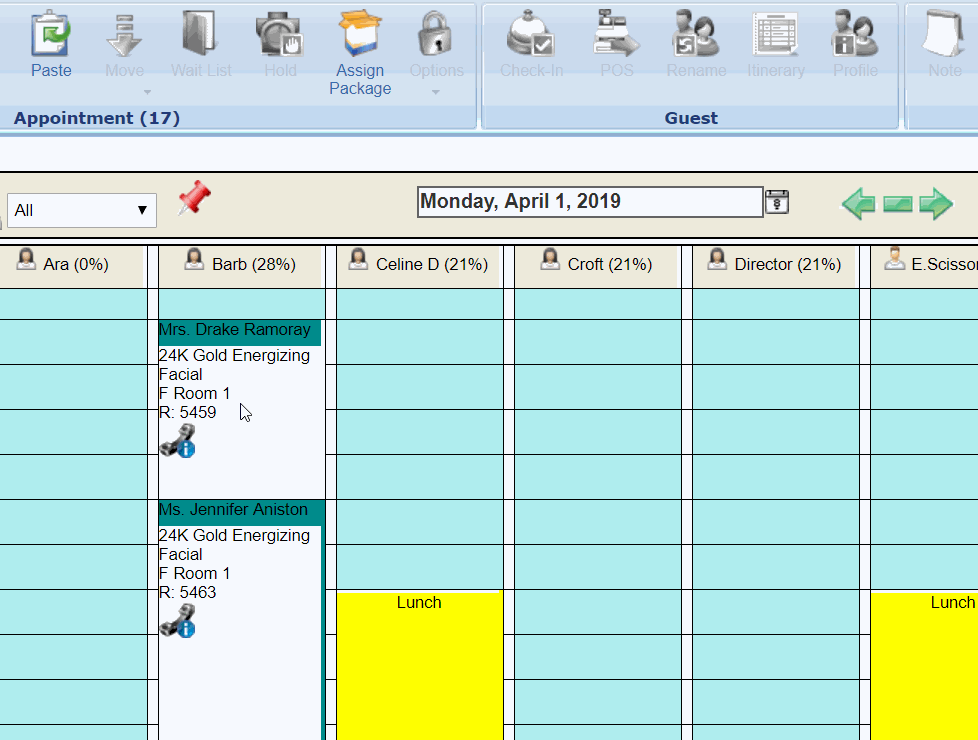
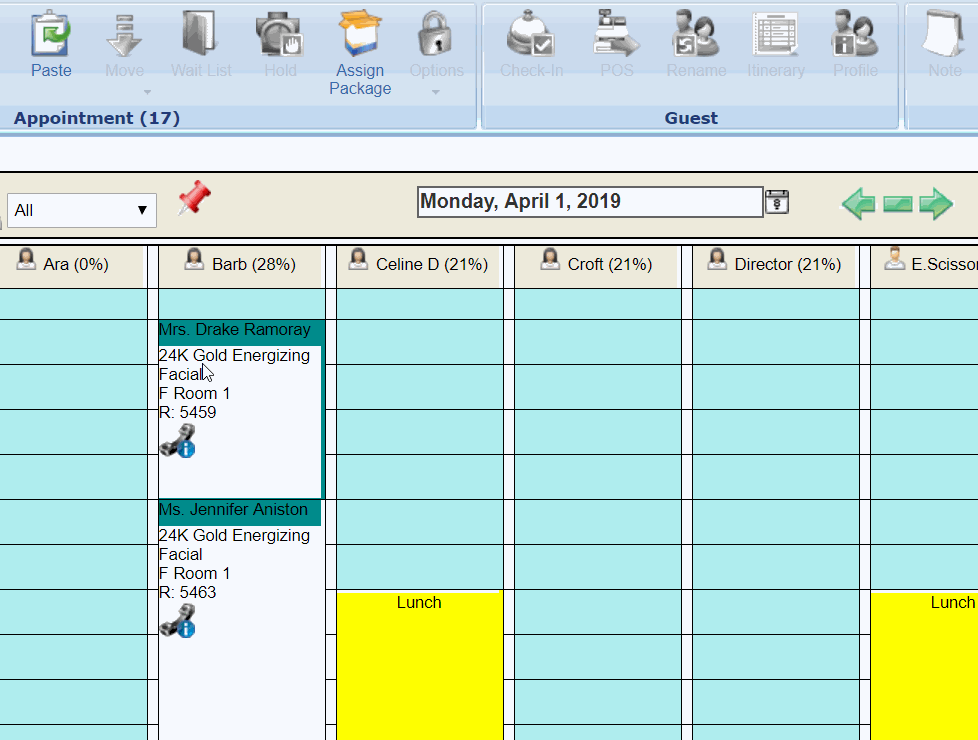
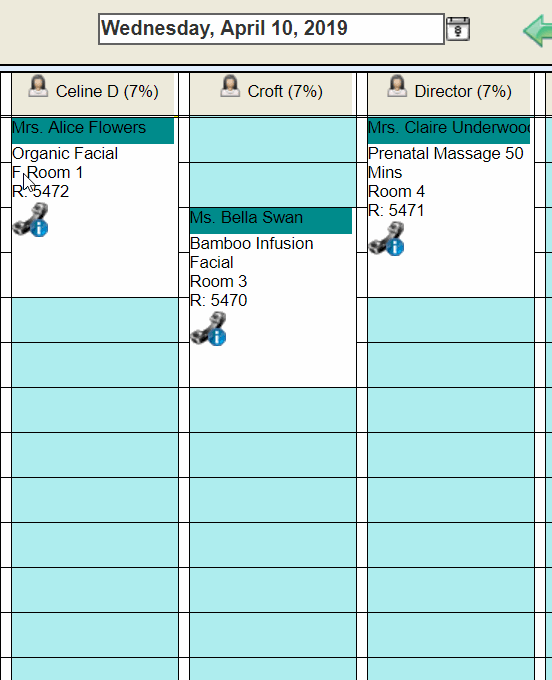
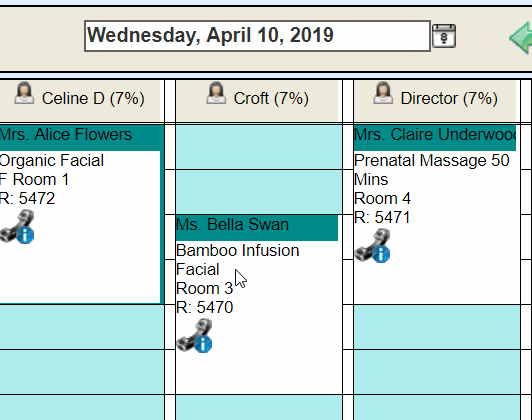
You can access the Edit screen by double-clicking on an appointment or highlighting the appointment and selecting "Edit."

Here you can edit the Activity, Resources, Duration, Price, and color of an appointment.
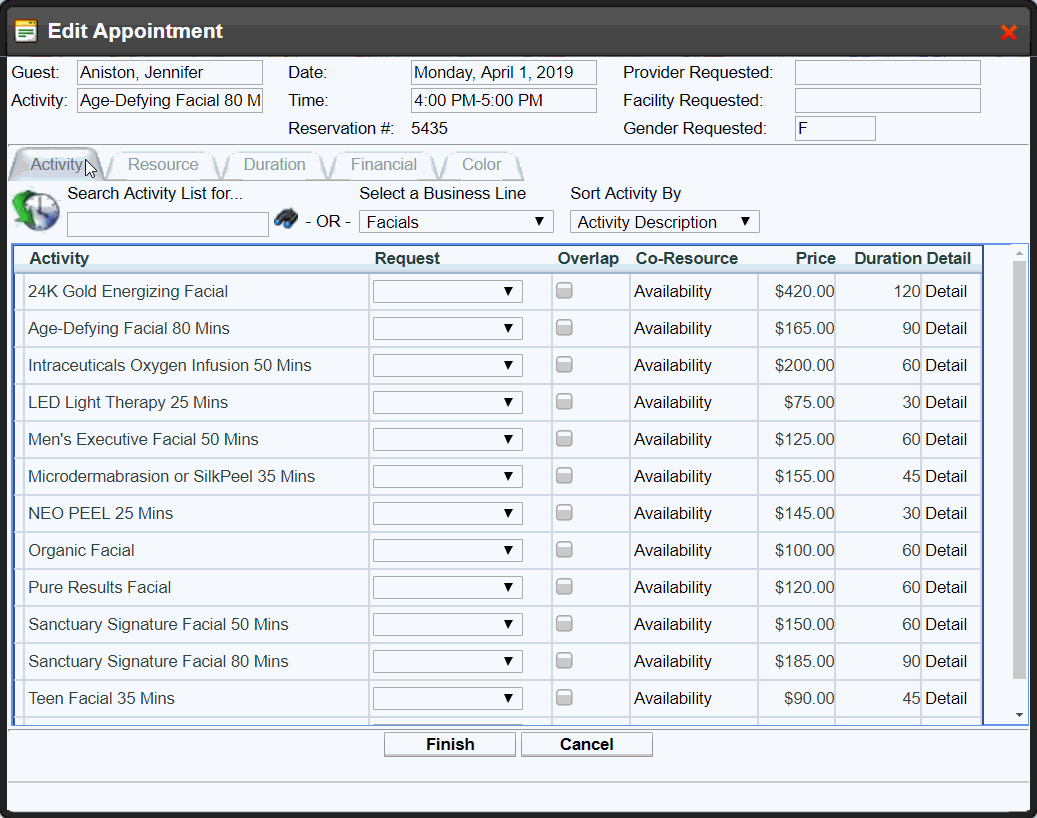
NOTE: You must edit each tab at a time and select Finish in order for your changes to save
You can access the cancel screen by double-clicking on an appointment or highlighting the appointment and selecting cancel.

Canceling will send an SMS Text to the associated Provider.
NOTE: Provider’s SMS phone number must be configured into their Employee Profile.
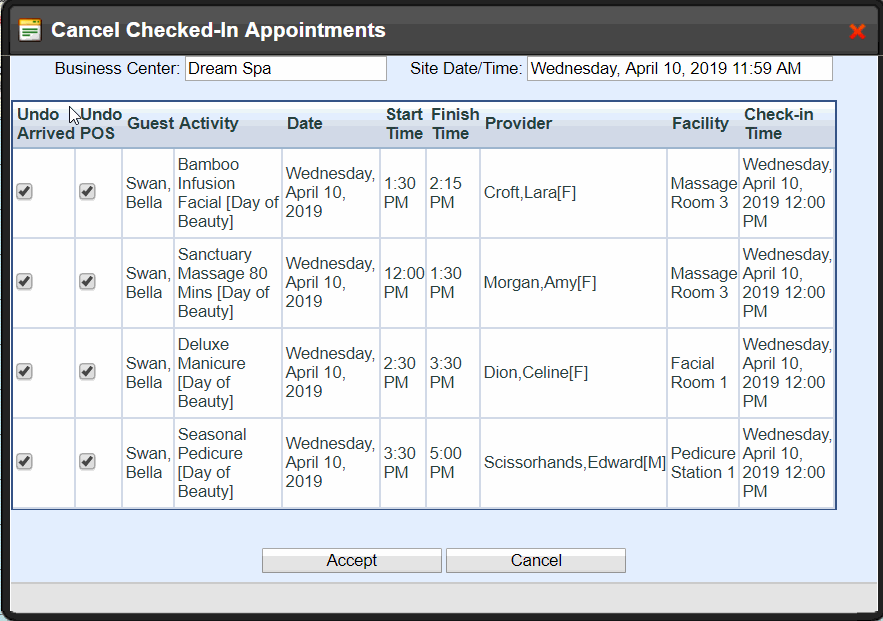
To Cancel an Appointment
Step 1:
Access the Cancel function by double-clicking the appointment or
highlighting the appointment and then selecting "Cancel"
Step 2:
The Cancel screen will list all appointments under this Guest

Step 3:
Select the appointment(s) you wish to Cancel
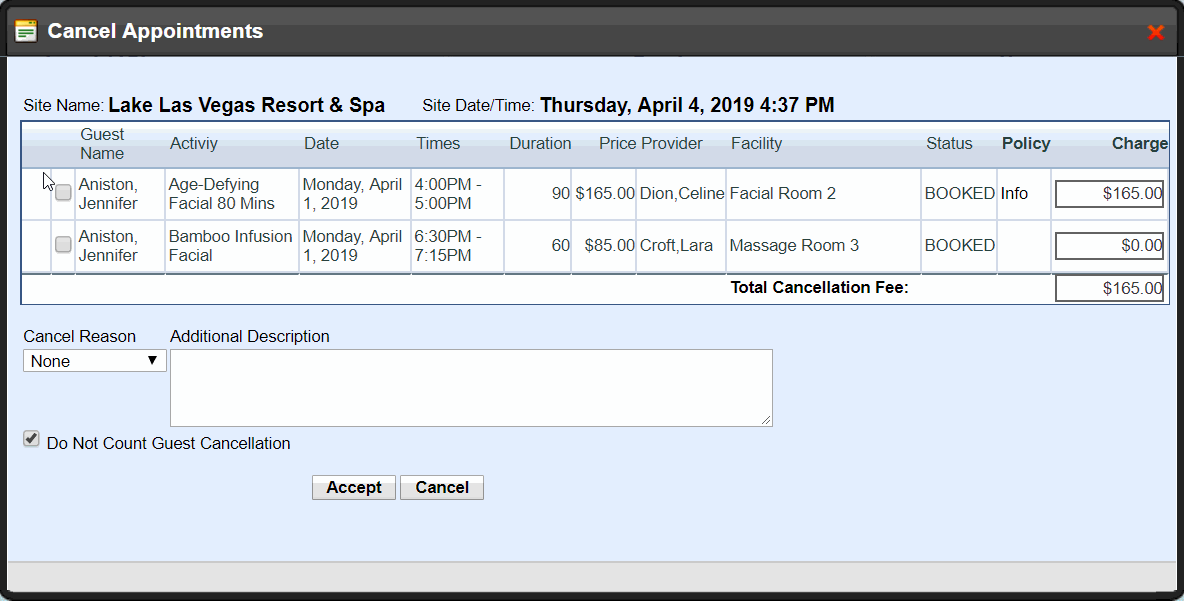
Step 4:
Select a Cancellation Reason from the drop-down list - Additional Description is optional

Step 5:
Select this checkbox if you do not want to count this cancellation against the Guest - this will automatically take you to their POS profile so you can settle payment or remove the charge
Leave it unselected if you do not want to count this cancellation against the Guest - this will simply Cancel the appointment and not post the cancellation charge to their POS profile
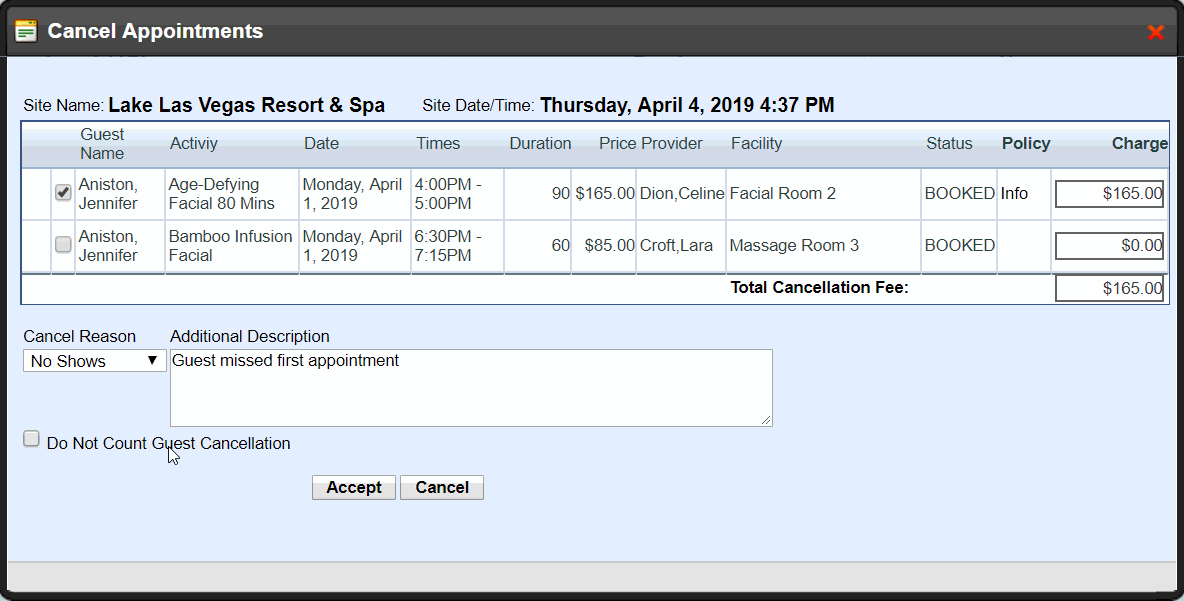
Step 6:
Select "Accept" - you have cancelled an appointment!
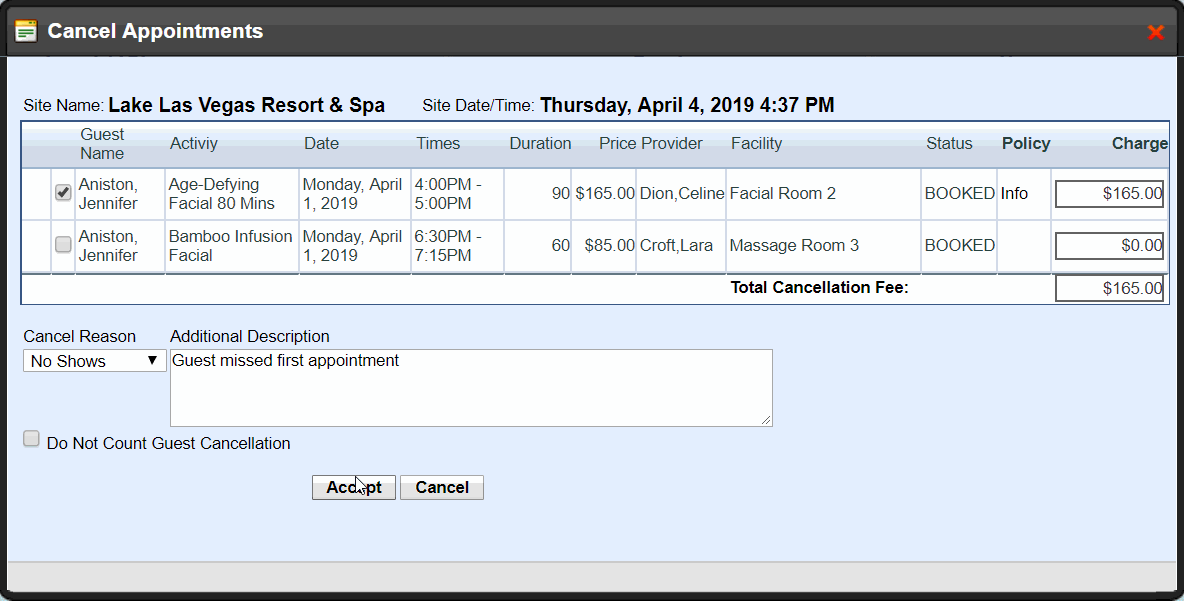
NOTE: You must have a Cancellation Policy in place and configured so the system can automatically calculate the cancellation charge

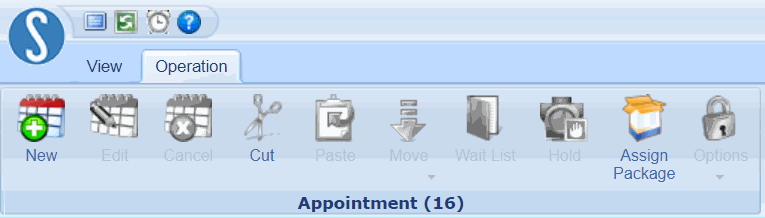
Use this function to cut an appointment from the Visual Book.
Remember! Appointments that have been cut and not yet pasted will be stored on the Cut Board.
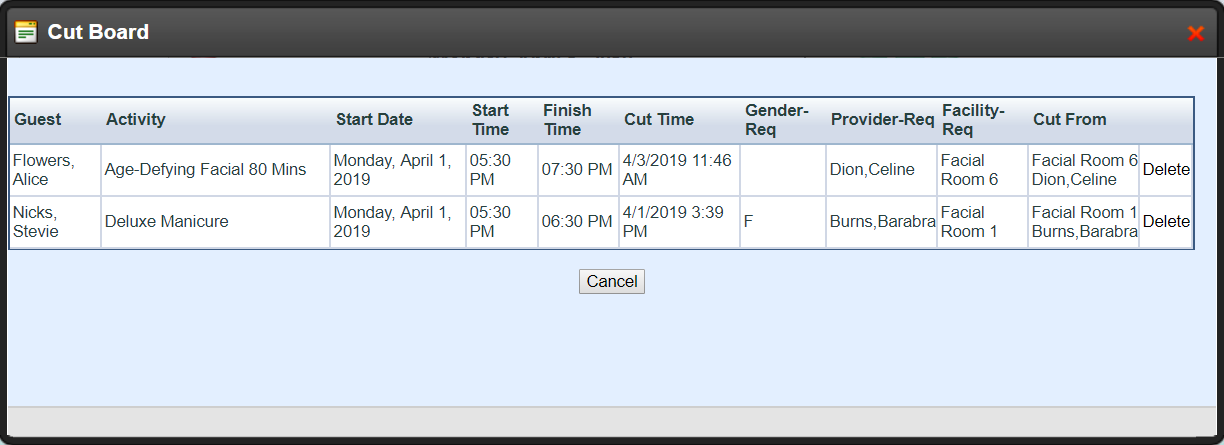
NOTE: It is recommended that you review the Cut Board at the end of each night to avoid any neglected appointments
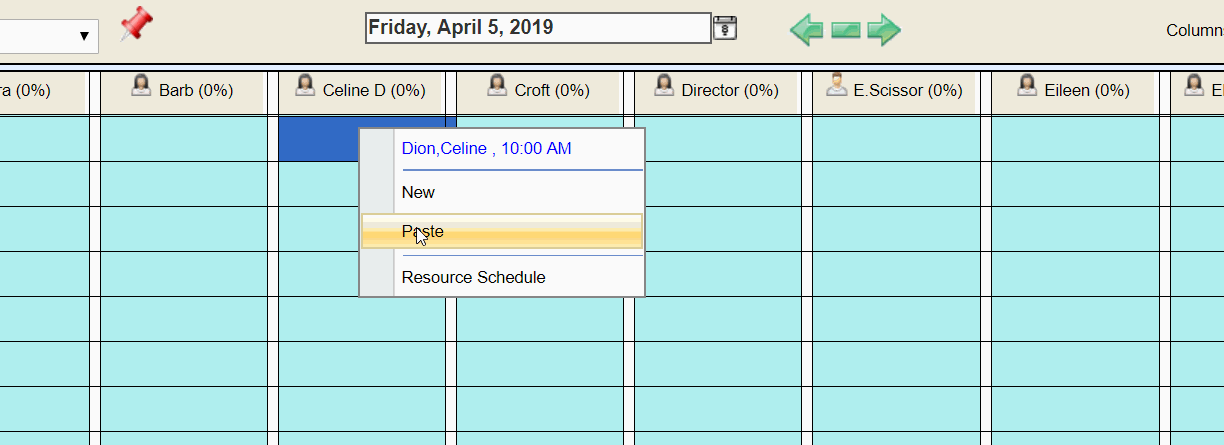
You can access the Paste function by double-clicking on an appointment or highlighting the appointment and selecting Paste.
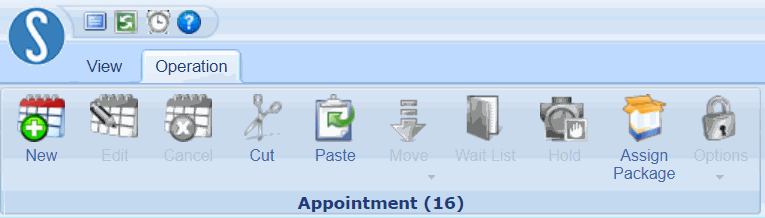
Use this function to Paste a Cut appointment onto an available timeslot or overlap slot, given the Resource is qualified to perform it.
To Paste an Appointment
Step 1:
Access the Paste function by double-clicking an available appointment slot or
highlighting the appointment slot and then selecting "Paste"

Step 2:
If there is only one appointment on the Cut Board, it will automatically paste - you pasted an appointment!
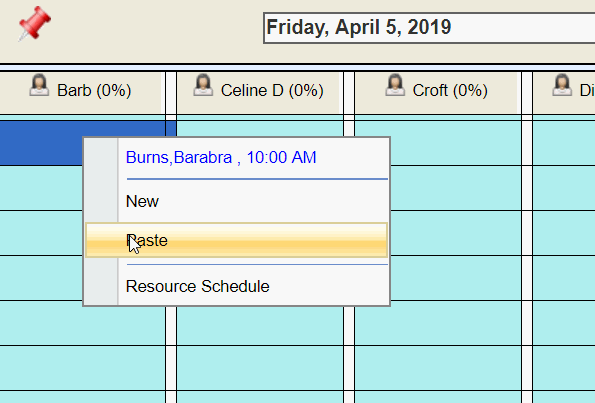
Step 3:
If there is two or more, it will prompt you to select which to paste.
Highlight the appointment you wish to Paste & select "Finish" - you pasted an appointment!
If there are any Resource conflicts when trying to Paste, your browser will show an error message indicating what the conflict is.
For example, the error message below indicates that the appointment was "Provider Requested," and the user was attempting to Paste it onto the Provider that was not requested.


You can automatically move appointments to another qualified Resource if in case the current Resource becomes unavailable - similar to cutting and pasting.
To Selected Resource
This option allows you to specify who you wish to move the appointment to while maintaining the appointment details. Select a new Resource from the List and select Accept.
From the Appointment
Here you can move the single appointment that you double-click on
From the Operation Ribbon
Here you can move ALL appointments for this Resource
To Qualified Resource
This option quickly moves the appointment to the next available Resource based or start time and priority while maintaining the original appointment details.
From the Appointment
Here you can move the single appointment that you double-click on

From the Operation Ribbon
Here you can move ALL appointments for this Resource
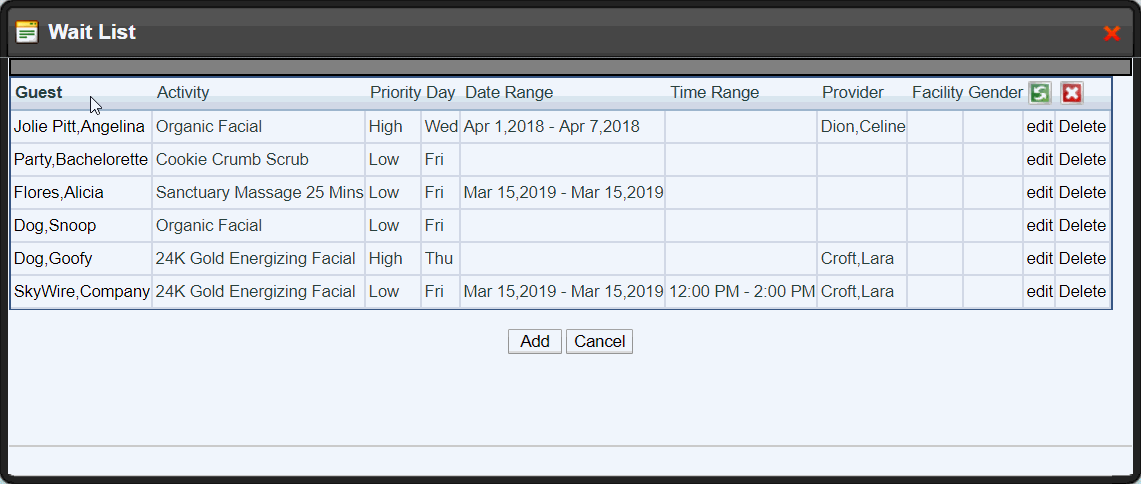
Waitlist
You can access the waitlist by highlighting any appointment and selecting "Waitlist."

Here you can add an appointment to the waitlist if a Guest wishes to book an appointment at a time that is not available. If the requested appointment timeslot becomes available, you can book the appointment directly from the waitlist.
To add a New Appointment to the Waitlist
Step 1:
Highlight the appointment slot that the Guest would like to wait for
Step 2:
Select "Waitlist" from the Ribbon
Step 3:
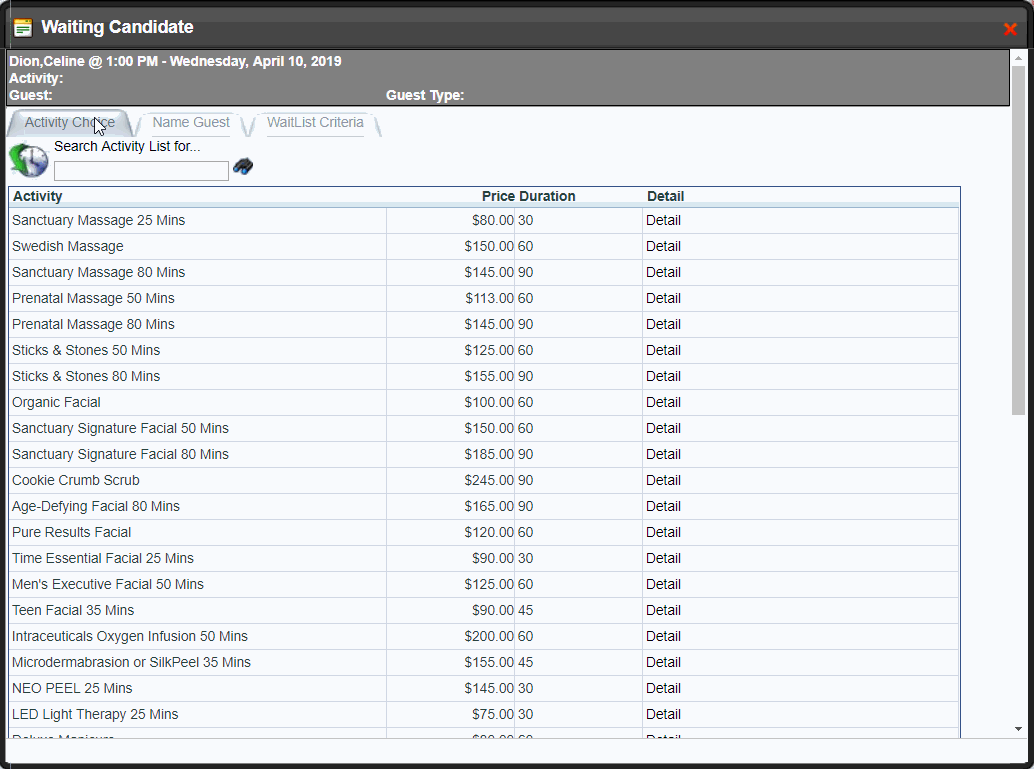
Select “Add”
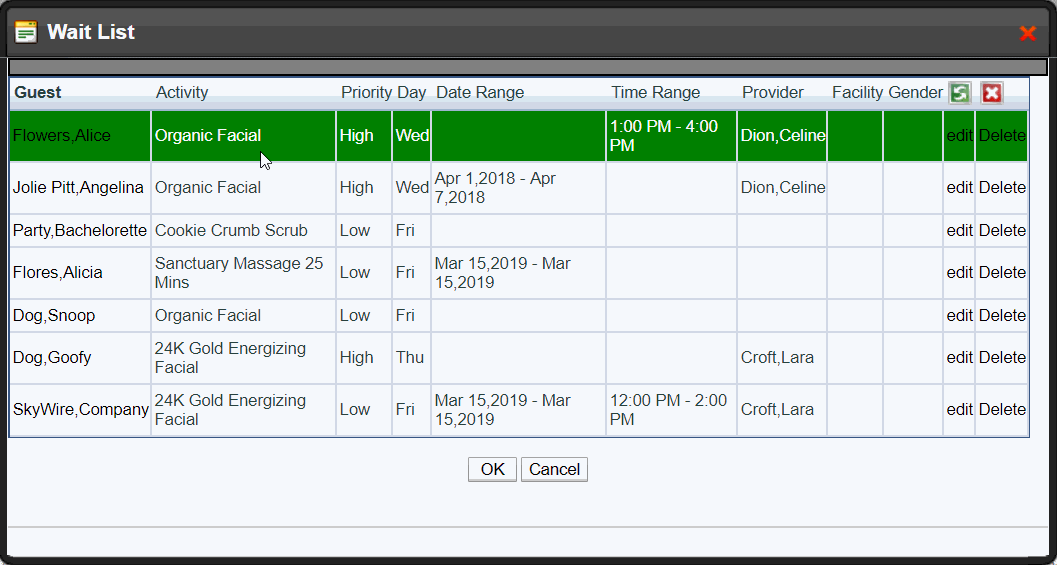
Note: Here you can view all appointments that are currently on the Waitlist
Step 4:
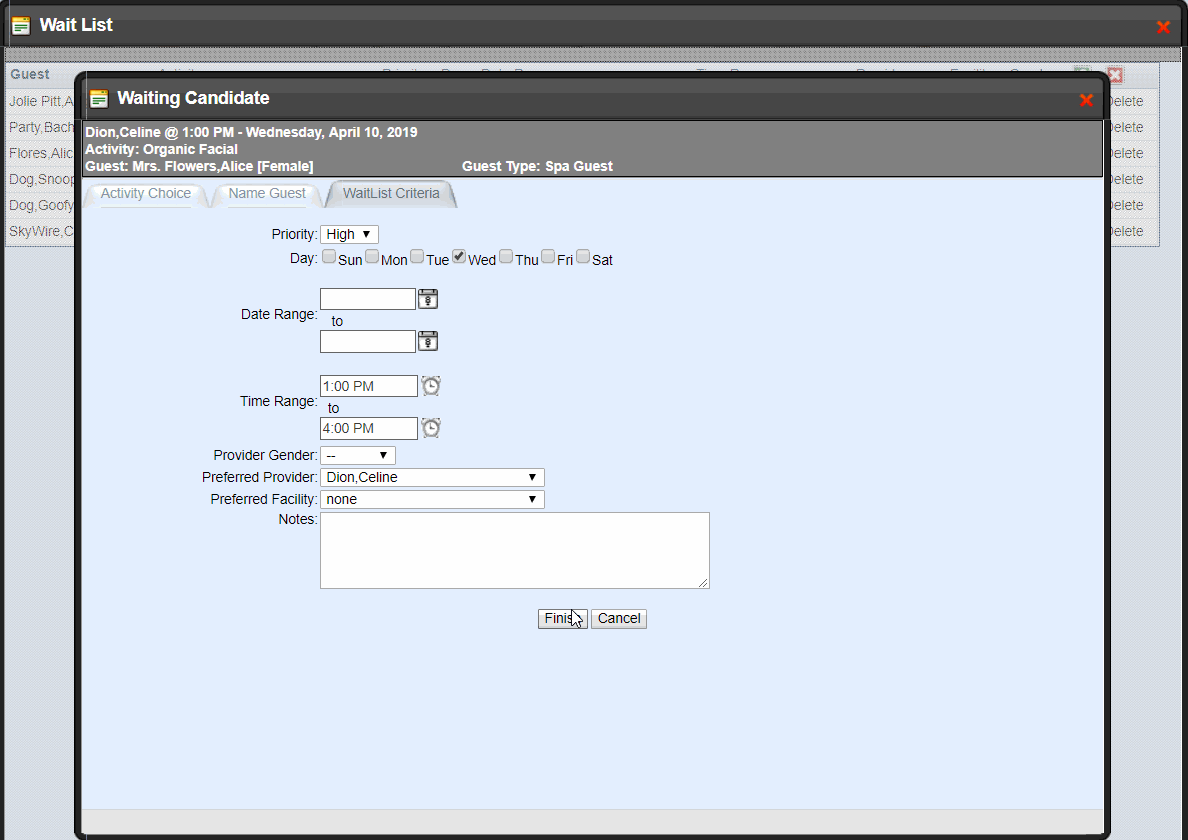
Specify the Activity, Name the Guest, and assign the Waitlist Criteria
Step 5:
Select "Finish" - you added an appointment to the Waitlist!
Here you can add an appointment to the waitlist if a Guest wishes to book an appointment at a time that is not available. If the requested appointment timeslot becomes available, you can book the appointment directly from the waitlist.
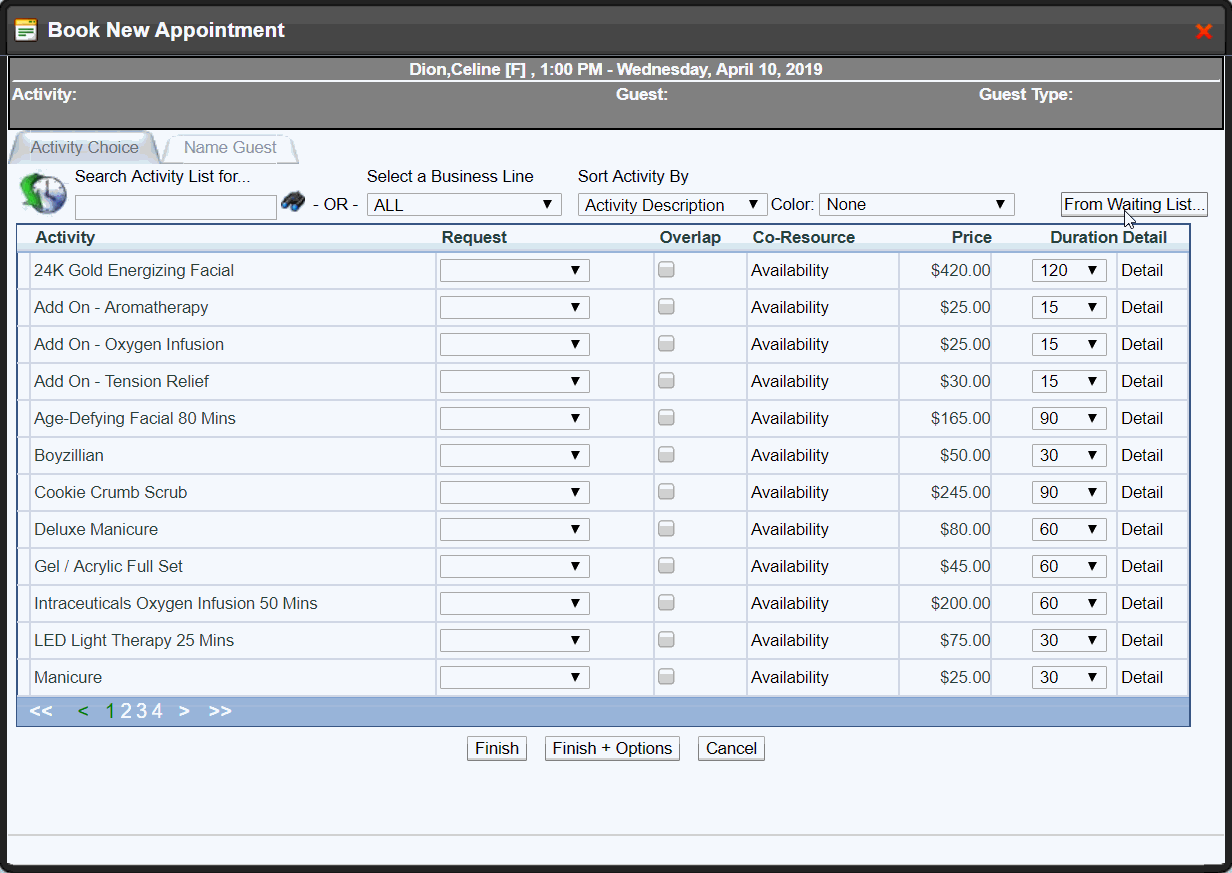
To Book an Appointment from the Waitlist
Step 1:
Double-click on the available timeslot or highlight the timeslot and select "New"
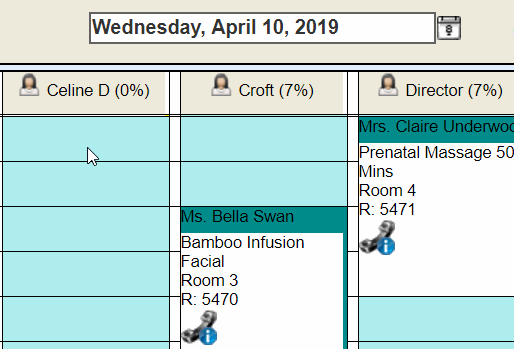
Step 2:
Select "From Waiting List"
Step 3:
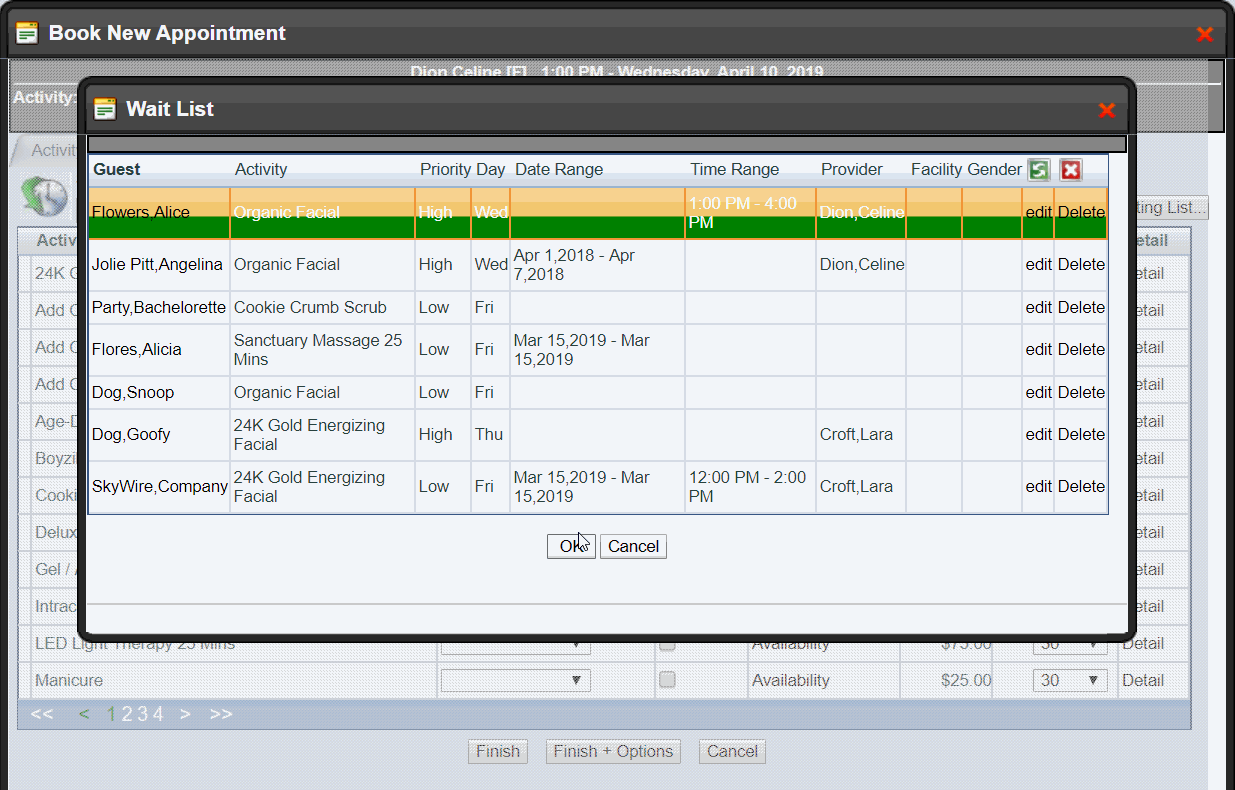
Appointments whose waitlist criteria fit the timeslot will be highlighted in green - select the appointment you wish to book
 Step 4:
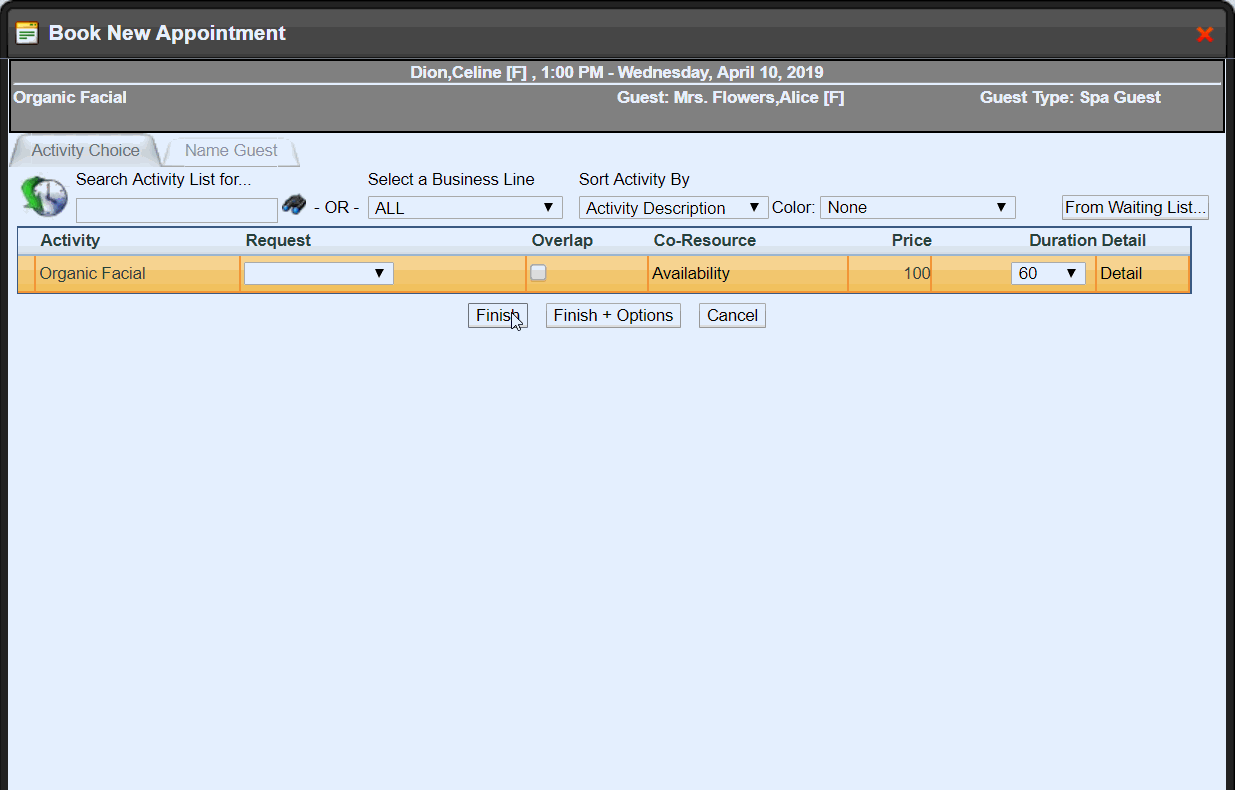
Select "OK" - appointment details will automatically populate
 Step 5:
Select "Finish" - you booked an appointment from the waitlist!
Here you can set an appointment on Hold based on your configured Hold Policy.
During the reservation process or any time prior to confirmation or check-in, you may place an appointment on hold as a courtesy to the Guest. Your configured Hold Policy determines how long this hold may be. Once a hold has been established, the appointment cannot be moved unless the hold status is first removed.
NOTE: Appointments on hold that are subsequently cancelled are not subject to cancellation fees.
To Set an Appointment on Hold
Step 1:
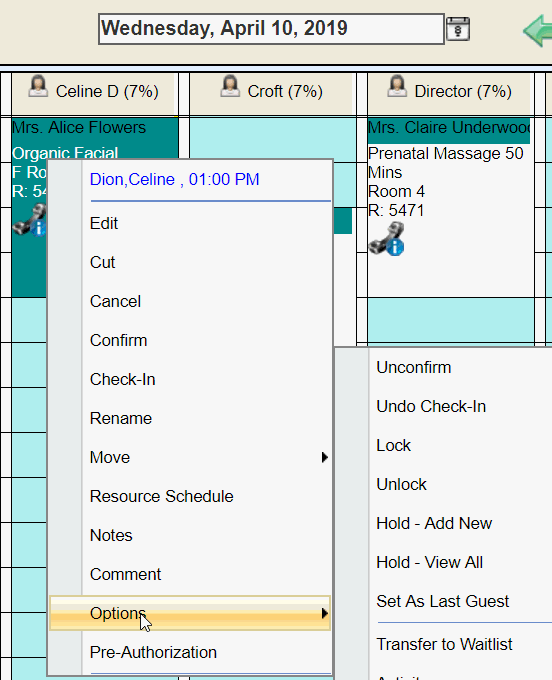
Double-click appointment and navigate to "Options"
Step 2:
Select Hold-Add New
Step 3:
Select which appointments you would like to place on hold

Step 4:
Select Hold Policy from drop down options

Step 5:
Select "Accept" - you set an appointment on hold!
NOTE: Appointment details will display when the hold expires

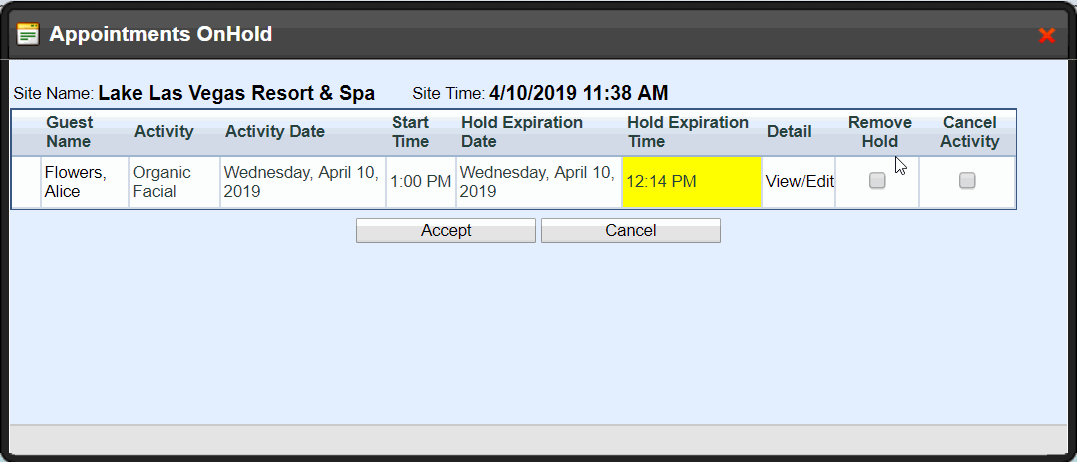
Viewing/Removing Holds
You can view appointments on hold by double-clicking any appointment and navigating to "Options" > "Hold-View All" OR select appointment > select "Hold" on the Ribbon > expand the tree view to select a Business Center > select target date > Continue.
To remove an appointment that is on "Hold," simply select the "Remove Hold" or "Cancel Activity" checkboxes and select "Accept."

Here you can assign two or more appointments that are booked under the same Guest to a pre-configured Package.
To Assign a Package
Step 1:
Highlight any appointment under the Guest you wish to assign
Step 2:
Select "Assign Package"
Step 3:
The system will list every booked appointment under the selected Guest, select which appointments you wish to assign to a package

Step 4:
Select the Package from the drop down options
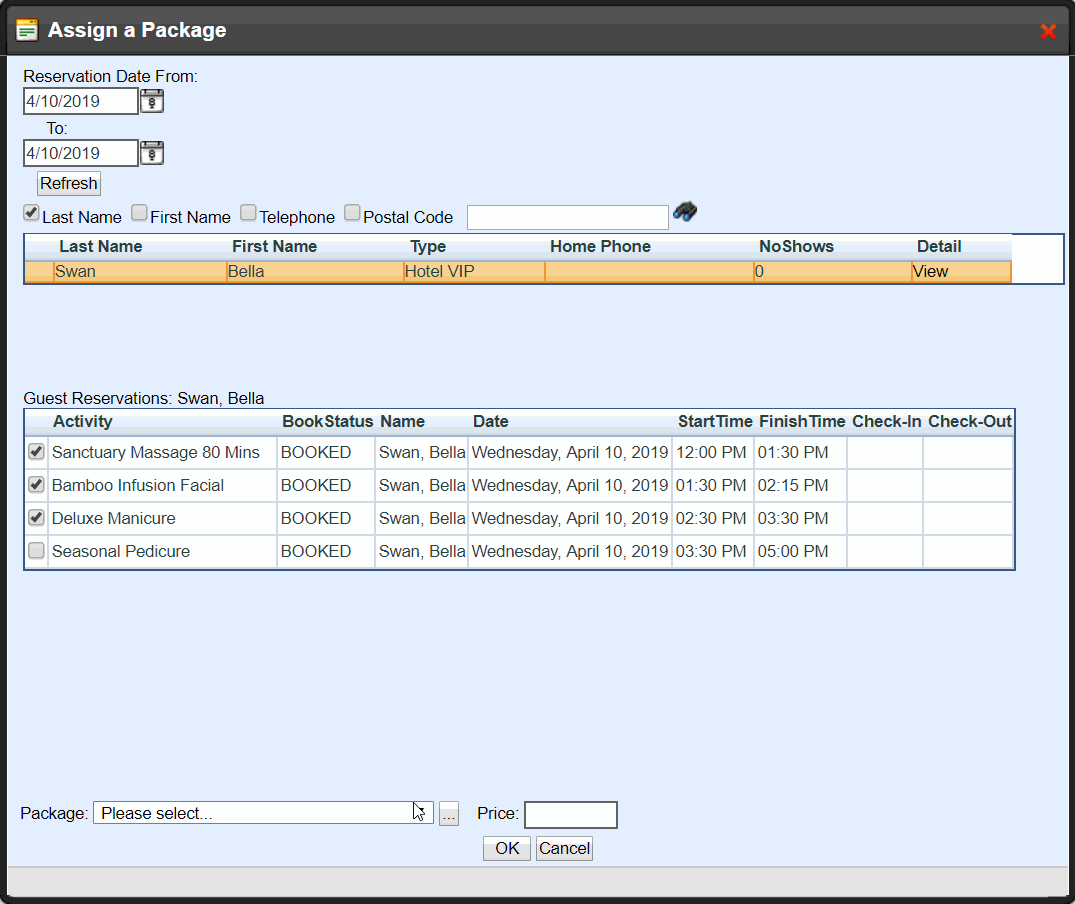
Step 5:
The price will automatically populate to the pre-configured value, but you may enter a different price

Step 6:
Select "OK" - you assigned these appointments to a package!
NOTE: Appointments are now shown as a package and will be charged at the bundled price
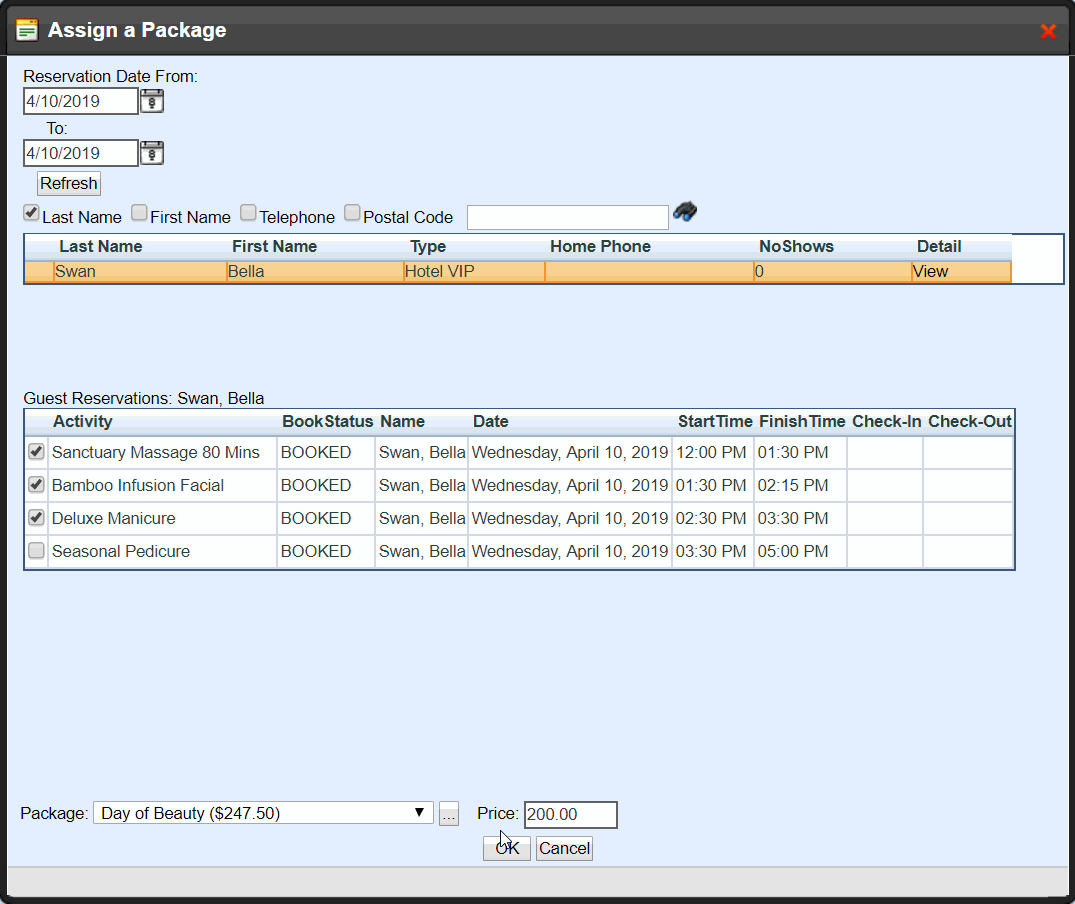
NOTE: Once you assign appointments to a package, you CANNOT unassign them

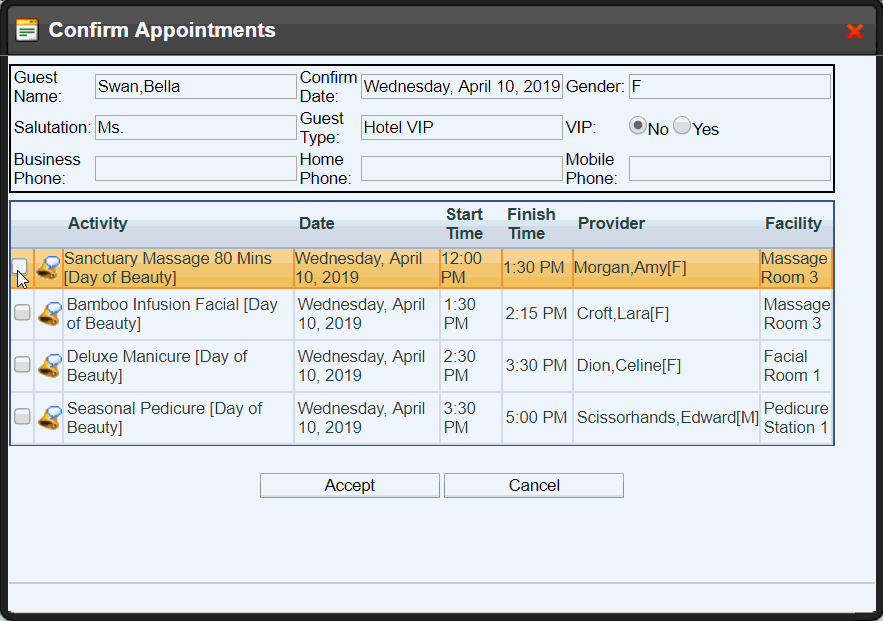
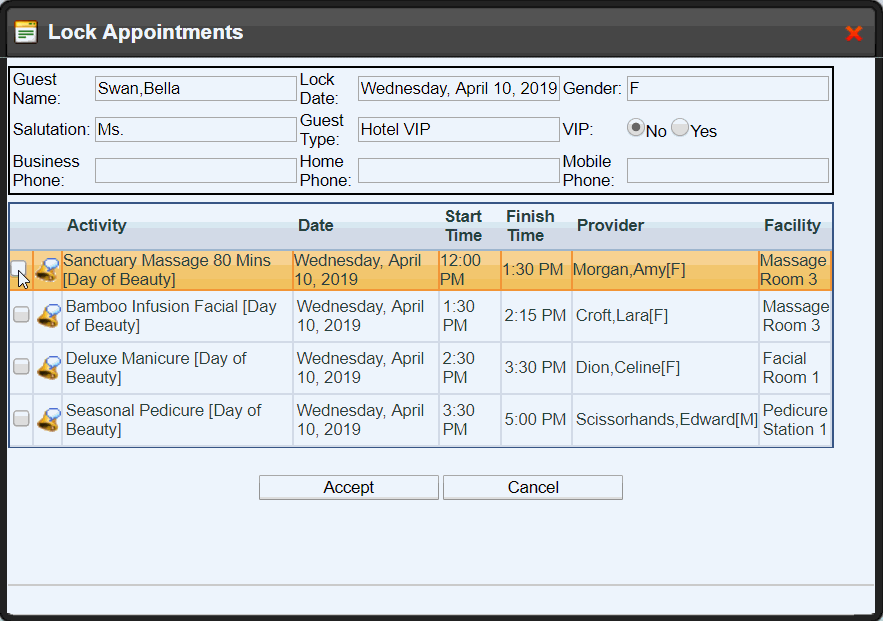
Here you can Confirm, Unconfirm, Lock, Unlock, or Undo Check-In for an appointment.
Confirm
Confirming an appointment will remove the Phone icon from the appointment, this indicates that you have contacted the Guest to confirm that they will be arriving to their scheduled appointment. Confirming will send an SMS Text to the associated Provider.
NOTE: Provider’s SMS phone number must be configured into their Employee Profile.
Lock/Unlock
You can prevent an appointment from being edited, processed, or finalized by setting it to Lock. If you wish to continue to work with that appointment, you must unlock it before doing so.
Accidentally checked-in or confirmed the wrong appointment?
No problem! Select Undo Check-In/Unconfirm to remove the Check-In/Confirm status.